Unlock your inner engineer and explore the wonderful world of physics with this simple rubber band car project.
Build your own car and learn how basic concepts in physics—like energy and motion—are used to boost creativity and engineering skills too!
Try it out and see the power of rubber bands in action while completing this fun engineering design project with kids.
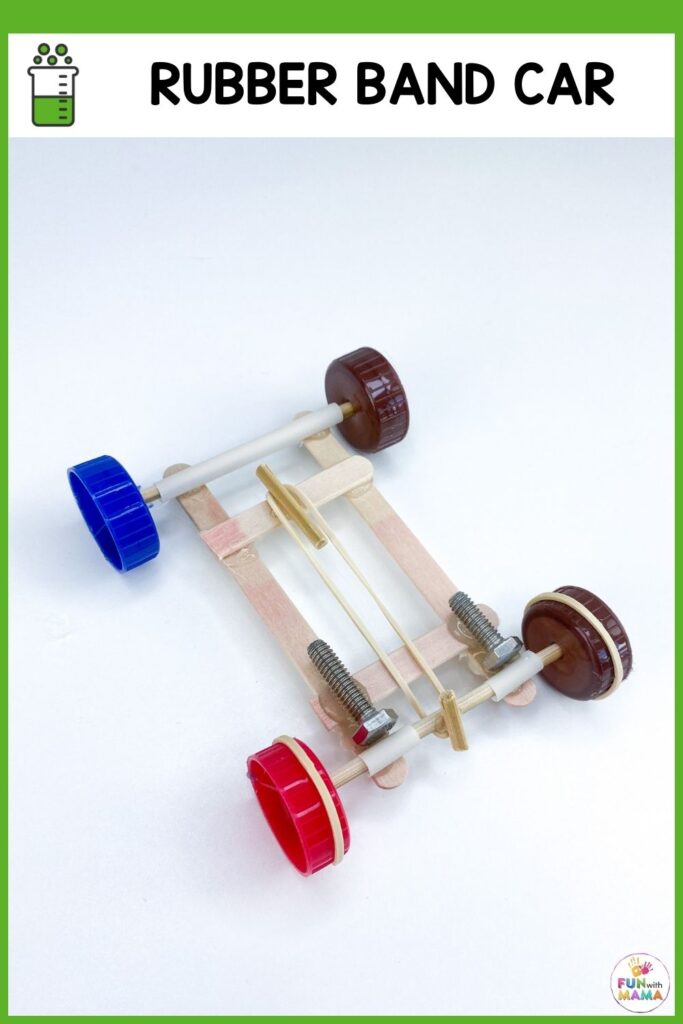
What is a rubber band powered car?
It is a model vehicle propelled by a large elastic band.
The basic mechanics of a rubber band cars involve a large elastic band that is firmly secured at one end to the frame of the car and at the other end to an axle.
As the rubber band is stretched, it stores energy, which is released when the band is released and allows the car to move.
A rubber band car demonstrates the physics concept of how the stored potential energy of the rubber band is converted into kinetic energy.
What do you need for a rubber band car?
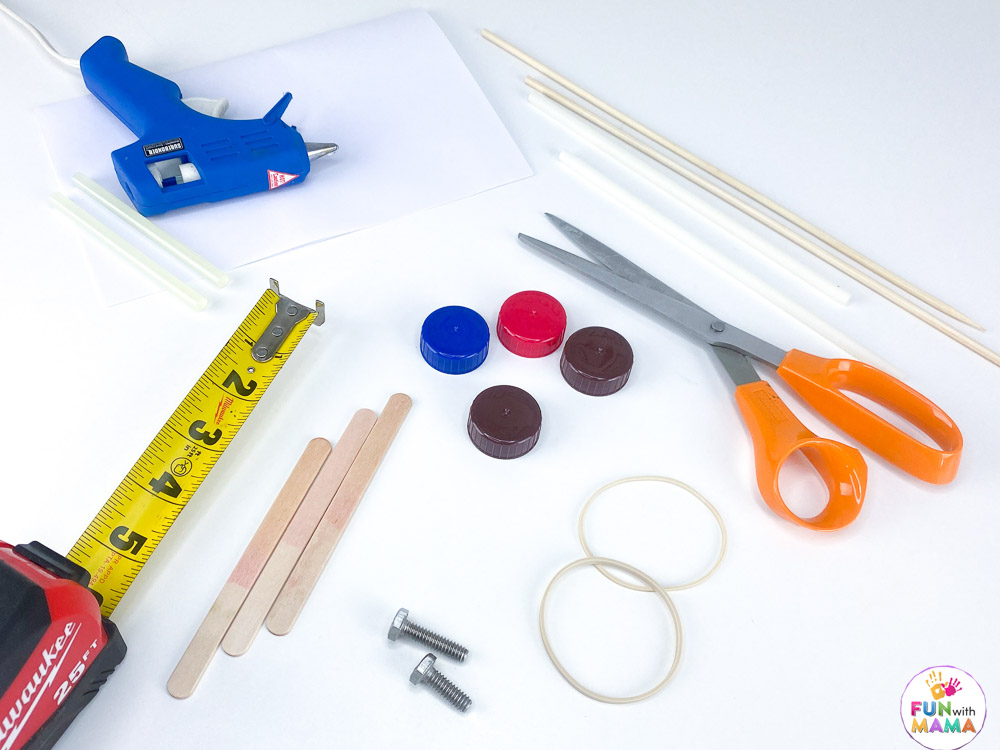
These are the materials we used to make our own car and are our suggested list of materials.
- Different types of rubber bands
- wooden skewer
- three craft sticks
- two small bolts
- four bottle caps
- straw
- hot glue gun
- scissors
What are the best materials for making a rubber-band powered car (besides rubber bands)?
When constructing a rubber band powered car, you’ll need some additional materials to turn your invention into a reality.
A few supplies that you should consider include a small plastic or metal body for your car, wheels to attach to the body, and a few types of connectors to join all your parts and ensure that the car moves with just a little engineering effort.
You may also want to gather some additional supplies such as glue, screws, and cloth, as these can provide some extra protection and stability for your simple machine car and ensure that it has a longer lifespan.
With these materials, you’ll soon be ready to assemble and take your unique and creative car for a ride!
How to make a Rubber Band Car
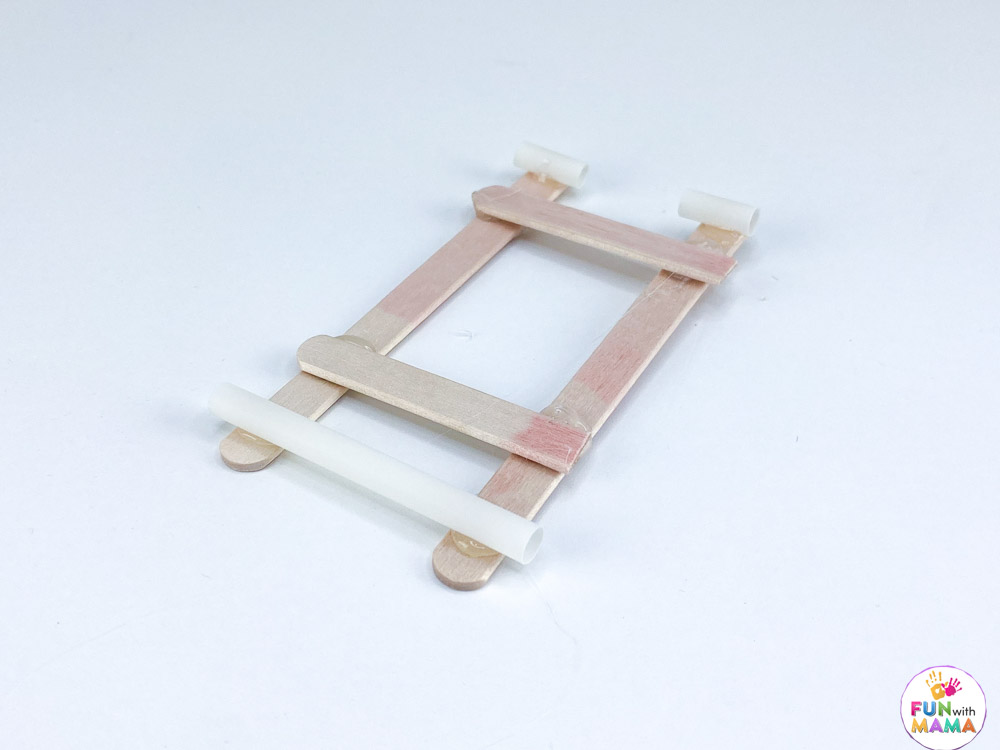
Cut one of the three craft sticks in half.
Place full-length sticks parallel to each other. Use hot glue to attach small sticks to perpendicular to the full-length sticks, about 1 inch from each end.
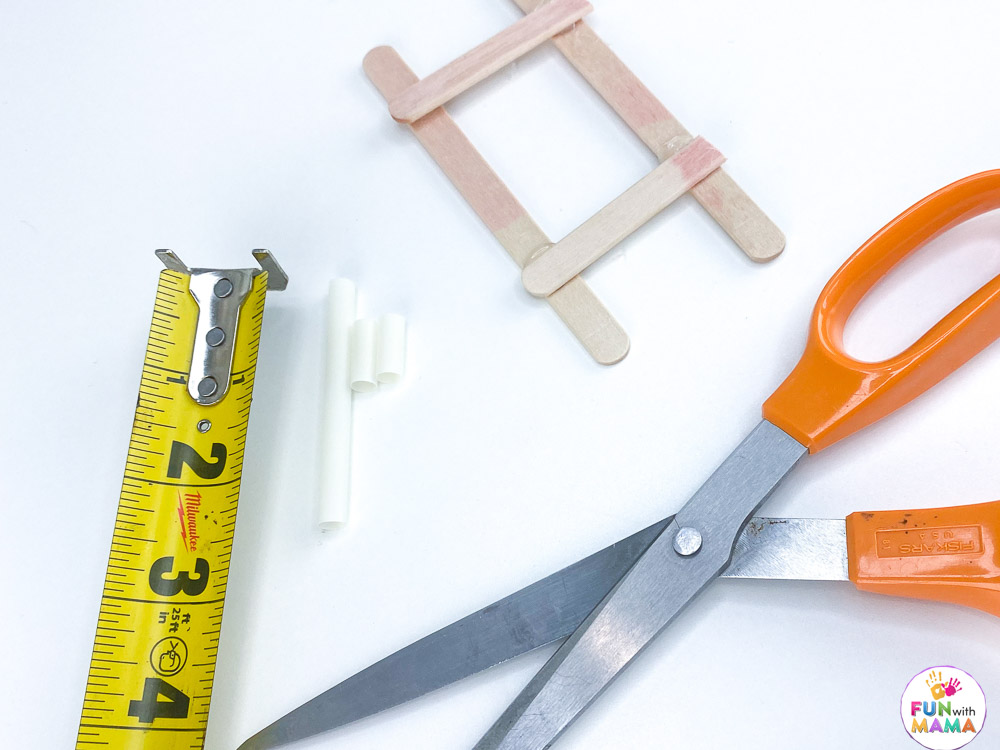
Cut two half inch straws and glue them to the ends of the full-length sticks, parallel to the small stick.
Cut one 2.5 inch straw piece and glue it to the opposite ends on the full-length sticks, parallel to the small stick.
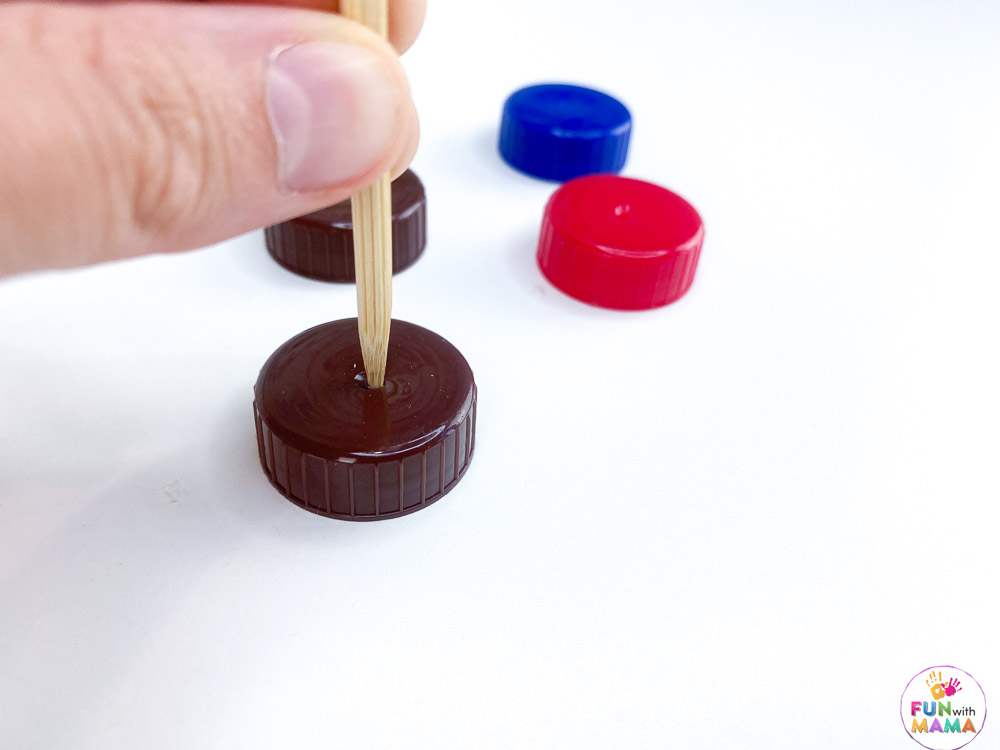
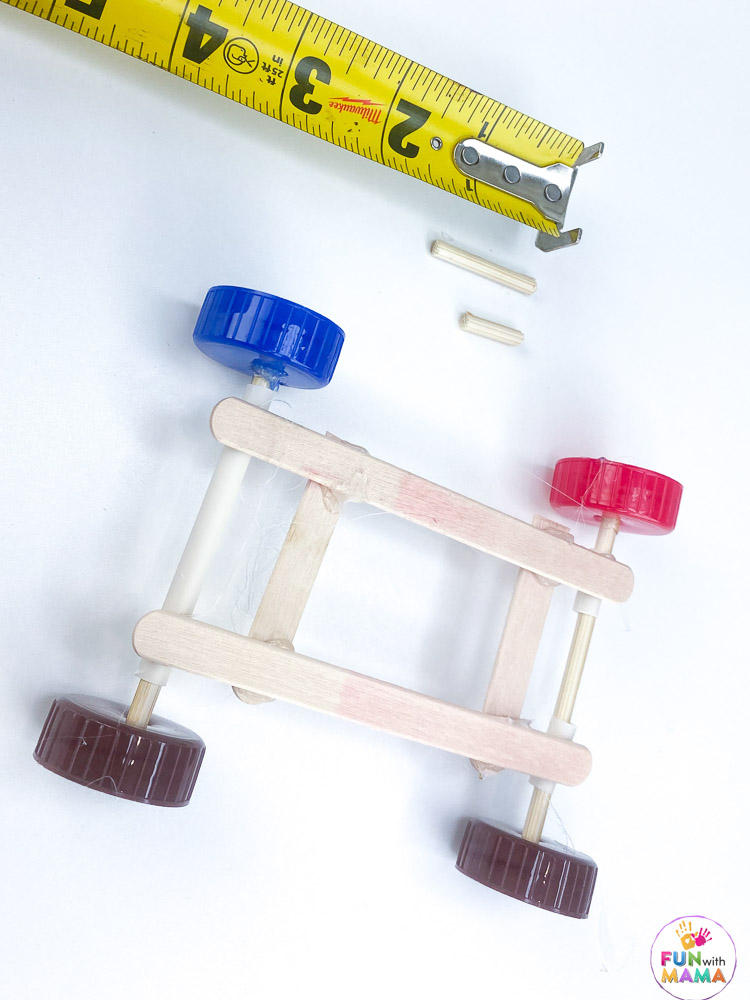
Use the pointy ends of the skewers to poke a hole in the center of each cap. If the plastic is thick, you may need an adult’s help to melt a small hole instead.
Cut two 3.5 inch skewers and place one through the straws at each end of the car.
Glue the caps onto both ends of each skewer.
Create your car’s axles. Cut a 1 inch and a half inch skewer. Glue the one inch skewer onto the small stick (near the long straw end of the car), but perpendicular to it. This will be the front axle of your car.
Glue the half inch skewer perpendicular to the skewer (rear axle) on the other end of the car.
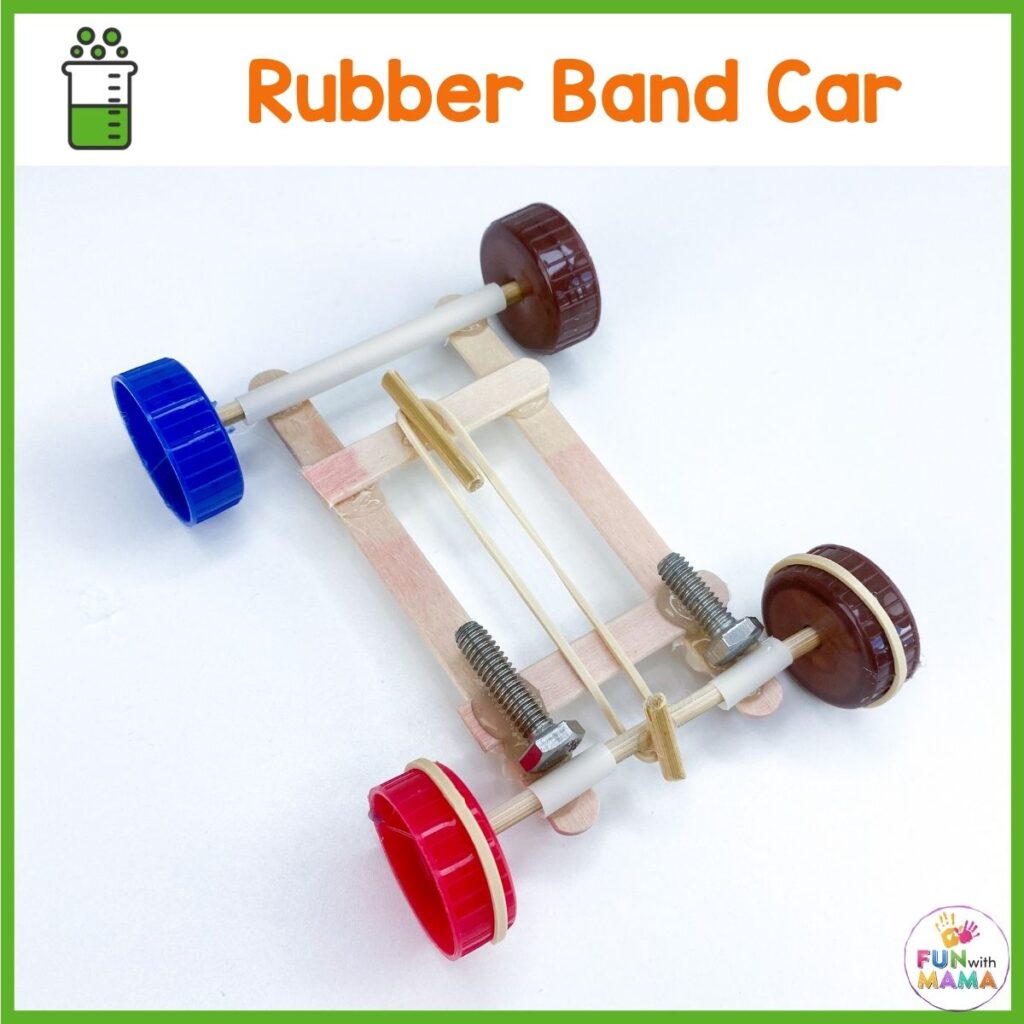
Glue a bolt on each full-length stick on the back of the car with a bead of hot glue.
Loop the end of the rubber band onto the front of the one inch skewer and glue it into place.
Pull the rubber band and hook the other end to the underside of the half inch skewer and glue it into place.
You may need to wrap a rubber band around each back tire to help the tires grip the ground.
Carefully pull the car back or twist the back tire, which will wrap the rubber band around the middle part of the skewer. Let go, and watch your car zoom away!
Do this activity with a sibling or friend and have a car race. Observe the differences in the winning car.
How does a rubber band car work?
When you wind a rubber band car’s axel, you stretch the band and store potential energy.
When you release it, the rubber band starts to unwind and the potential energy is converted to kinetic energy, propelling the car forward.
The more you stretch the rubber band, the more potential energy is stored and the farther and faster the car should go.
But things don’t always go according to plan. The wheels may be misaligned, causing them to wobble or jam.
The rubber band might slip relative to the wooden axle, preventing the wheels from spinning. Or, even if the wheels do spin, there might not be enough friction with the ground, causing them to spin in place without moving the car.
Related: Try making a balloon car as well. Observe the difference.
How far can the car go?
This depends largely on the design of the car and the terrain.
The length of the band and the track on which the car travels can also affect the distance.
By experimenting with designs, materials, and lengths of rubber bands, an individual can play around with creating the perfect rubber band powered car with an optimal speed and distance.
What makes a rubber band motor car fast?
Thee materials the car is made out of and the design of the car both play a role in addition to the rubber band’s tightness.
Materials such as wooden or metal, for example, will make the car heavier and therefore faster.
Choosing the right proportions and angles of the car is also important. The design should be aerodynamic, allowing it to cut through the air and move faster.
The rubber band should also have the right tension and elastic potential energy so that when it is released, it can propel the car forward effectively.
Why won’t my car move?
One possible explanation could be that the rubber band isn’t wound tight enough to generate enough momentum.
Another could be that the tire grip on the surface the car is on is not enough to prevent the rubber band’s energy from being dissipated through friction. If the traction on the surface is poor, the car may not be able to move. Try a different surface and make sure it’s a flat surface and try again.
Similarly, the weight of the car and any objects attached to it may be too much for the source of energy created by your rubber band, so the car will stay where it is.
To solve the problem, check the tightness of the rubber band, make sure the wheels are not stuck, and lighten the load if necessary by using different materials to boost the kinetic energy of the moving car.
The Science Behind it
When you stretch a rubber band, the rubber band stores a type of energy called potential energy.
When the band starts to unwind, potential energy is converted to kinetic energy, the energy of motion.
This is how you can power a car model using only a rubber band! Your kids will be able to see and understand the power of potential energy first-hand as they watch their rubber band-powered car zoom across the room!
Variations on Your STEM Inventions
Choose between long, short, thick, and thin rubber bands to build a rubber band car that will wind up the car at different energy levels.
Explore alternative materials such as wooden craft spools for wheels and pencils or toothpicks for axles.
Get the whole involved and make different designs to see whose car can go the farthest!
Check out another STEM activity: Create a paper roller coaster.












Leave a Comment