Science is all around us, waiting to be explored and discovered! As teachers, we have the unique opportunity to spark our students’ curiosity and excitement for learning. One engaging way to do this is through hands-on experiments like making egg geodes.
Egg geodes are visually stunning and provide a wonderful opportunity for students to learn about crystals, geology, and chemical reactions in a fun and interactive way. Today, we’ll guide you through 2 different ways you can create this fascinating experiment with your elementary students.
RELATED: Stained Glass Egg Suncatcher Craft
Geode Science for Kids
Before diving into the experiment, it’s important to understand the science behind it. Geodes are geological formations that contain sparkling crystals inside. They are formed when minerals seep into rock cavities and crystallize over time. In our experiment, we’ll simulate this process using simple household ingredients. It’s an ideal STEM activity for the Easter holidays.
What You Need to Make Eggshell Geodes with Borax
- Plastic Easter eggs (that open horizontally)
- Borax powder (available at grocery stores or online)
- Boiling water
- Food coloring (optional)
- Shallow containers
- Stirring utensils (spoons or stirrers)
- Paper towels
Step-by-Step Instructions to Make Borax Crystal Easter Eggs
Split the halves of your eggshells apart. Place them into a shallow, glass container (one container per color of egg).
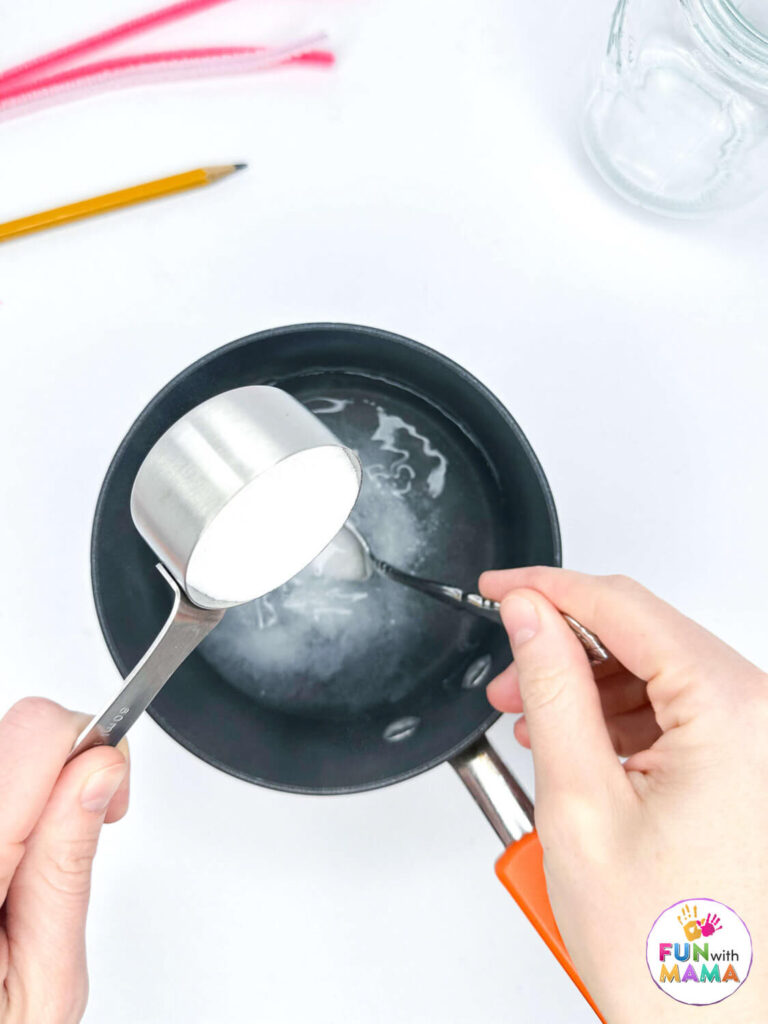
On the stove, mix 2 cups of boiling water with 1/4 cup of borax powder per egg. Stir until the borax is completely dissolved.

Carefully pour the borax solution into each egg shell until they are about halfway full. Be sure not to overflow or spill the solution.
Drop a few drops of food coloring into each shell.
TIP: The more dye you add, the brighter the crystals will be once finished.
Move the filled eggshells to a safe location that’s out of the way. This will allow the crystals to form undisturbed.
Now comes the exciting part – waiting for the crystals to grow! Leave the eggshells undisturbed for several days to allow the borax solution to evaporate and the crystals to form. You can periodically check on the progress of your geodes and observe any changes.
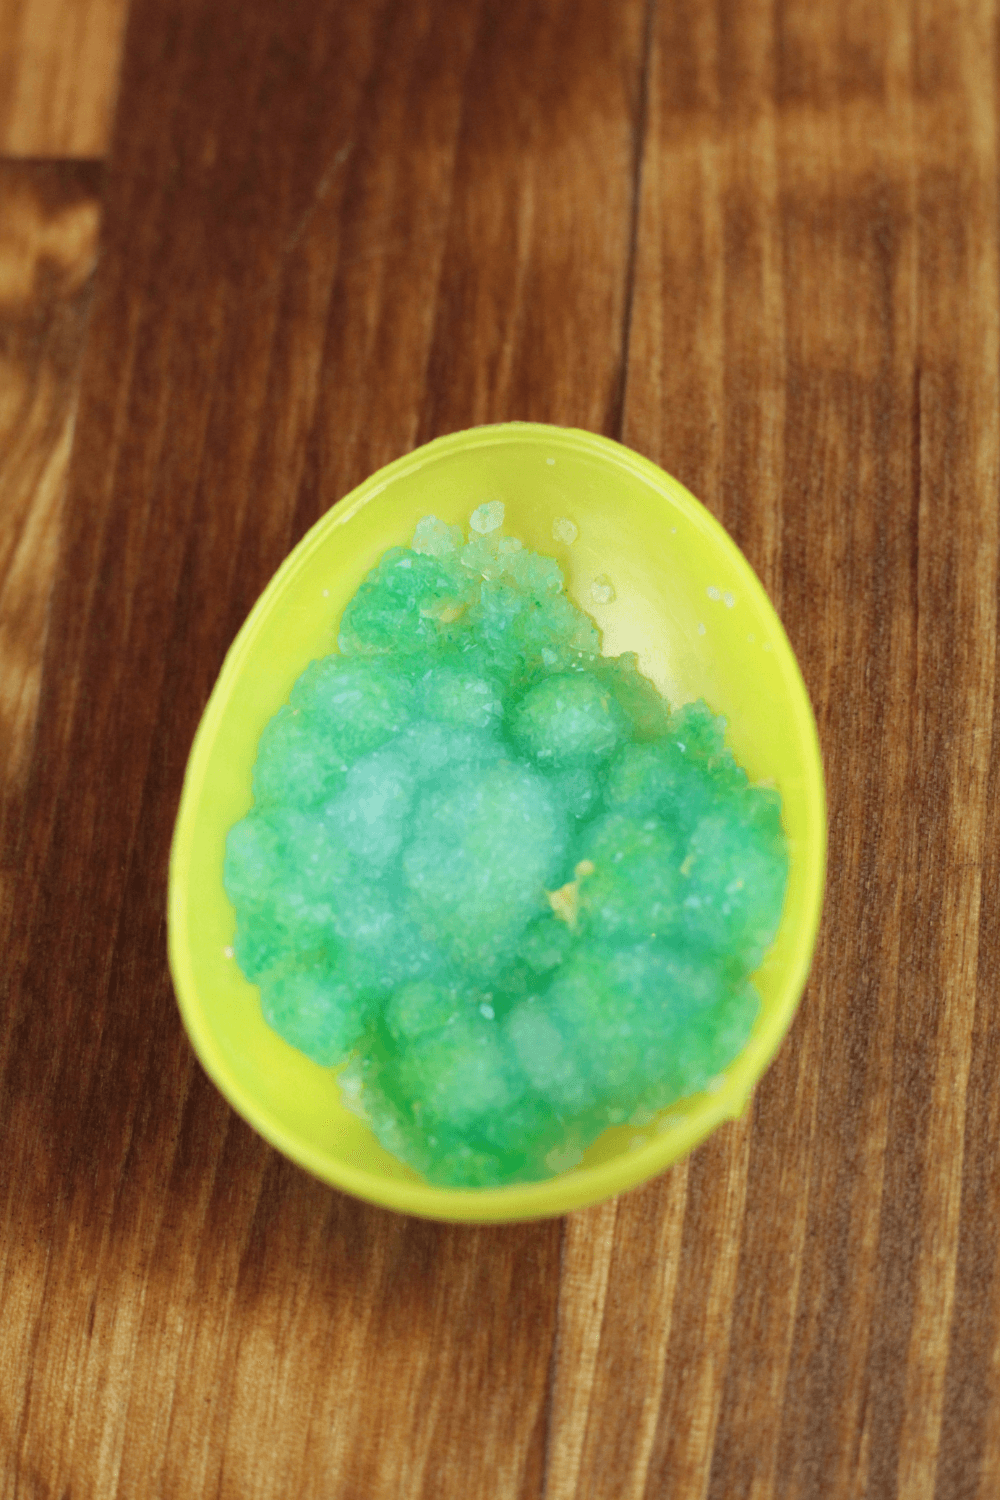
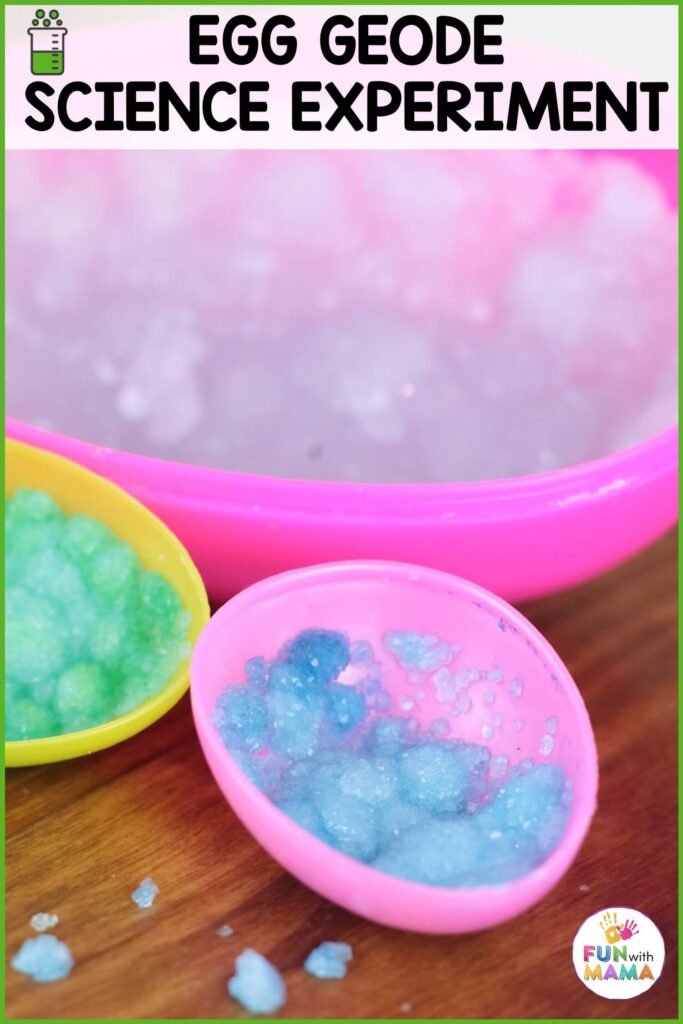
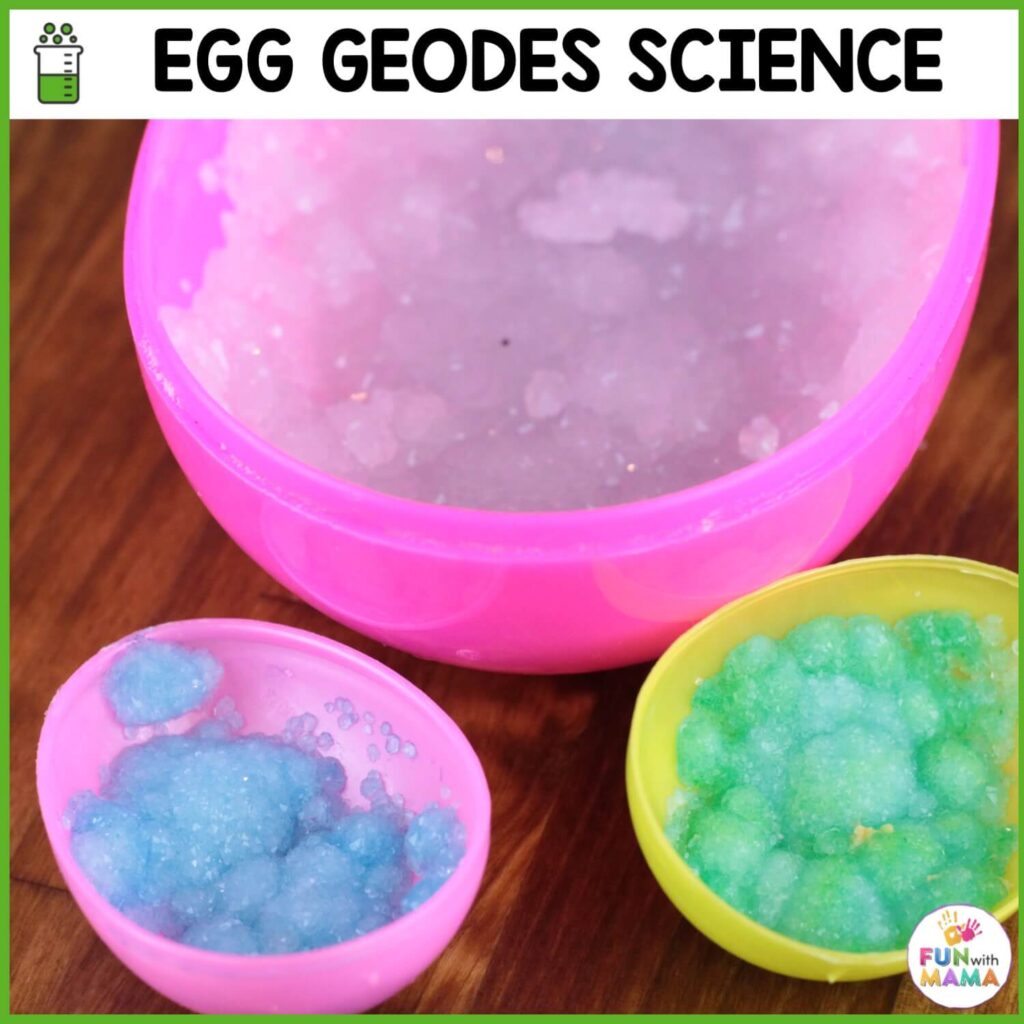
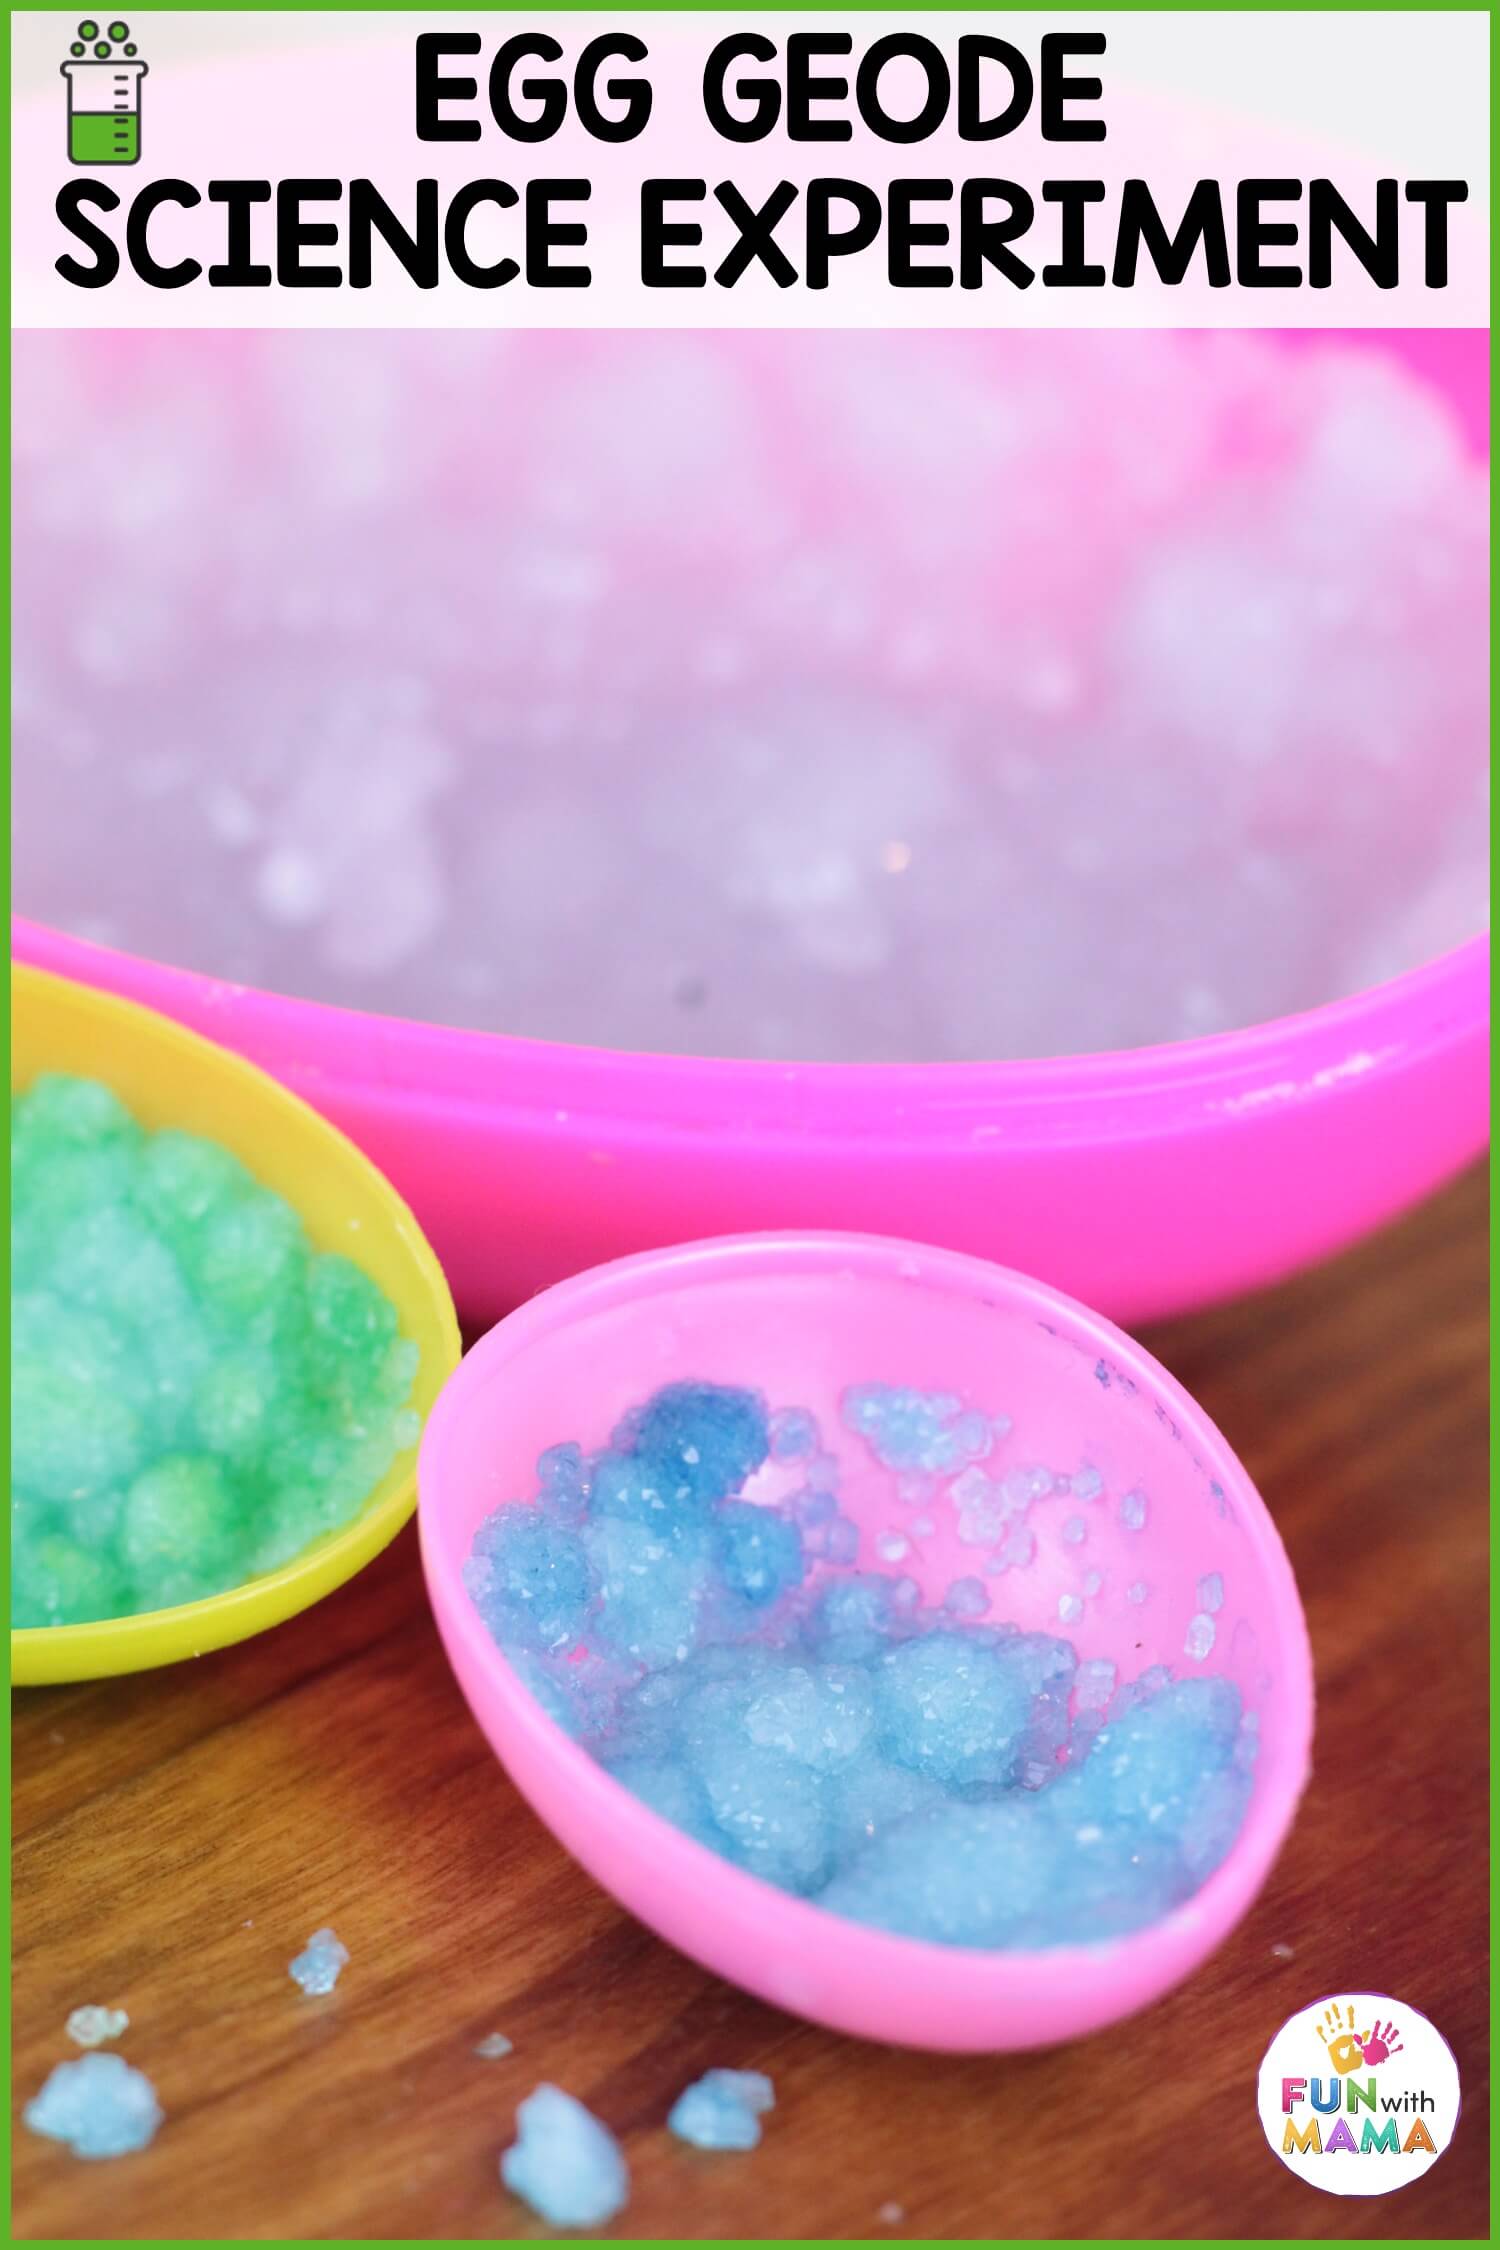
After several days, carefully remove the eggshells from the borax solution. You should see beautiful crystals lining the inside of the shells. Pour out any excess liquid from the eggs and put them on a paper towel to dry.
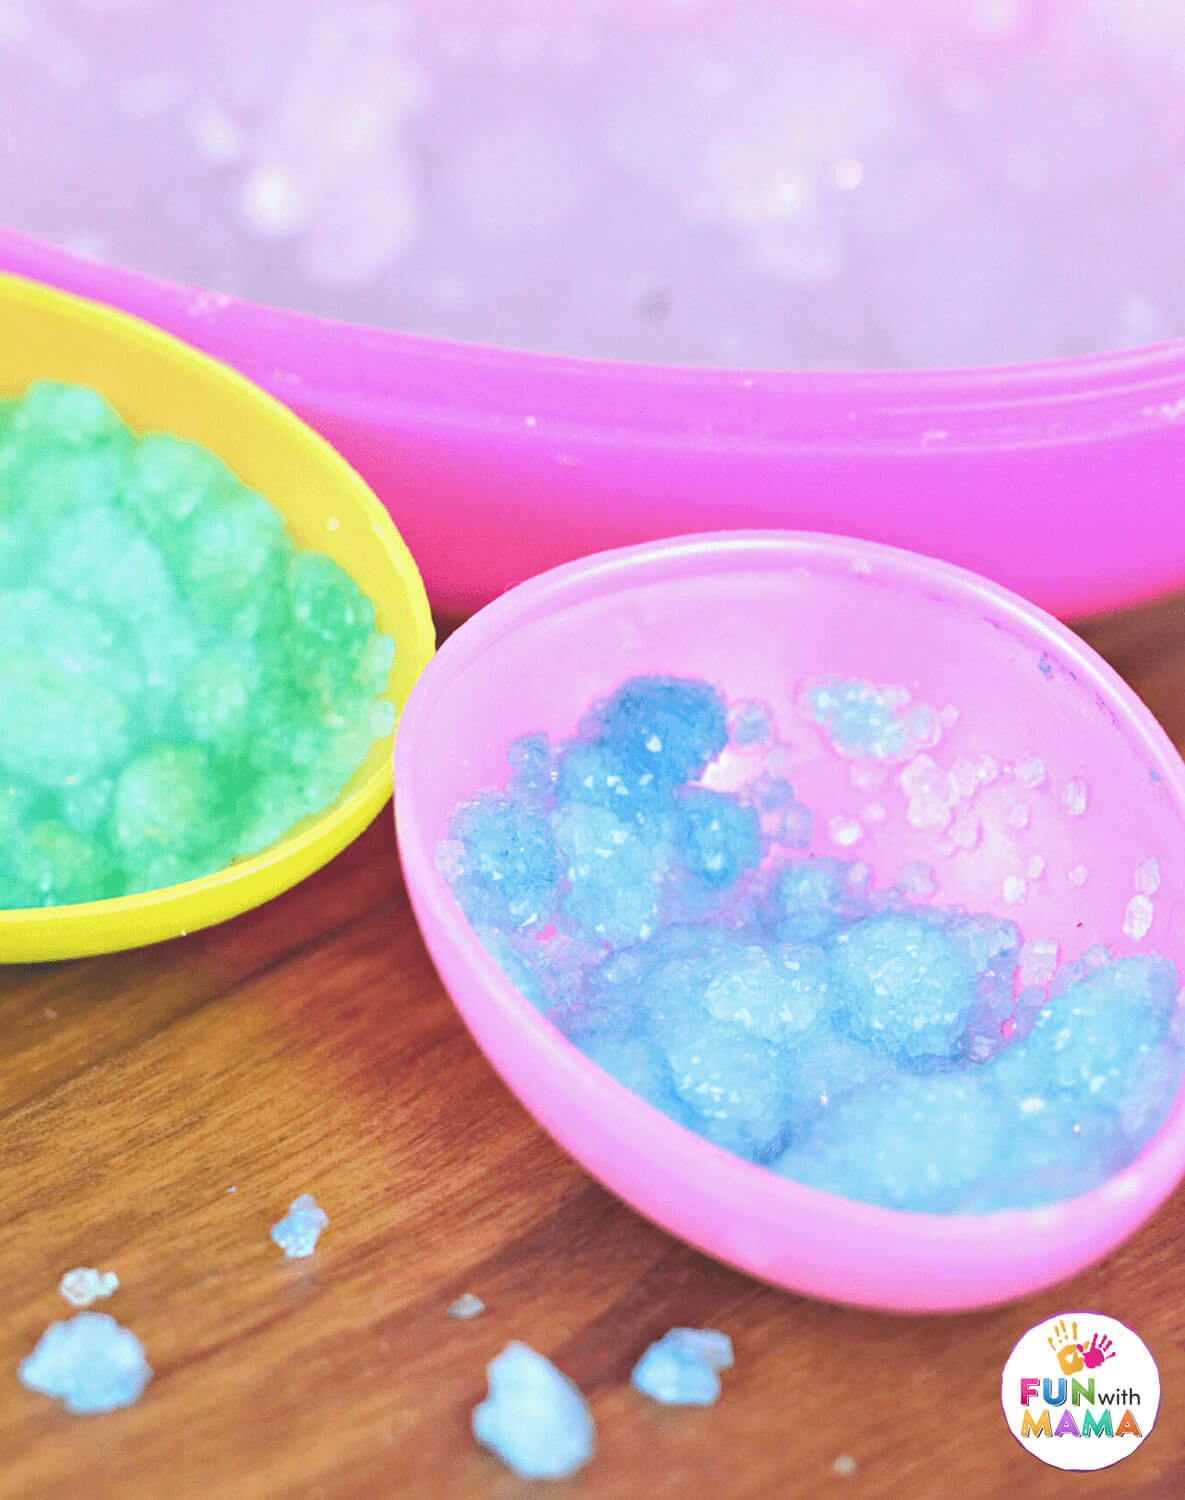
When the crystals are dry, flip them back over to display the colorful geodes!
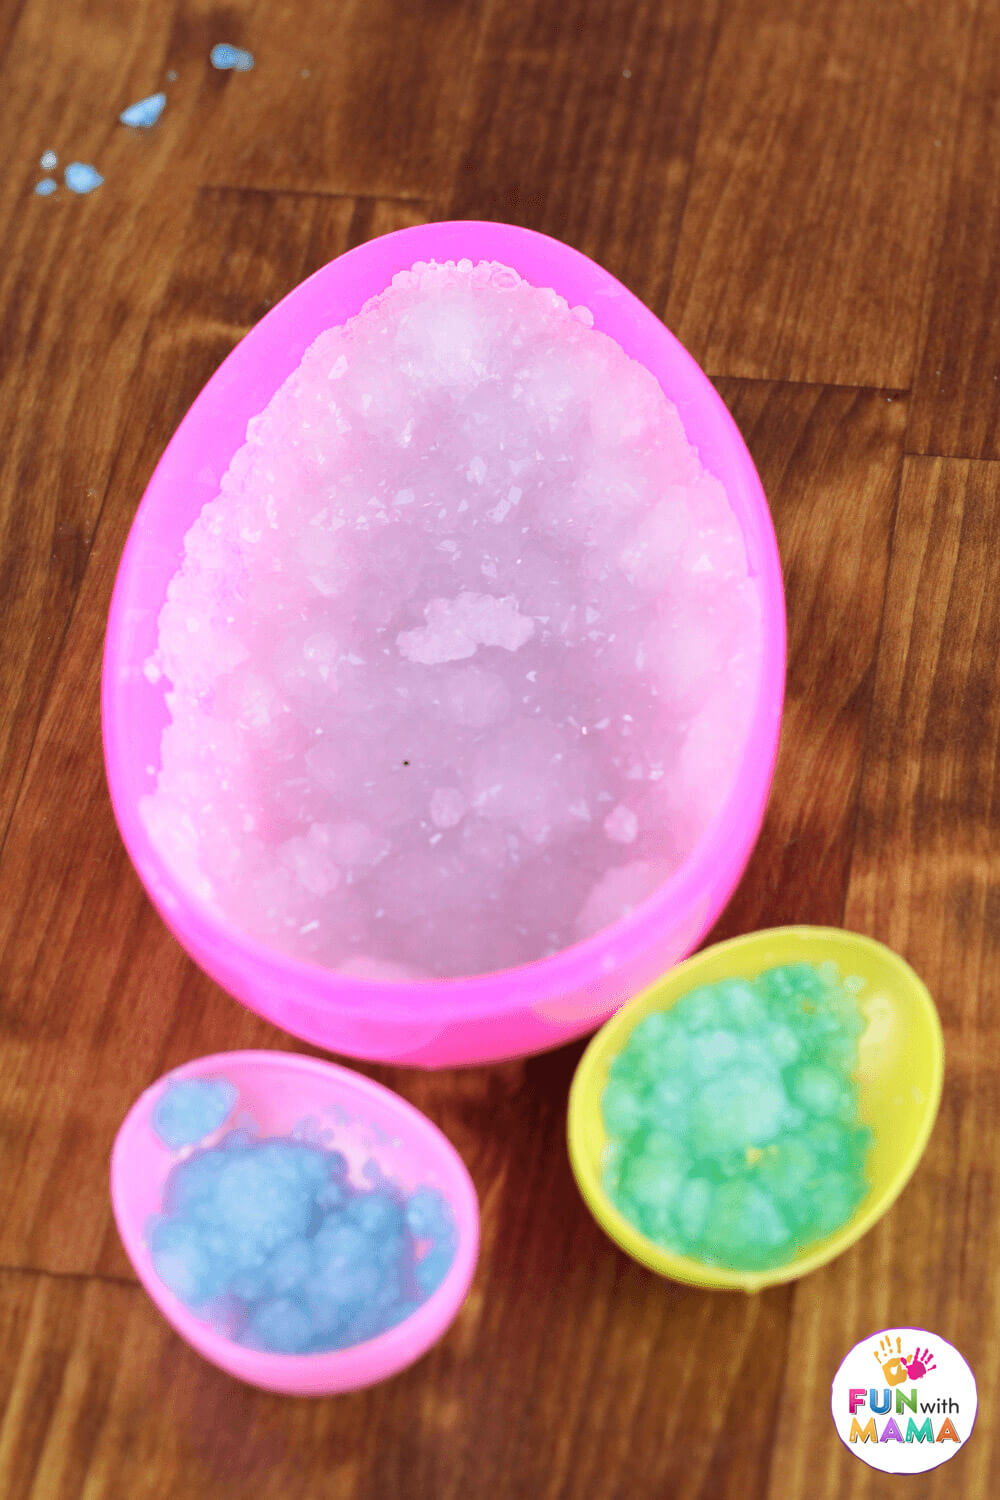
Encourage students to observe the shapes, colors, and sizes of the crystals. Use this opportunity to discuss the science behind the experiment and answer any questions they may have.
Benefits of the Egg Geodes Experiment
The egg geodes experiment offers numerous benefits for elementary students:
- Hands-On Learning: Engaging in hands-on experiments like making egg geodes allows students to actively participate in the learning process, making scientific concepts more tangible and memorable.
- Encourages Curiosity: The visually stunning crystals produced by this experiment are sure to pique students’ curiosity and spark further interest in science.
- Teaches Patience and Observation: Waiting for the crystals to grow teaches students the value of patience and the importance of careful observation in scientific inquiry.
- Reinforces STEM Concepts: The egg geodes experiment integrates various STEM (Science, Technology, Engineering, and Mathematics) concepts, including chemistry, geology, and crystal formation.
- Fosters Creativity: Students can personalize their geodes by experimenting with different colors and shapes, allowing for creative expression within the scientific context.
The egg geodes experiment is a fantastic way to engage elementary students in hands-on science exploration. By following these simple steps, you can create a memorable learning experience that inspires curiosity, critical thinking, and a lifelong love of science. So go ahead, gather your materials, and watch as your students marvel at the magic of crystal formation right before their eyes!
Here is another method for making Egg Geodes using Epsom Salt. This method makes the salt crystals a bit harder and looks really amazing, too!
What You Need to Make Eggshell Geodes with Epsom Salt
- Plastic Easter eggs (that open horizontally)
- Epsom salt (also known as magnesium sulfate)
- Boiling water
- Food coloring (optional)
- Shallow containers
- Stirring utensils (spoons or stirrers)
- Paper towels
Step-by-Step Instructions to Make Epsom Salt Crystal Easter Eggs
Heat water until it’s hot but not boiling.
Pour the hot water into a bowl or container.
Stir in Epsom salt until it dissolves completely. You’ll need enough salt to create a supersaturated solution, meaning that no more salt can dissolve in the water. This will allow crystals to form as the water cools.
Add a few drops of food coloring to the solution to give your crystals some color. Stir well to distribute the color evenly.
Carefully open the plastic Easter egg shells and fill them with the prepared Epsom salt solution. Fill them almost to the brim, leaving a little space at the top to prevent spillage when closing the egg.
Place the filled plastic egg shells on a plate or tray and let them sit undisturbed in a warm, dry place.
Over the next few days, as the water evaporates, Epsom salt crystals will begin to form inside the egg shells. You should start to see crystal growth within 24 to 48 hours, but larger crystals may take several days to develop.
After a few days, check on your crystals. Pour out any remaining liquid and flip the eggshells upside down to dry the crystals.
After about 2 hours, flip the egg shells back over to reveal your delicate Epsom salt crystals.
More Easter Activities
- Get this free Easter bingo game printable
- Learn the Best way to Dye Easter Eggs with this fizzying science experiment
- Easter Sensory Bin
- Make a cute Easter Bunny Hat Craft
- Check out our favorite Easter Book Recommendations


Leave a Comment