The kids will have a blast with this marble painting with shaving cream activity! It’s the perfect fall activity – and a great way to encourage artistic creativity.
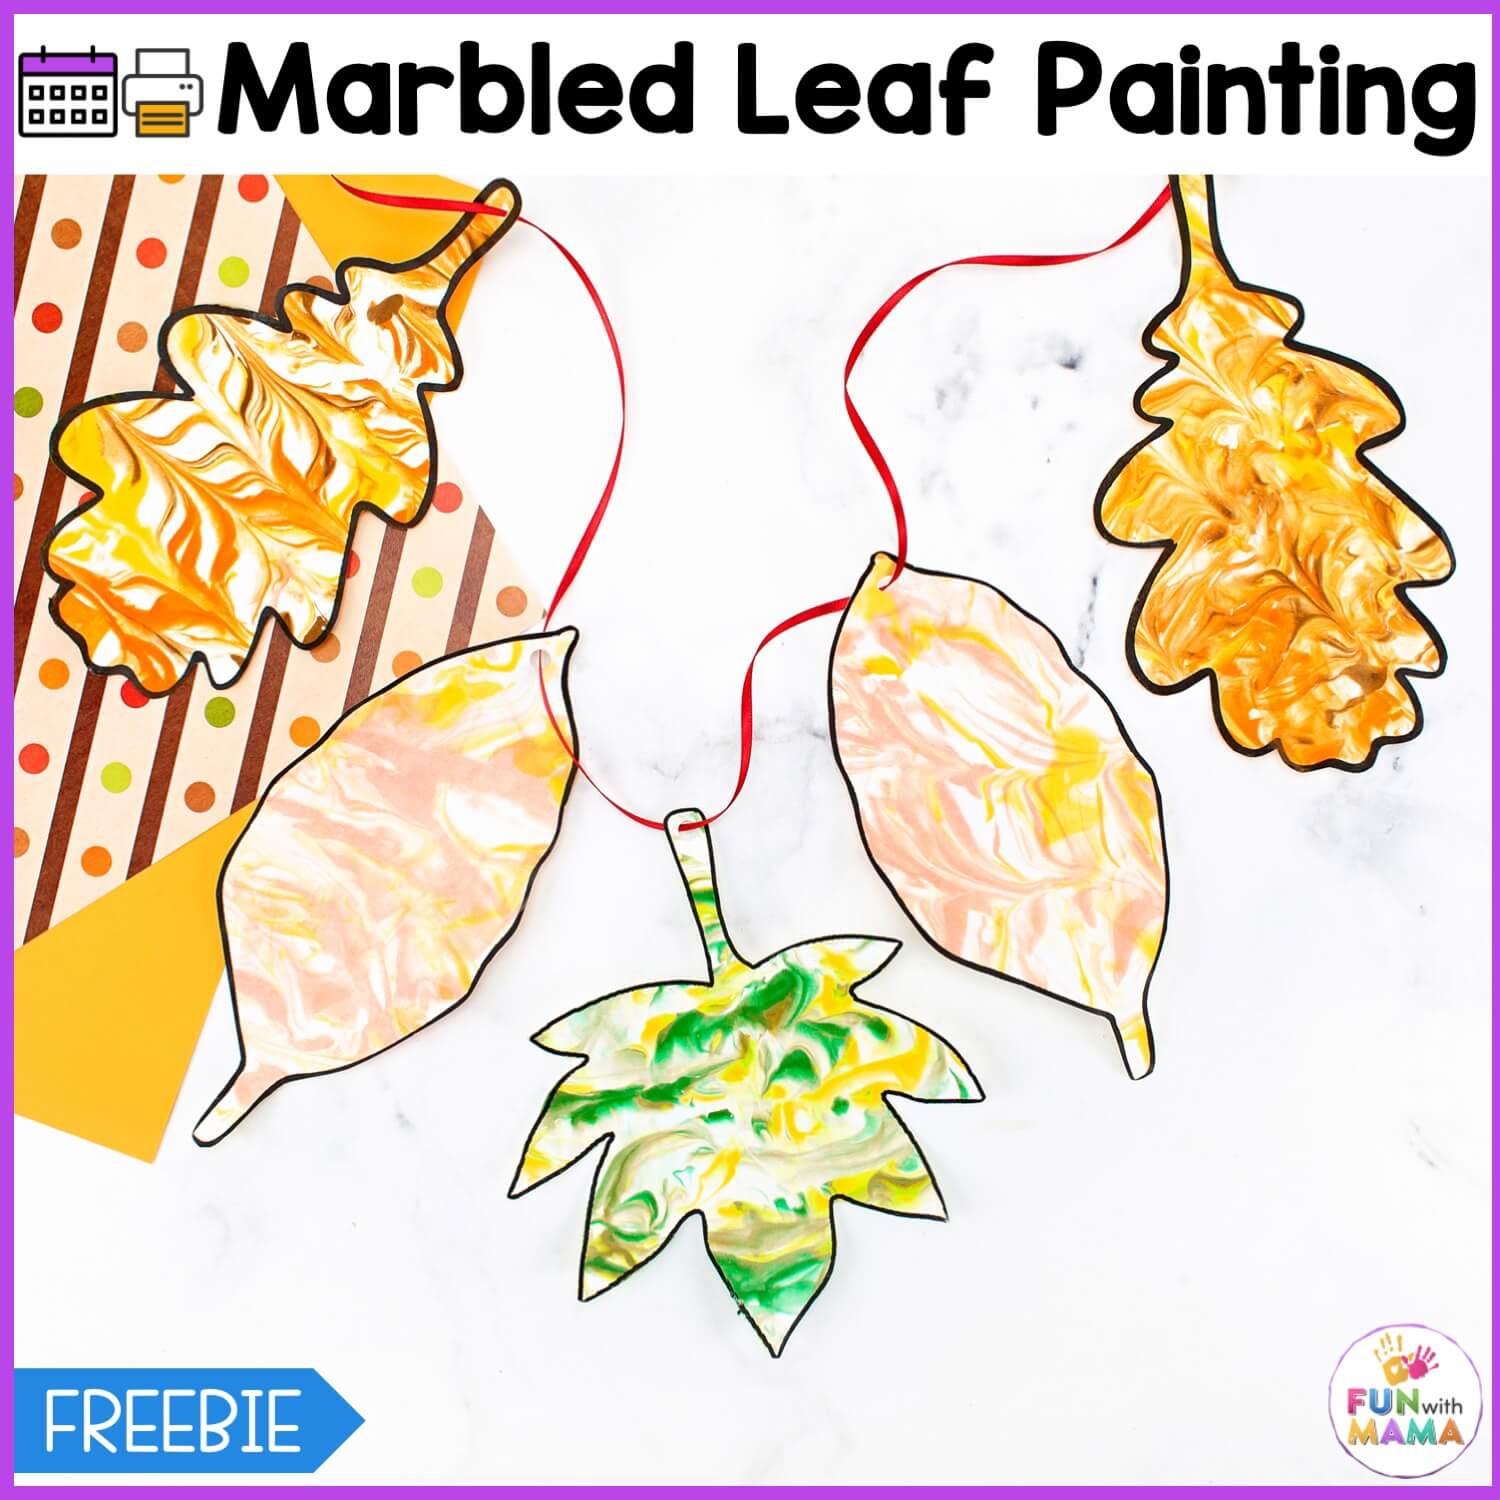
The steps are simple to follow, and I’ve included them all step-by-step for you below! Once they’re done, you’ll have some pretty cool fall decorations – or you can add a string and make a fun fall marble leaf banner, too!
Be sure to check out my Shaving Cream Painting Process Art for Preschoolers as well for another fun hands-on activity.

Marble Painting with Shaving Cream
Here are some tips to make it less messy:
- I used paper plates for the shaving cream so it was really simple to throw everything away when we were done.
- I also used a tray that was to be used when we would remove the shaving cream from the painting and then left the finished paintings on another tray. This really prevented any mess!
- Watercolor paint can stain clothes so make sure that kids wear an apron or old tshirt.
Materials Required:
The really fun thing about this shaving cream art activity is that you’re really just using shaving cream and food coloring – or even watered-down food coloring, to create the lovely artwork!
- Dish (we used paper plates)
- Cardstock or watercolor paper
- Shaving Cream
- Watercolor paints (you can also use food coloring but the result will be a lighter more muted color. We prefer the watercolor paints.)
- A stick/dowel or anything that can be used to swirl the colors around.
- Paint scraper (an old card works well for this too – example in the video.)
- The Leaf templates (found at the bottom of this post.)
 Get It Instantly In The FWM Members Club
 Get It Instantly In The FWM Members Club
Activity Video
What are the learning benefits of this art activity?
This is perfect for sensory play! The kids can easily do this from start to finish as well, which is great for their earning confidence!
How to make this Shaving Foam Art Activity
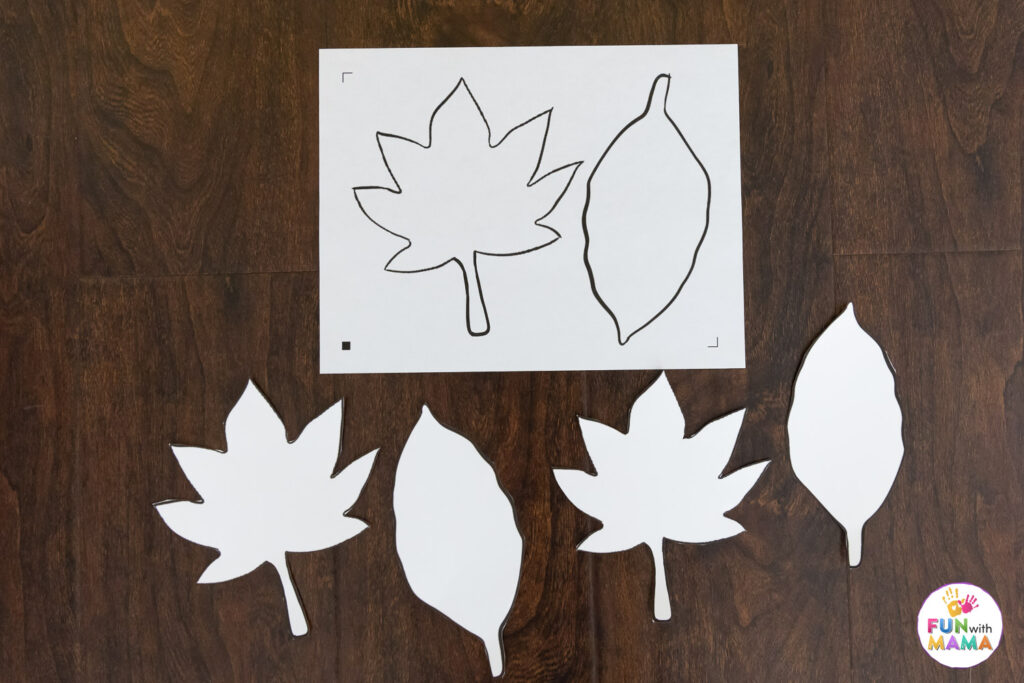
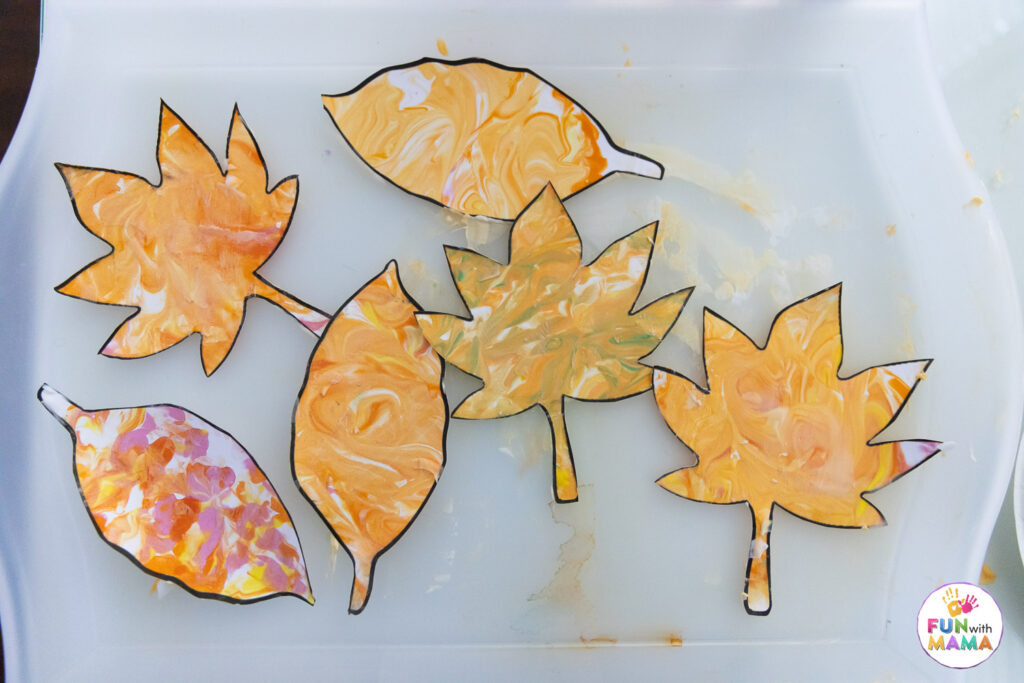
First, cut out your templates from cardstock or from a sheet of white poster board. (I like using them because they’re thicker and they have a very smooth surface.)
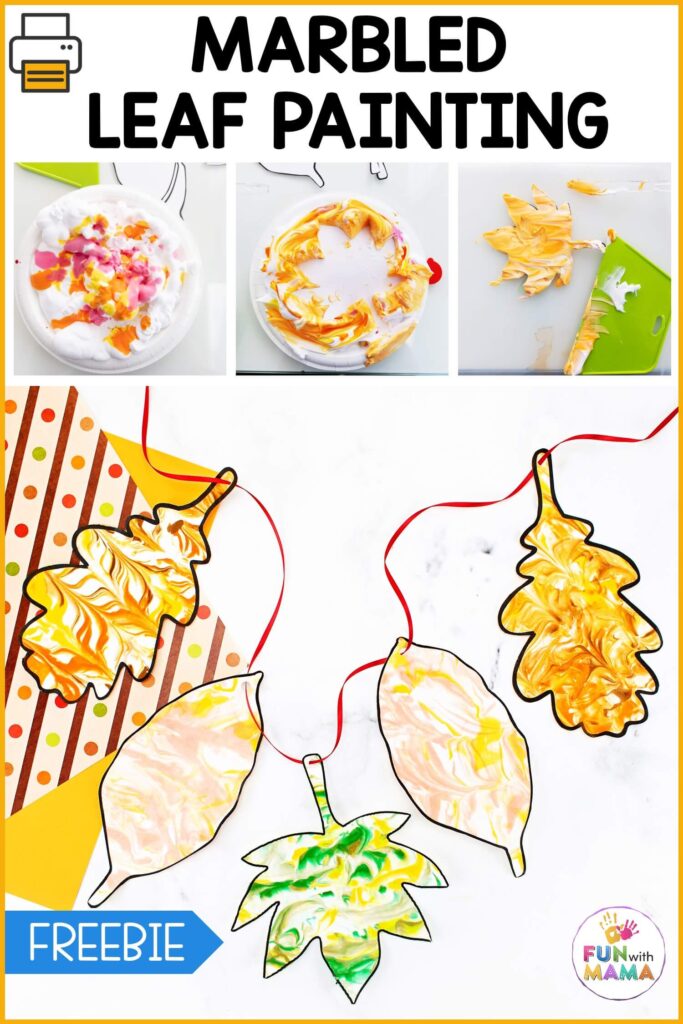
Then start by adding shaving cream to a paper plate, pan, or tray. You can use anything that you’d like to as long as it holds the shaving cream.
Make sure your shaving cream is around the same height all around.
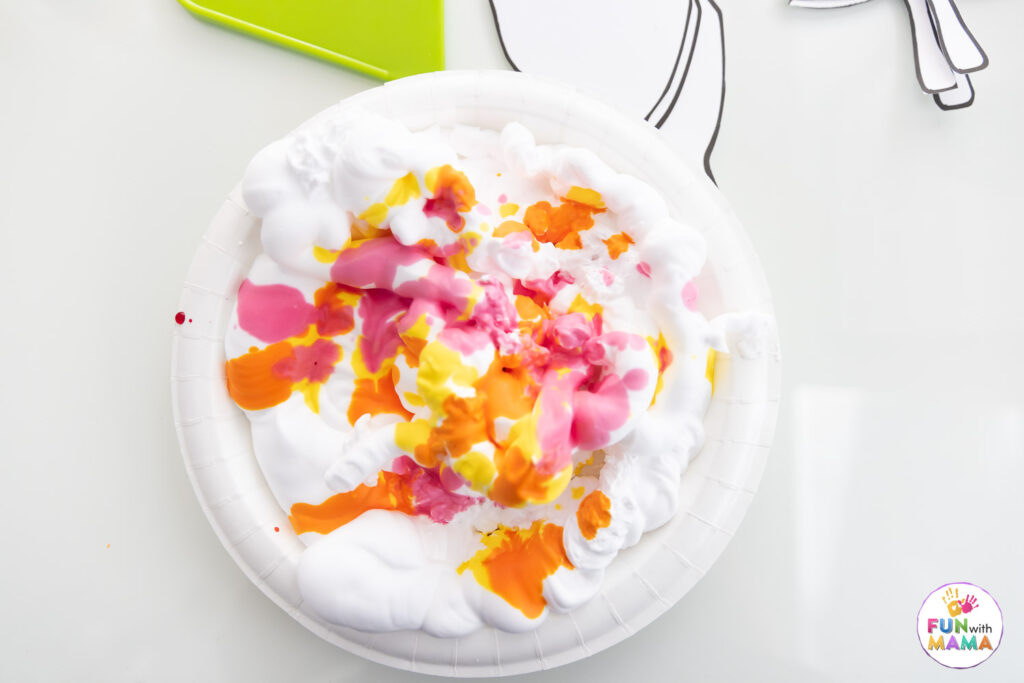
Then, use an eye dropper and drop the watercolor paint drops all over the shaving cream.
Take the end of a paintbrush, skewer, chopstick, ruler, knife, fork, pencil, or even a rubber spatula and swirl the paint in the shaving cream. Don’t mix it, just swirl it.
The swirling is what will actually create the pretty marbling effect.
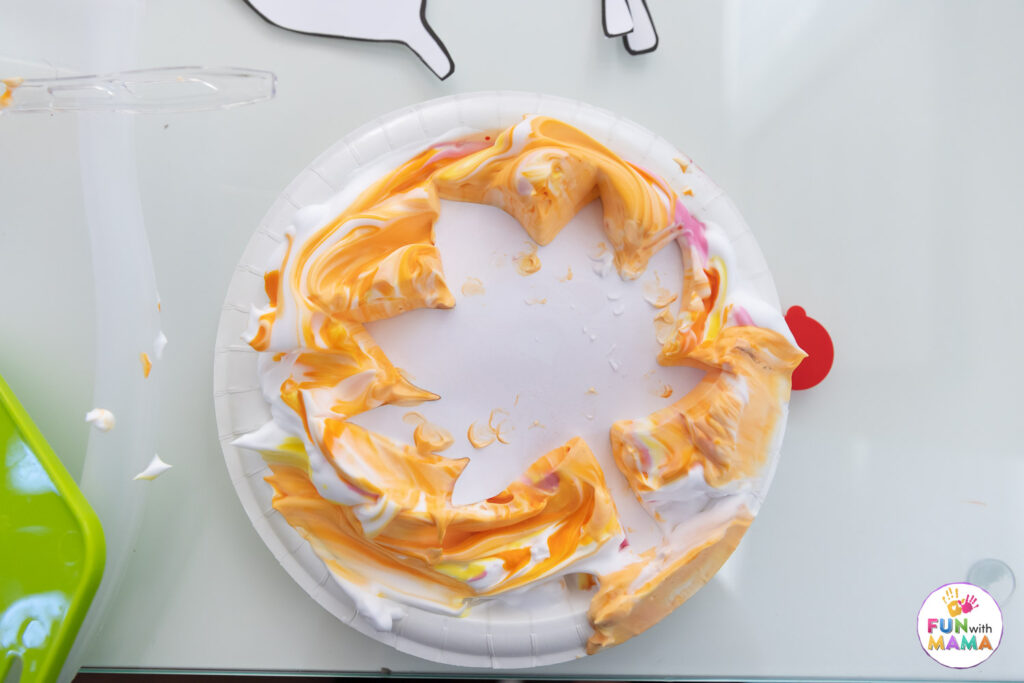
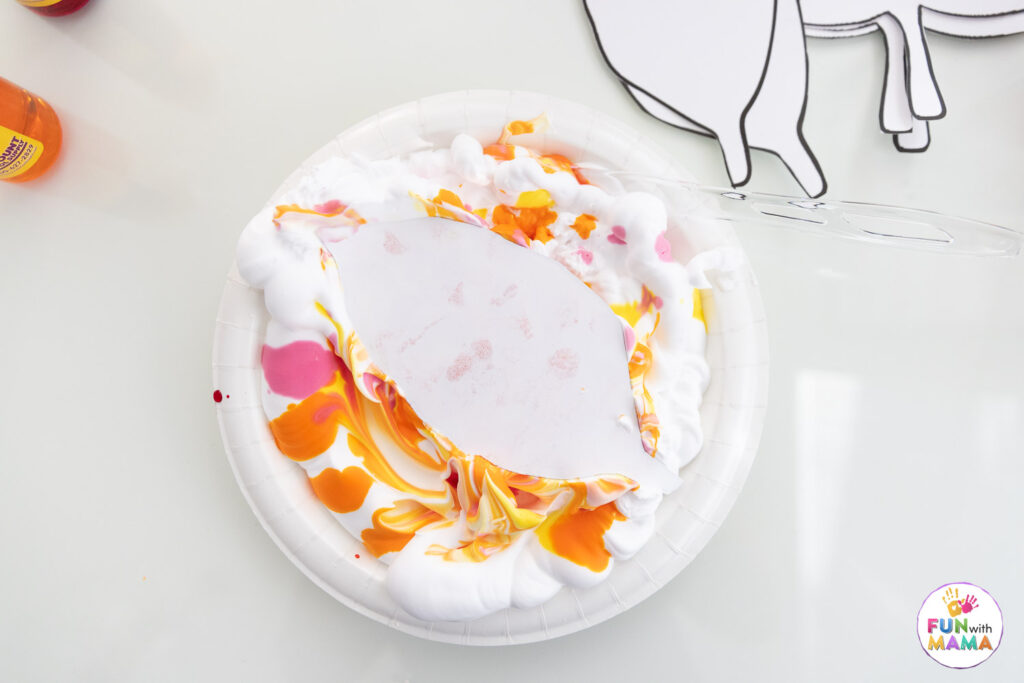
Press the cut paper leaves down into the shaving cream and swirled liquid watercolors. Then lift them up. Use the back of a spoon or a knife and scrape off the excess shaving cream. You can also use anything with a flat edge, like a scraper.
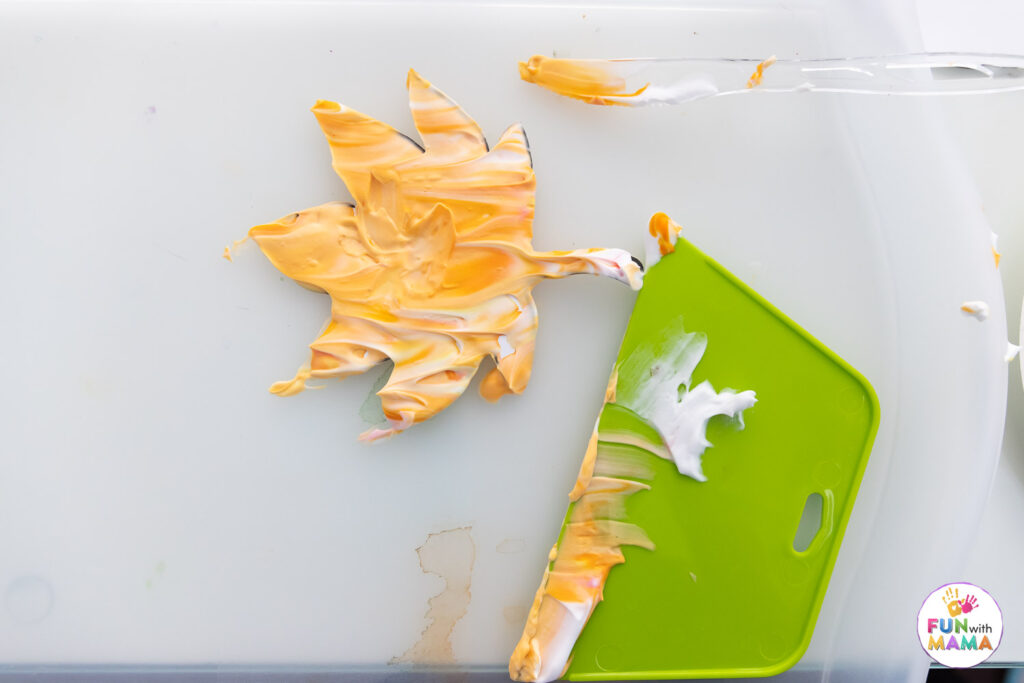
As the leaves are scraped, the liquid watercolor paint stays on the paper portion and creates the marbled look!
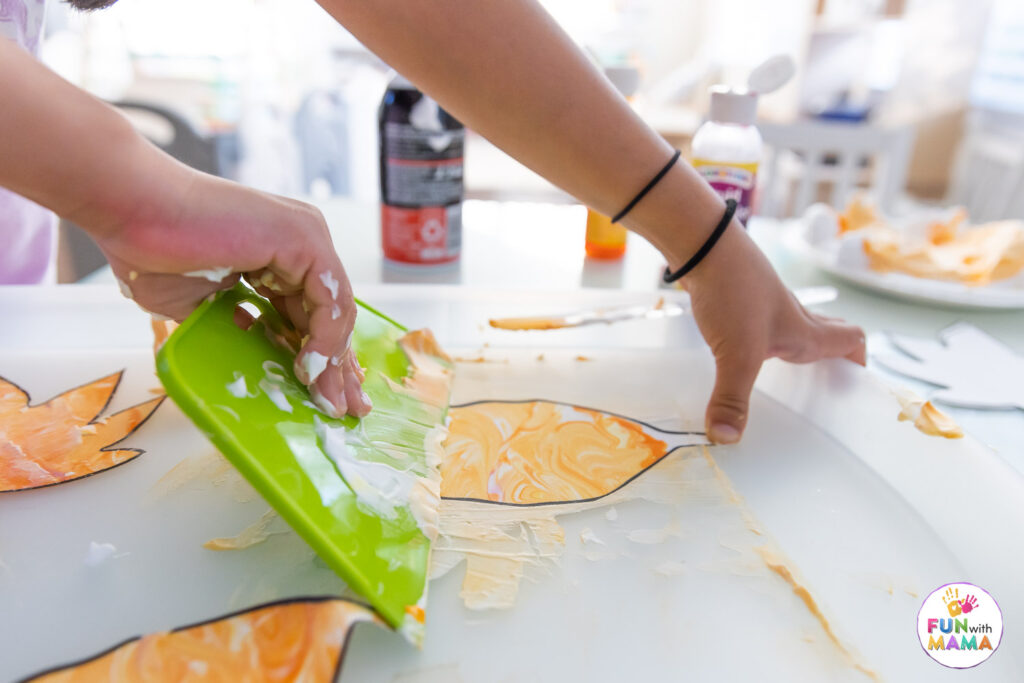
For better results, make sure to lay them out to finish drying before doing anything with the newly marbled paper.
If you use card stock, you can then hole punch them, and put a string through them to create a banner!
Check out our Leaf Coloring Pages for more leaf activities.
What age group is this art activity for?
I think any age group can enjoy this activity. Preschoolers would need a bit of help but once they get going, they will LOVE it. It is a very sensory activity with the shaving cream addition.
My 13-year-old, 8-year-old, and I all enjoyed doing this activity.
How messy is it?
I’m not going to lie. It can be messy if you don’t prepare your table and materials.
Get the leaf templates here:
Keep in mind that this fun shaving cream art can be done to make different shapes and ideas, too! Plus, change up the colors so that the kids will have a blast creating something new and unique.
More Sensory Play Activities
- Alphabet Sensory Bottles DIY
- Aquafaba – How to make chickpea foam
- Rainbow Bubble Foam Recipe
- The Easy Way to Make Monster Slime (3 ingredients!)
Get It Instantly In The FWM Members Club


Leave a Comment