Color-changing flowers are a great science activity for kids. They’ll love seeing the flowers change color, almost right before their eyes. A fun and beautiful option to showcase science!
The best part about this color-changing flower activity is that it’s simple for all ages to do. You can use this as a fun science activity for kids – or a really unique way to create a vibrant bouquet of flowers as well.
Be sure to check out my Rainbow Colors Science Experiment For Kids for another really great STEM activity that they’re certain to love.
Color Changing Flowers
What is the science behind color changing flowers?
The kids will love seeing capillary action happening right before their eyes! This is where the liquid actually defies gravity and flows upward, which is really cool to see.
How long does it take for a flower to change color with food coloring?
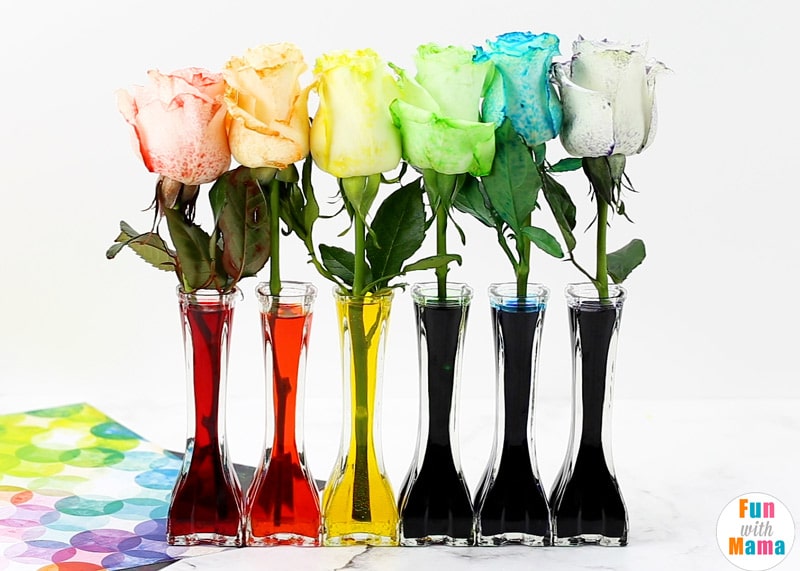
The process will vary depending on the type of flower and the length of the flower stem. You should start to see some color within 2-3 hours, and the flower should be fully colored within 24 hours.
What type of flowers works best?
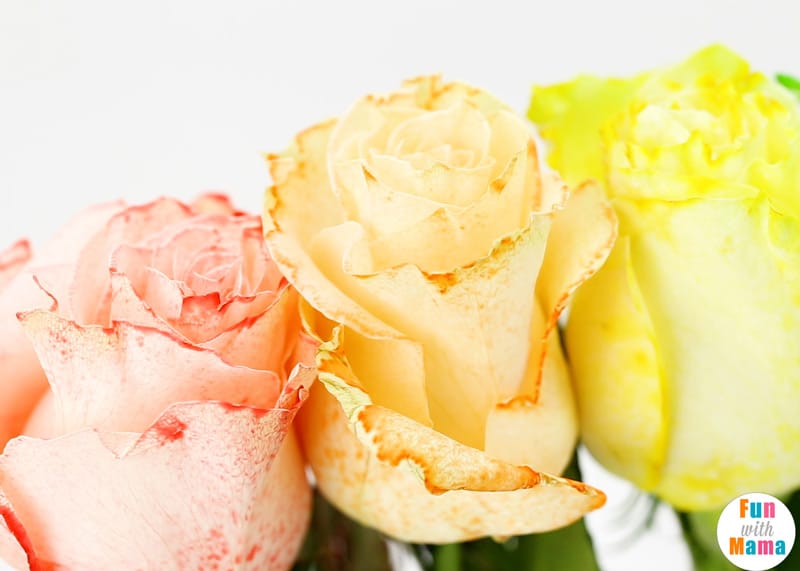
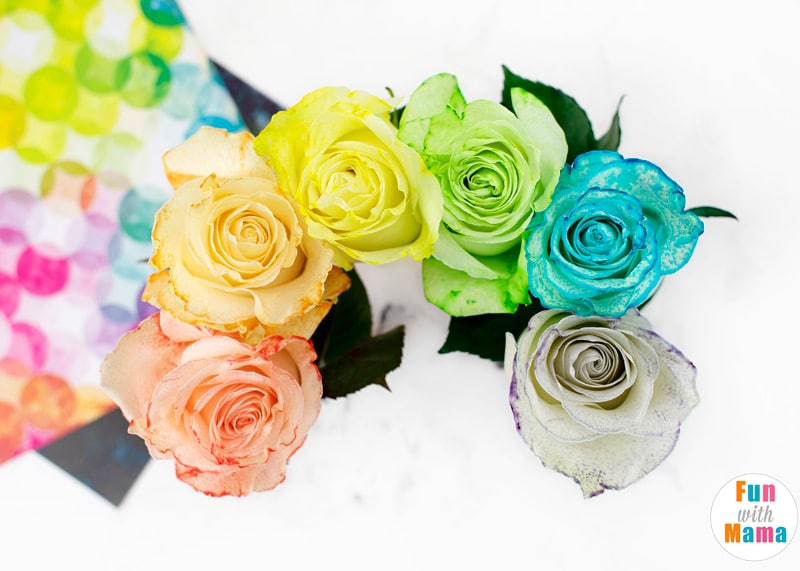
Since the petals are the main part of the flower that is getting the color, you can use white flowers, or carnations to show off the liquid food coloring.
A hydrangea color change is really a great flower to watch and see through the process as well.
Watch the video below to see my color changing flowers experiment
Supplies needed for this fun science experiment
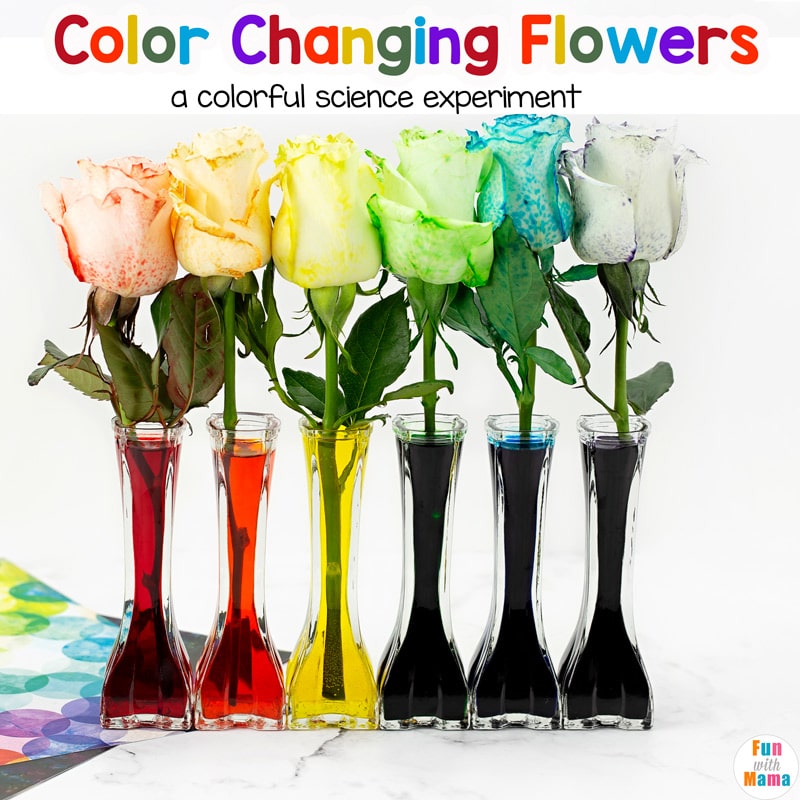
- Glass vases or cups – You just need something that can hold the flowers in place.
- Food coloring – I use simple colors, but you can use any colors that you want to change the flowers.
- Flowers – I used white roses, but you can change it up and try a different type of flower.
How to do this fun flower science activity
You can easily do this in a classroom or right at home! This capillary action experiment is the perfect way to show early learners that science is fun!
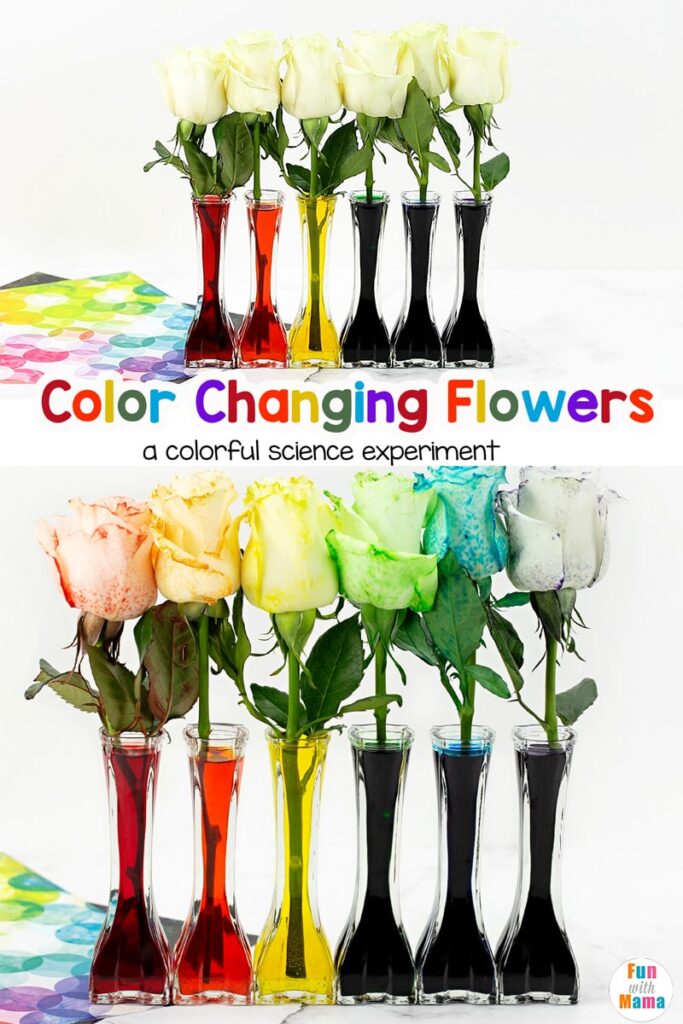
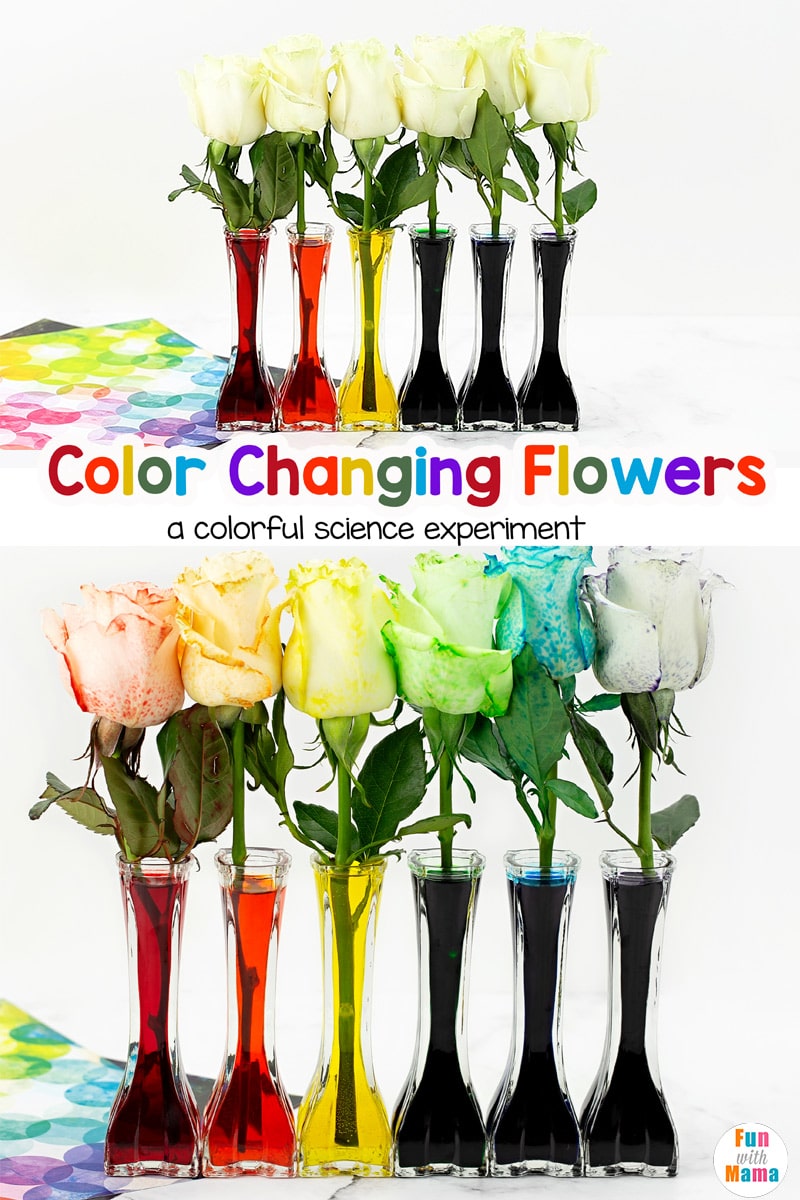
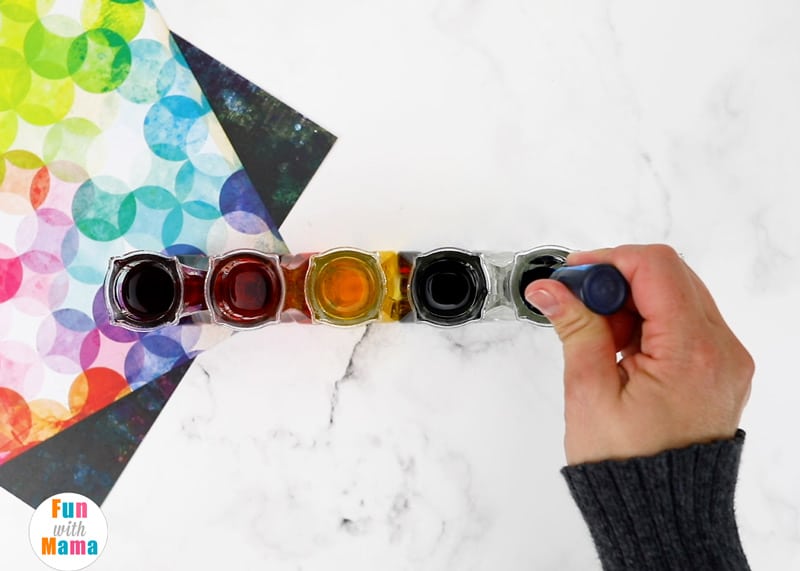
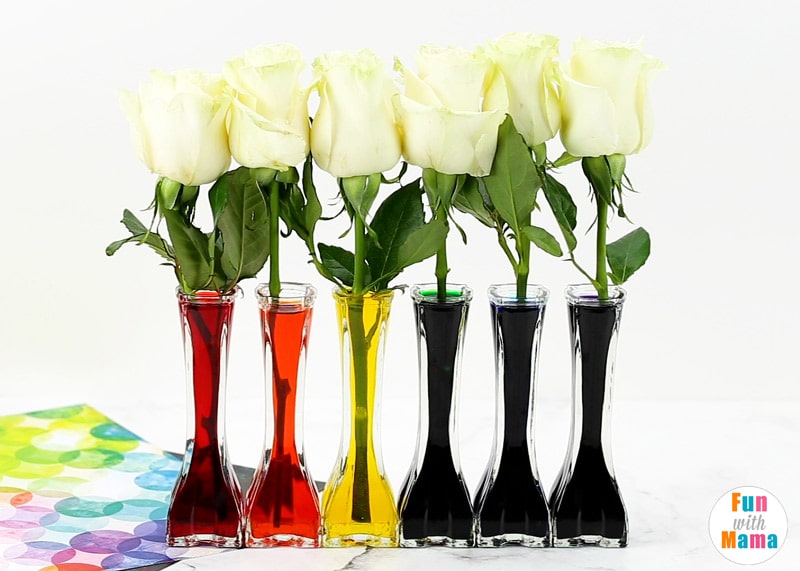
Start by lining up the glass vases and filling them with water. Add 10-15 drops of food coloring, but only one color, to each vase. You’re wanting to make bright and distinct colors on the flowers, so don’t mix them.
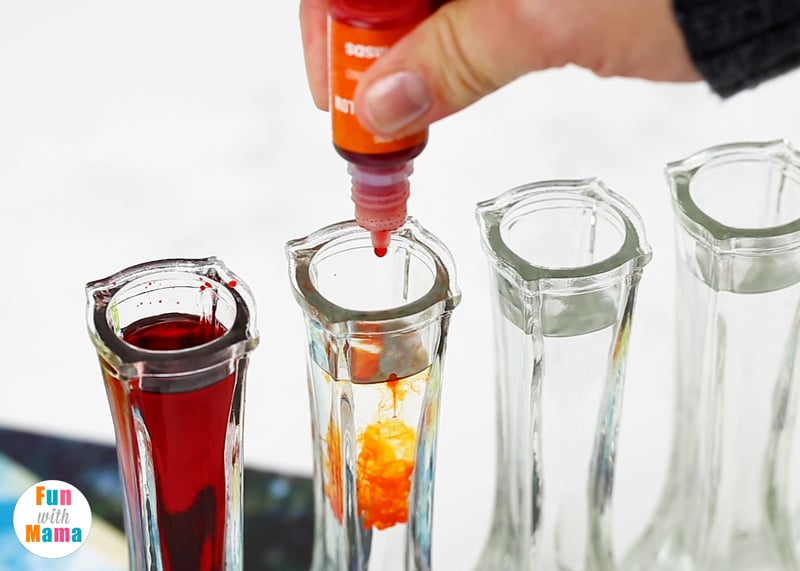
This is great for kids of all ages to help with as they can work on their fine motor skills and counting skills by helping to add in the drops!
Once the drops are added, it’s time to add the flower into the colored water. (Make sure that you trim the stem a bit so that it’s cut slightly at an angle before adding to the vase)
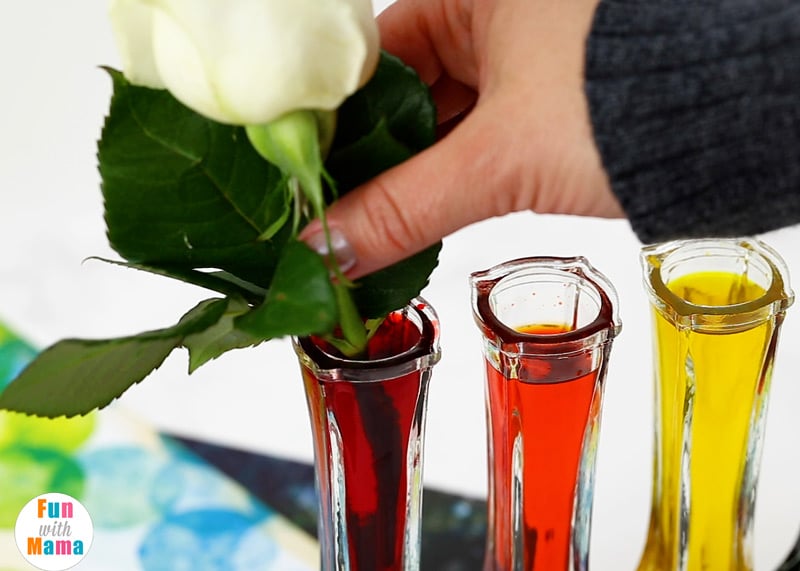
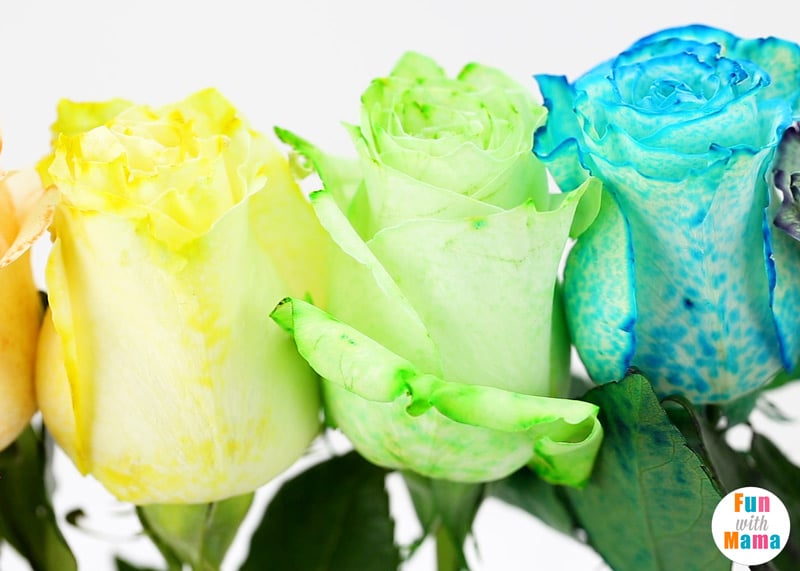
As you can see, the flowers will stay perfectly white in the vase for quite some time.
This is a great time to talk to the kids about the new experiment and have them guess (or make a hypothesis) how long it will take for the dye to color the flower completely.
How long does the color changing flower experiment take?
Remind the kids to be patient! For the new colors to happen, it will take several hours!
You can have the kids take notes about what they see and what they think about the process. This will help to teach them about documenting during experiments as a real scientist would!
What will the kids learn from this colored flower experiment?
They’ll actually learn quite a few things! First, they’ll learn how the flowers actually drink water, up through the stem.
Secondly, they’re going to realize that the food coloring traveling to the stem shows the ability of a liquid and the journey that it takes to hydrate the whole flower.
It’s a really fun experiment that I think they’re going to love.
What age group is this experiment geared towards?
As long as there is supervision, preschool learners and kindergarteners can be a part of this experiment! It’s one that they’ll have a blast doing and learn so much from!
More Science Experiments for Kids
- Homemade Thermometer Science Experiment – Making a DIY STEM Thermometer
- Magnetic Building Blocks Benefits – Best Magnetic Tiles for Kids
- Pop Rocks and Soda Experiment
- Walking Water Experiments For Kids


Leave a Comment