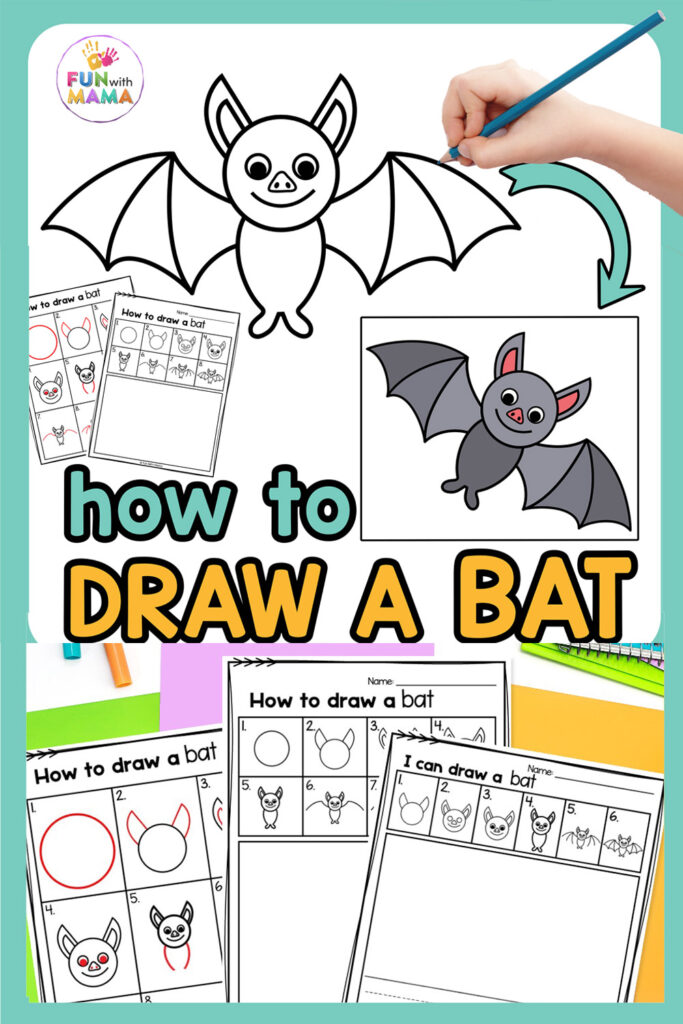
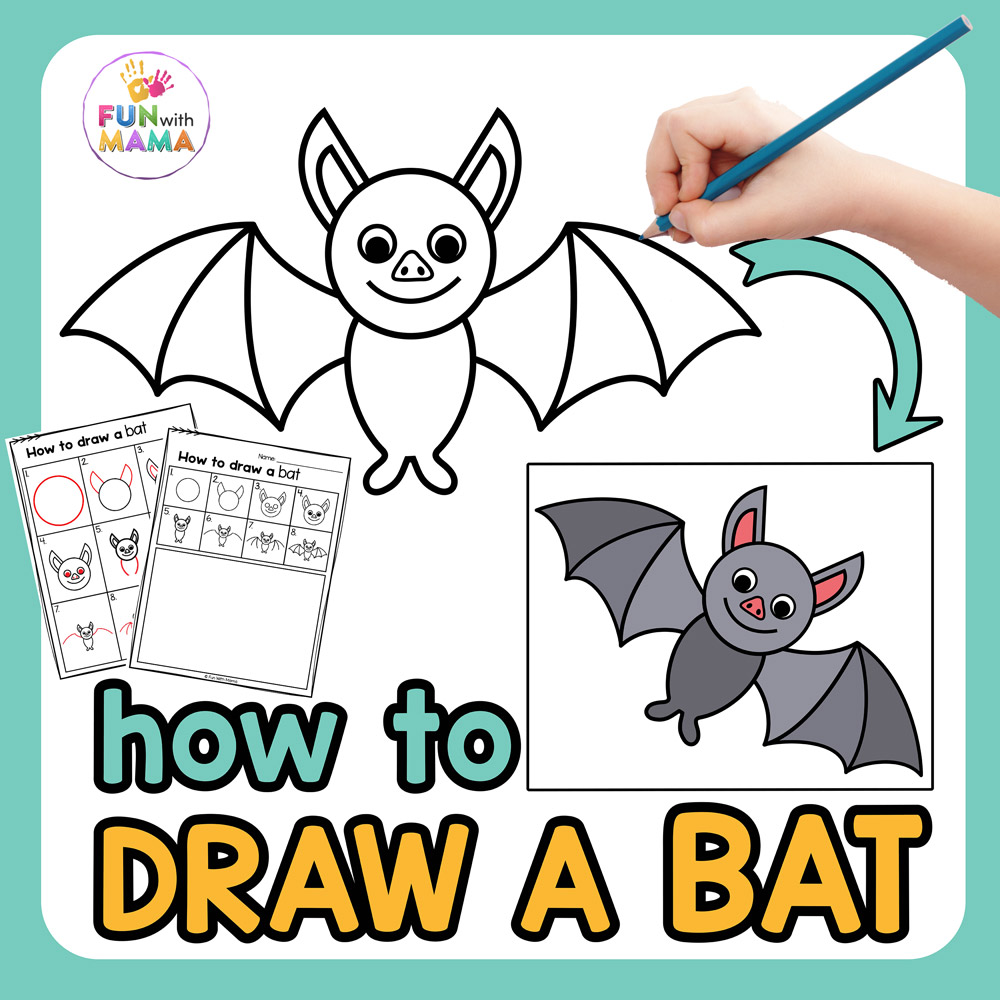
If your kids have some crazy BATtitudes and you’re just trying to wing everything then you need to check out this bat drawing tutorial!
Drawing Guides are a source of creativity and stress relief but they also have their own special purpose! They are a great motivator to encourage the kids to listen or follow directions. This Easy Bat Drawing Guide is a FREE, fun activity for you to try at home or in the classroom. It will be a great idea for your Halloween or Fall unit.
Interesting Facts About Bats
Bats are very interesting creatures! Did you know that these mammals are considered adults when they are one year old? Imagine a one-year-old being an adult- I can only foresee chaos!
If you’d like to learn about the bat life cycle and other interesting facts then check out this Bat Activity Pack!
How To Draw A Bat
Ready for a fun drawing lesson? Print your free templates out, grab some materials and let’s get started! Before you follow the drawing instructions, grab your materials.
Materials
You can find links to our favorite drawing supplies here.
Here’s what I recommend:
- Pencils or crayons
- Eraser
- Black marker
- Special suggestion: Use watercolor paints instead of color pencils or crayons and let the kids put these up at home as Fall decor! It also creates different textures.
Step-By-Step Bat Drawing Guide
This bat drawing project is perfect for your little ones or young artists who are beginners! I love using it during Halloween time and we call it a ‘Halloween Bat’. It really is a perfect art project.
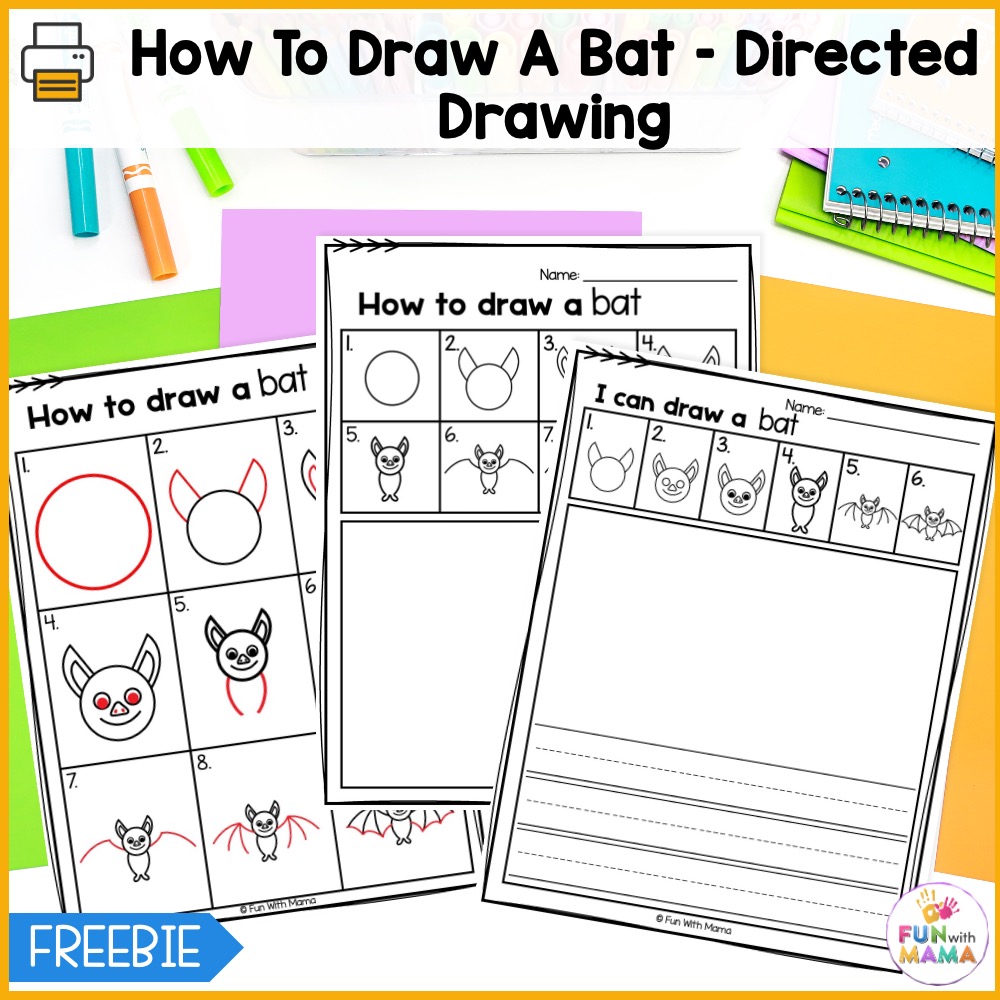
These drawing tutorials do not have words, but they include high-quality printables that you can get at the bottom of this page. Once you get and print it out, you will have two options to pick from.
Option 1: This worksheet is a step-by-step guide and can be used as an individual or homework activity!
Option 2: This worksheet is structured with 9 blocks and is ideal for a follow-along activity!
Let’s get this bat tutorial started! Follow these easy instructions.
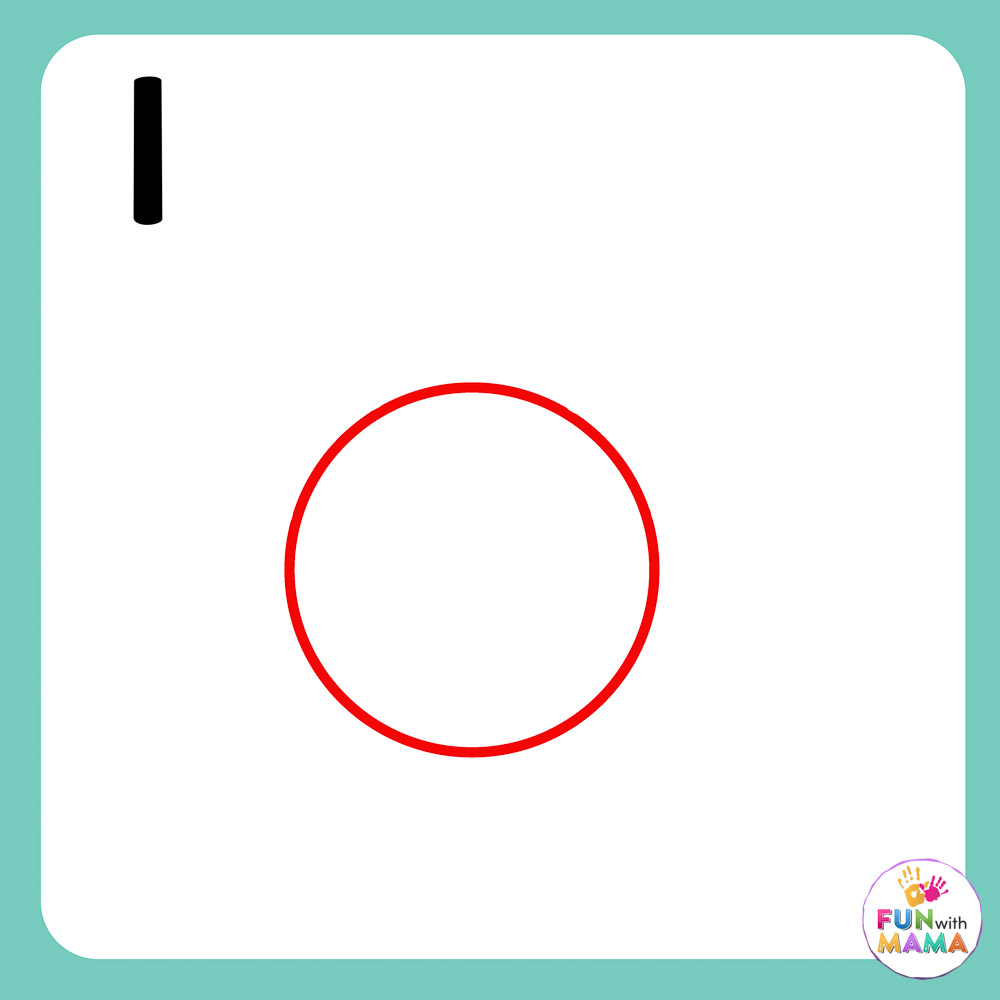
Step 1: Draw a circle. Easy peasy!

Step 2: Draw ears on the side of the head; think of them as orange slices with a bite taken off!
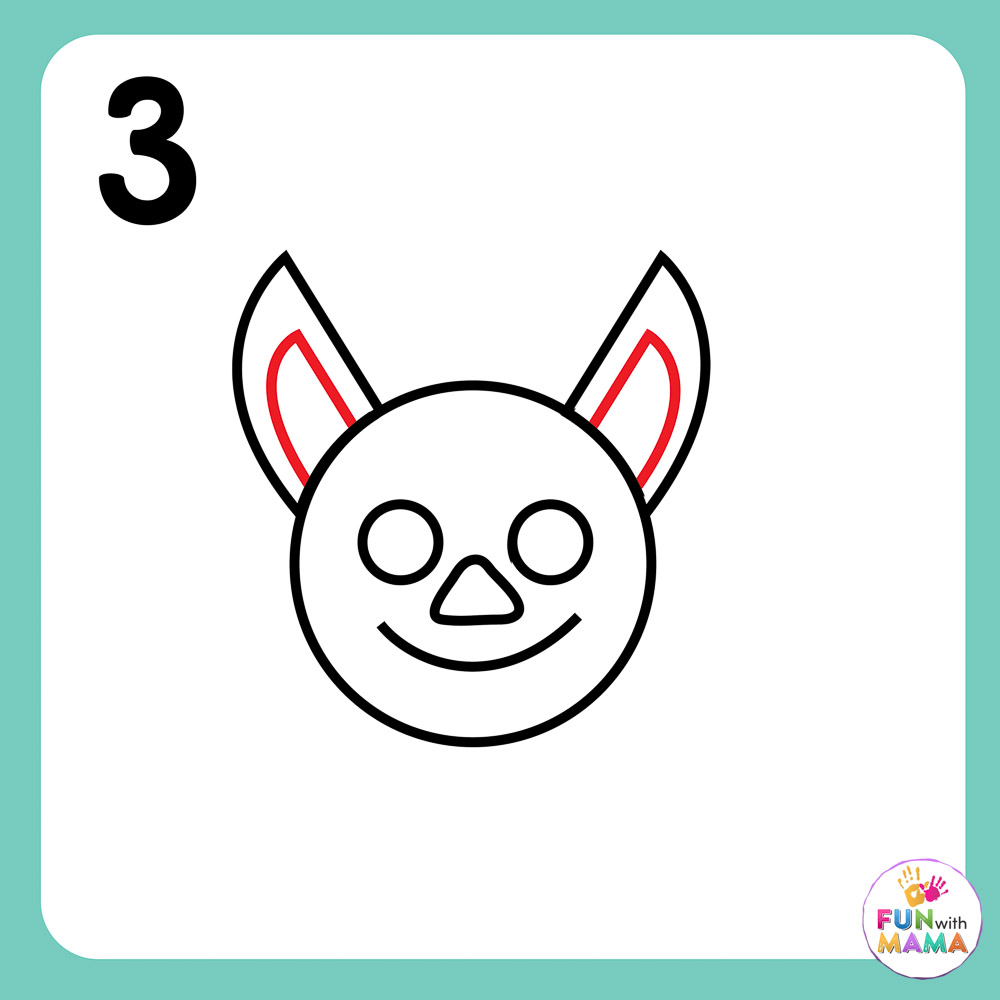
Step 3: Draw the folds of the ear- basically you have to draw the bitten orange slice smaller to make it look like an outline! Add circles as eyes, a triangle as a nose and a curve as a smile. Now our bat is finally taking shape!

Step 4: Shade in the eyes partially to create pupils then add two blobs on the nose to create nostrils. You can get really creative and use stickers for this or use some glue and stick on beads for an extra effect!

Step 5: Draw the body. This will resemble an oval shape. It looks like a football without the ends closed!
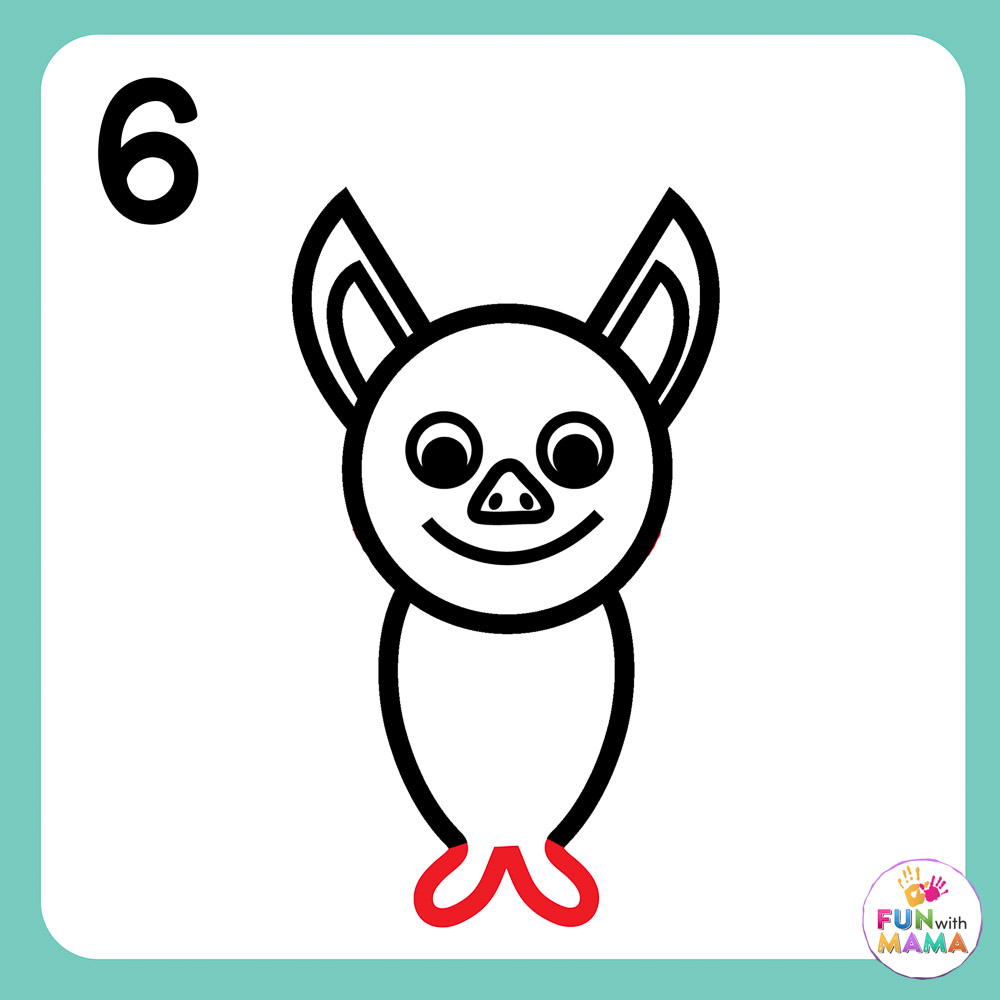
Step 6: Draw the feet. Think of it as two flower petals or squiggles. One squiggle is drawn arching towards the left side of the bat and the other squiggle arches towards the right.
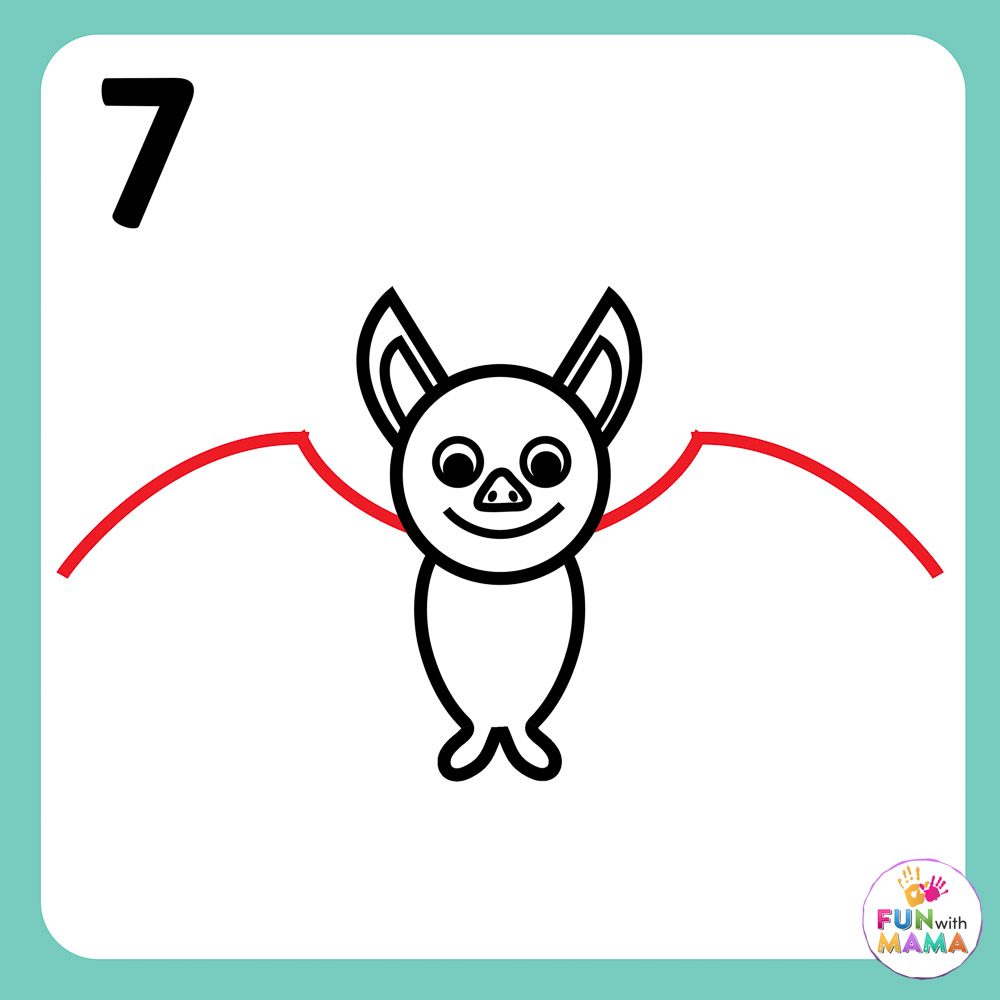
Step 7: Now draw the bat’s wings. Draw the curved lines up like arms and then add a curved line at an angle. Think of the bat as having ‘open arms’. How lovely!
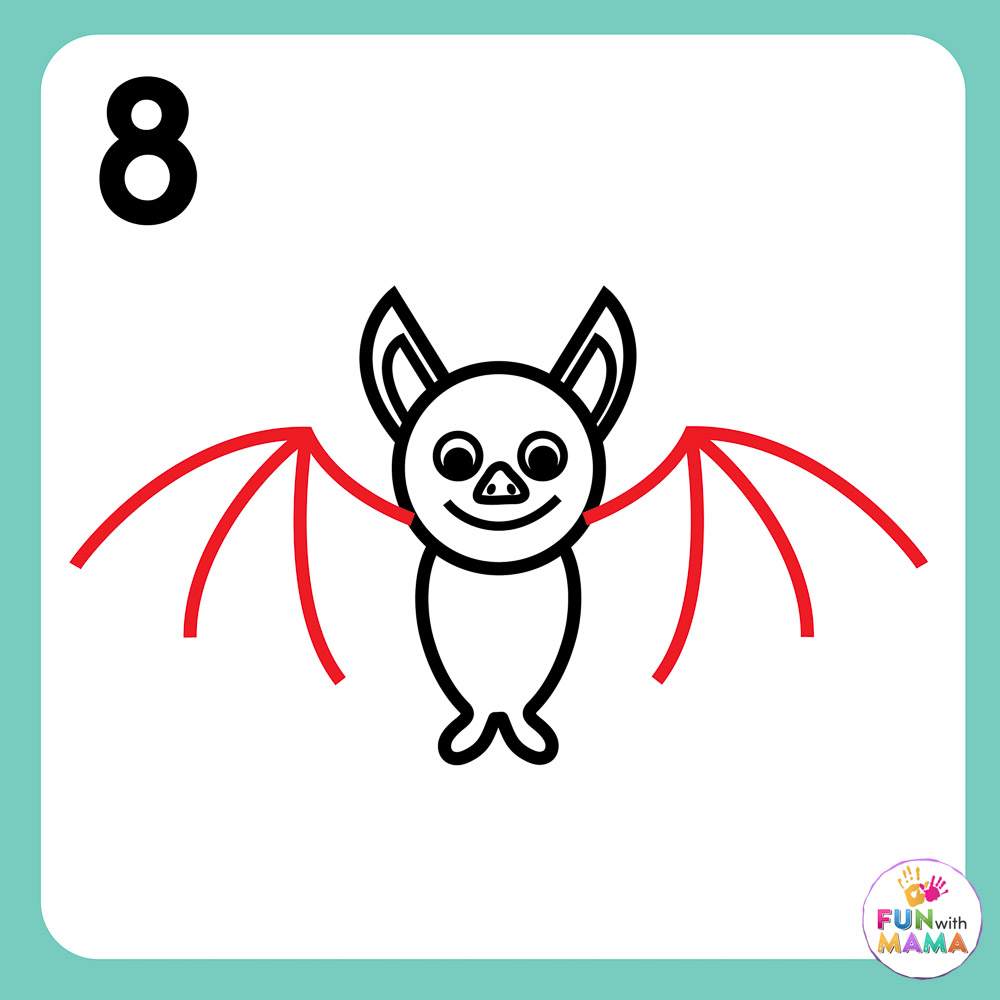
Step 8: Add more curved lines to create that signature wing bone! You will add two curved lines to each wing, spacing them equally.
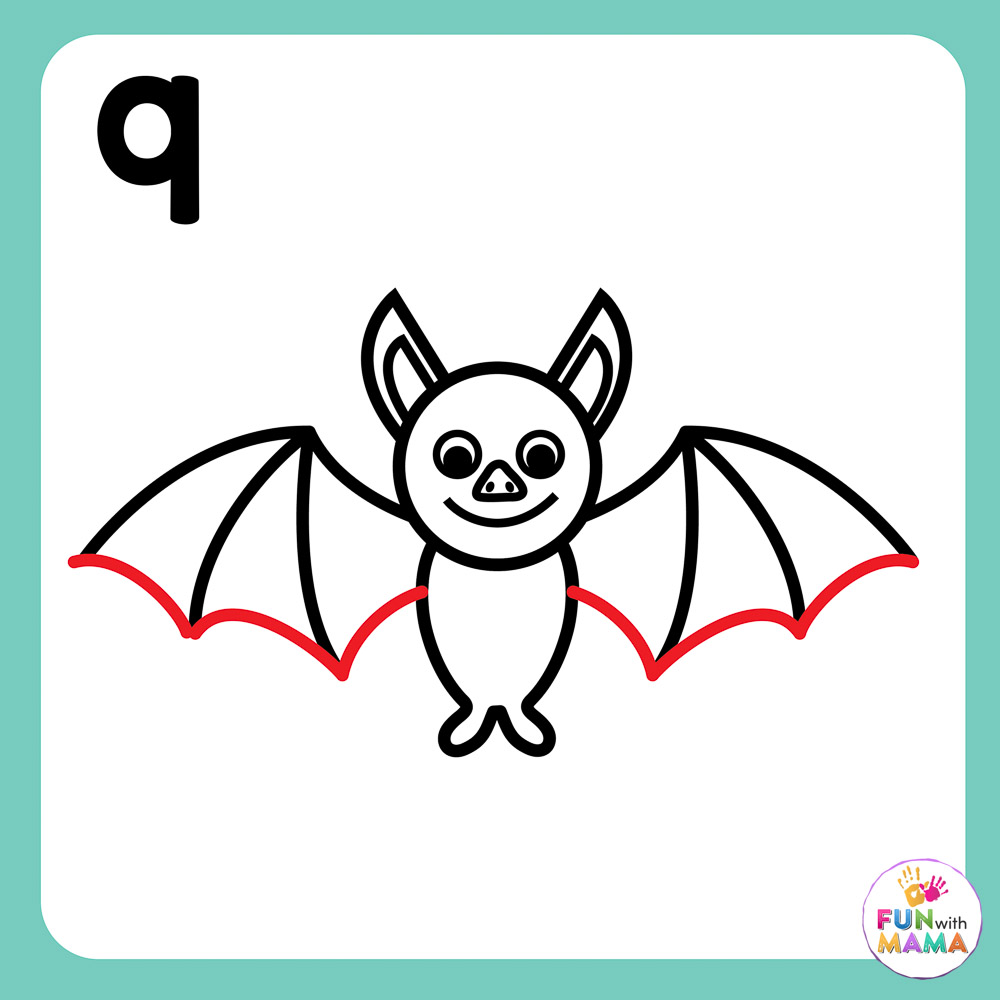
Step 9: Join the bottoms of the wings with curved lines to close them! It’s almost like drawing an umbrella. You will have to draw three joining curves on each side. You don’t have to stop there! Paint it, add glitter or textures like pom-poms or cotton wool and make it wall-worthy!
Get the free How To Draw A Bat printable here
I have a freebie for you. I have included this easy to draw bat in a printable PDF for your convenience. It includes the easy bat drawing steps and a blank space for you to try drawing a bat too.
Get the free printable right here.
Next, check out these drawing guides: how to draw a spider and how to draw a Spider Web.
Can’t get enough of drawing fun? Check out my Learn to Draw Activity Pack where your kids can learn to draw so many different types of other animals!
Looking for more Bat Activities?
GET THE BATS ANIMAL STUDY ACTIVITY PACK HERE

Why Drawing Is Important For Children
Drawing helps improve fine motor skills and communication skills, improves emotional intelligence and is an excellent way to foster self-esteem!
I love using ‘drawing time’ as a stress reliever. Many scientific studies reveal that art therapy can lead to a significant reduction in stress levels. The kids are free to express themselves and you’ll be so proud to watch their confidence grow!
Give it a try and be sure to tag me on Instagram or Facebook! And yes, please share it on your awesome Pinterest board too!


Leave a Comment