
This snowman drawing activity is a fun approach to teaching your kids how to follow simple instructions. It encourages them to follow step-by-step guidelines to build discipline, and if you’ve done one of our previous drawing guides, you know we’re also all about having a good time!
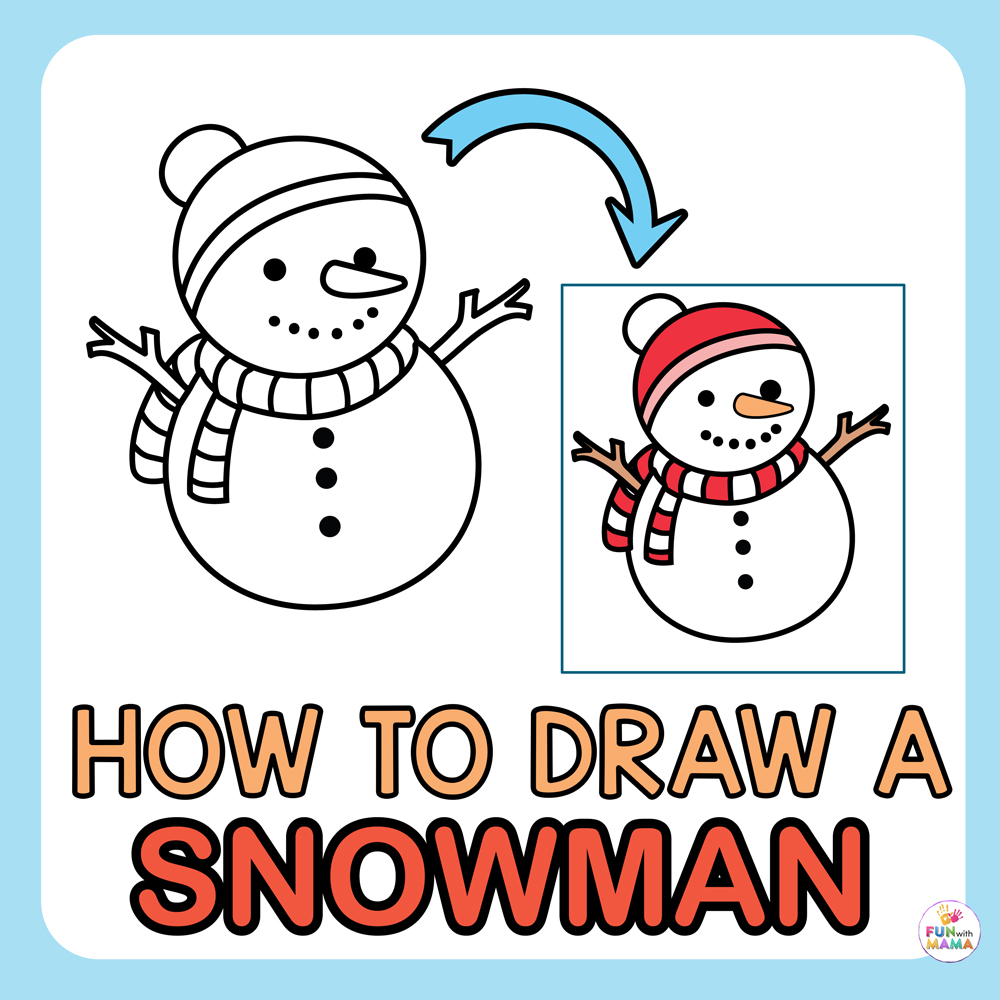
A snowman is representative of the winter season. If it doesn’t snow where you live, this cute snowman drawing with a scarf, buttons, a carrot nose, and a top hat is the ideal activity to capture that feeling and discuss winter around the world.
If you’re looking for a festive winter drawing activity, check out our How to Draw a Christmas Tree and How to Draw Santa’s Sleigh drawing guides!
Did you know that snow is translucent and NOT white? Or that snowflakes exist in 35 different shapes and sizes? Me neither!
As the kids enjoy this easy snowman sketch, share some of these Snow Facts for Kids with them.
Benefits of Directed Drawing Guides
Directed drawing has a lot of advantages for children. Kids can develop their confidence and learn to sequence, plan, and strategize by doing step-by-step (guided) drawings. In addition to being enjoyable, directed drawing helps teachers integrate art into the classroom and engages pupils. You’ll see why step-by-step drawing is so beneficial for children when you consider how wonderful it is to practice drawing the same image over and over again! Let’s elaborate:
Sequencing:
Children learn about sequencing when they draw using guided drawing, also known as step-by-step instructions. What occurs initially occurs again and again. This prepares their brain for other sequential tasks like math and writing.
Strategizing:
When kids draw, they have to plan and obey visual directions. Children can learn to plan and apply by drawing step-by-step (much like a chess player who needs to consider a few steps ahead).
For more ideas on integrating directed drawings into your classroom, check out this post on Fun Ways to Teach Directed Drawing.
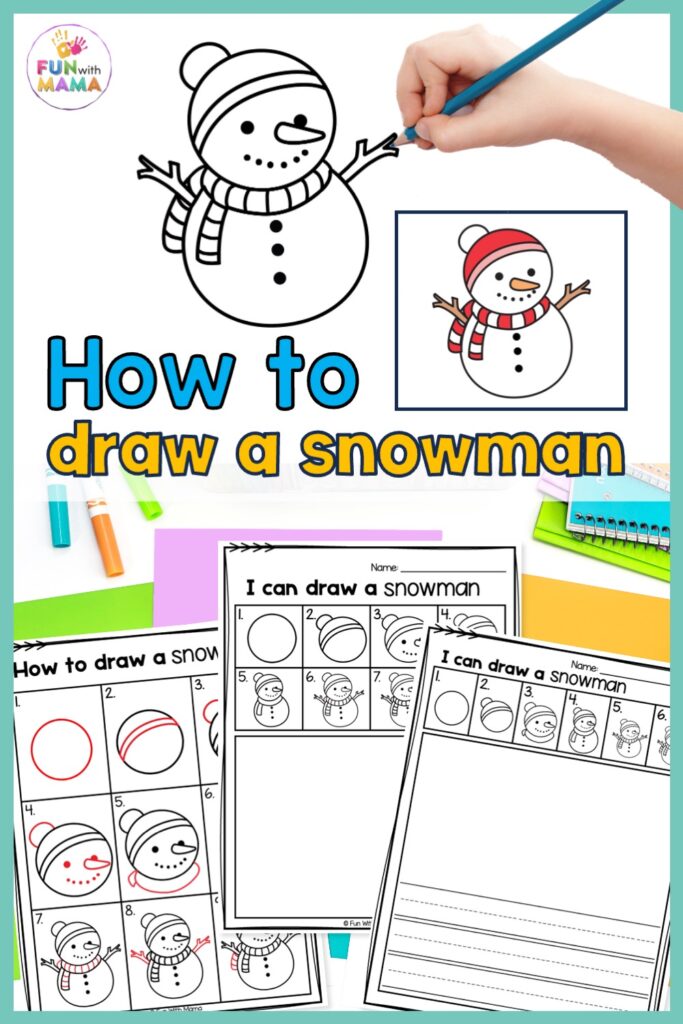
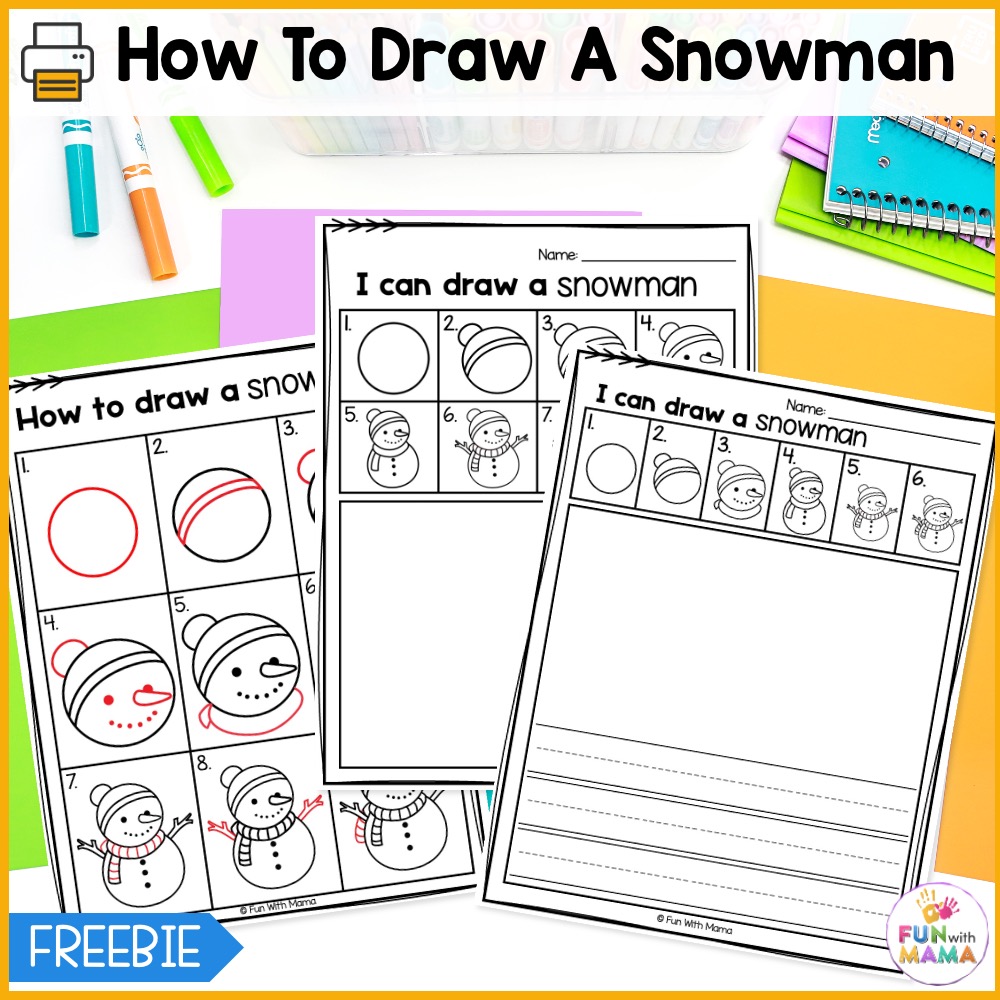
Free Snowman Step By Step Tutorial
This easy snowman drawing tutorial comes with two options. The first printable requires the kids to follow your directions. The second printable has step-by-step instructions. I’d suggest the first option for older kids and the second one for your preschoolers or kindergarteners.
Grab some crayons, pens, erasers, colored pencils, markers, watercolors, acrylic paints, oil pastels, or any coloring materials you have on hand to get started!
Check out our favorite kindergarten and preschool supplies list here. Don’t forget to get your free PDF printable at the bottom of the page!
Tip: If your little ones are younger, help them go over the outline with a black marker. This will make it easier for them to color, adding depth to the artwork.
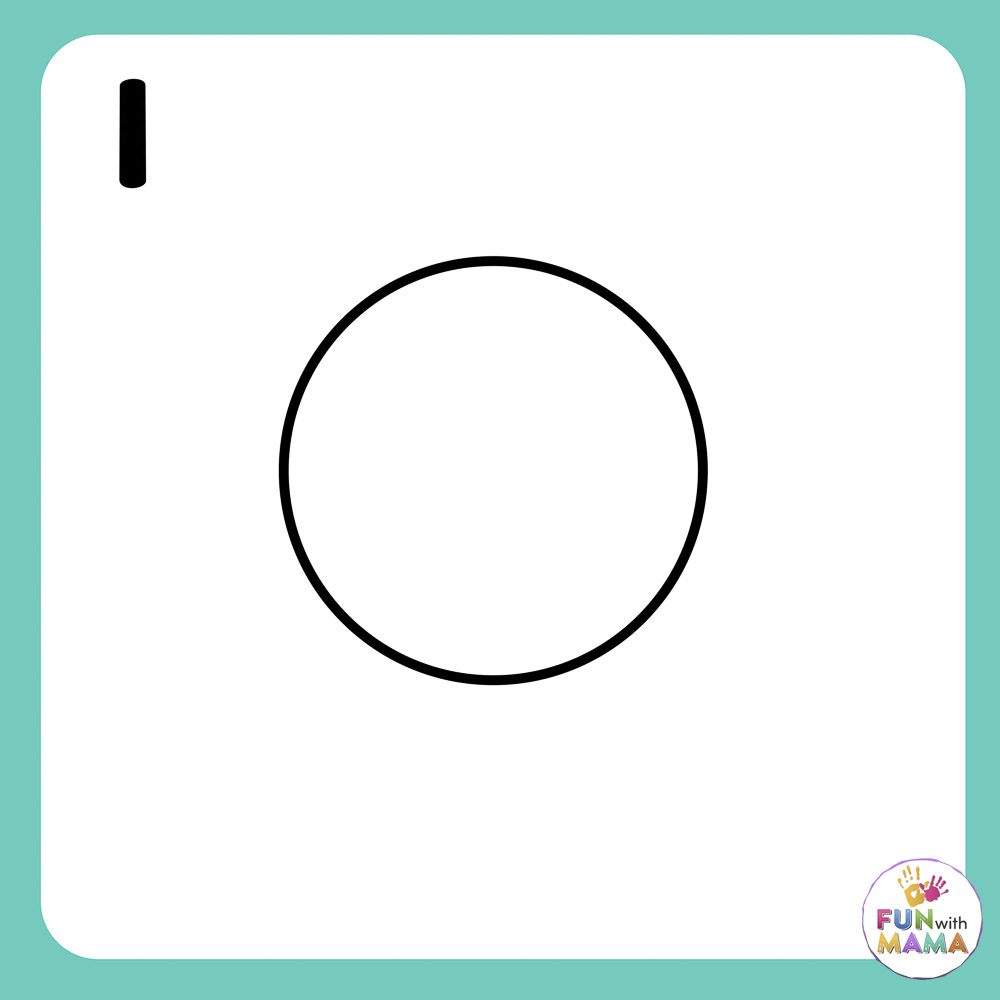
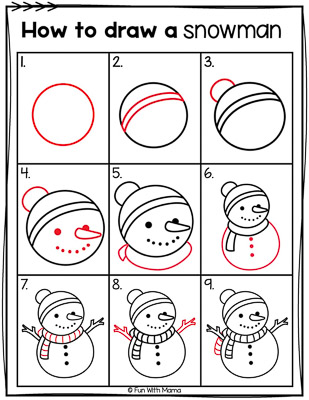
Step 1: Draw the snowman’s head. There is no need for perfect circles! However, you can let the kids use a circular object and trace it to get a perfect round head.
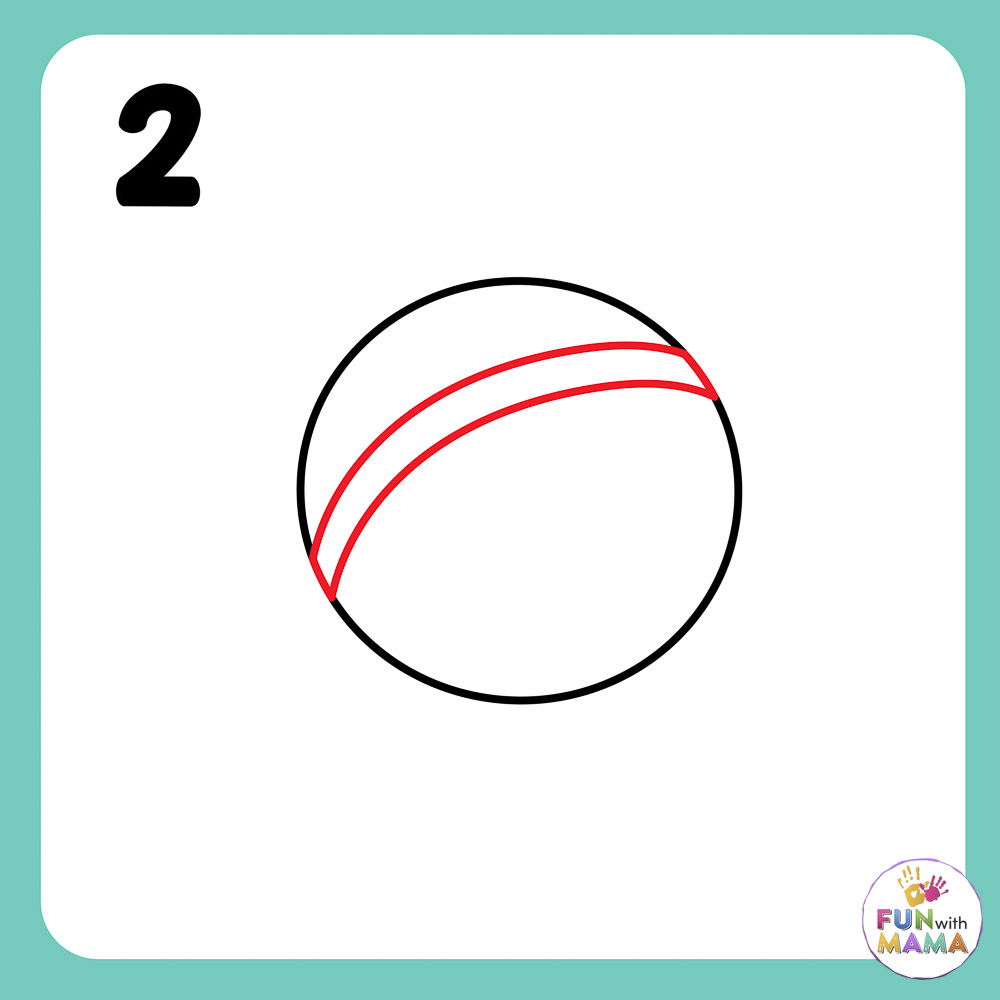
Step 2: Add an arc towards the top left of the snowman’s head. Add another curved line below it to create a band.
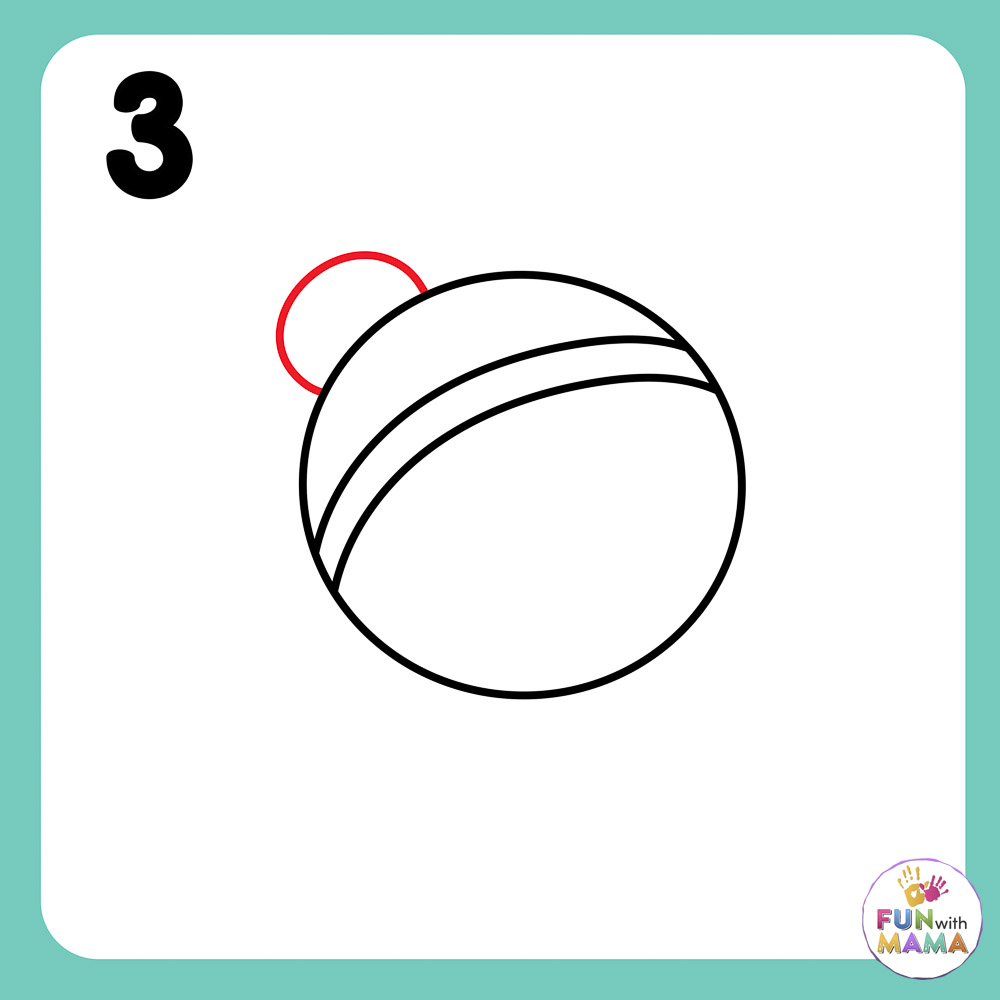
Step 3: Draw a small semi-circle blob on the top of the hat. Think of it as a pom pom on a winter hat. Now, the snowman’s hat is complete!
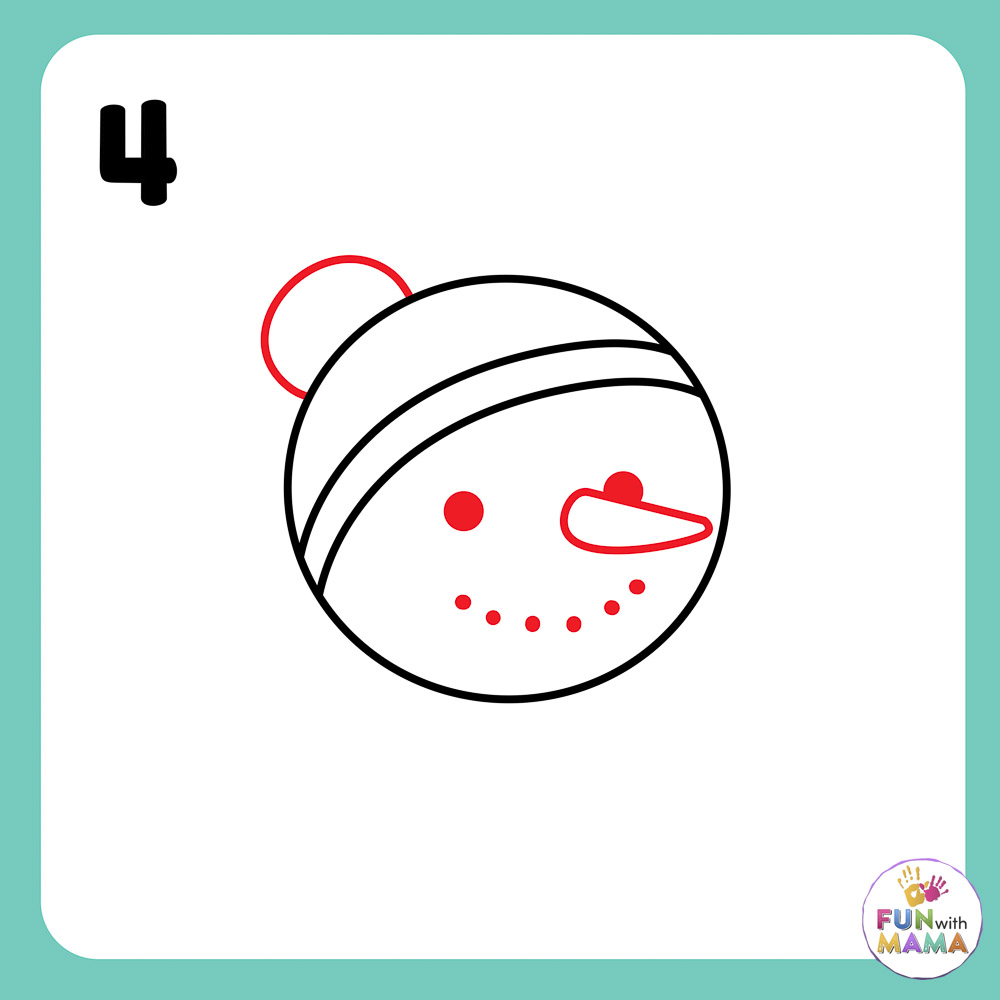
Step 4: Now we’re going to add facial features. First, add two large dots to create the snowman’s famous ‘coal eyes.’ Add its triangle carrot nose; it looks like a horn! Lastly, draw a smiling mouth by simply adding smaller dots in a curved shape onto the face of the snowman.
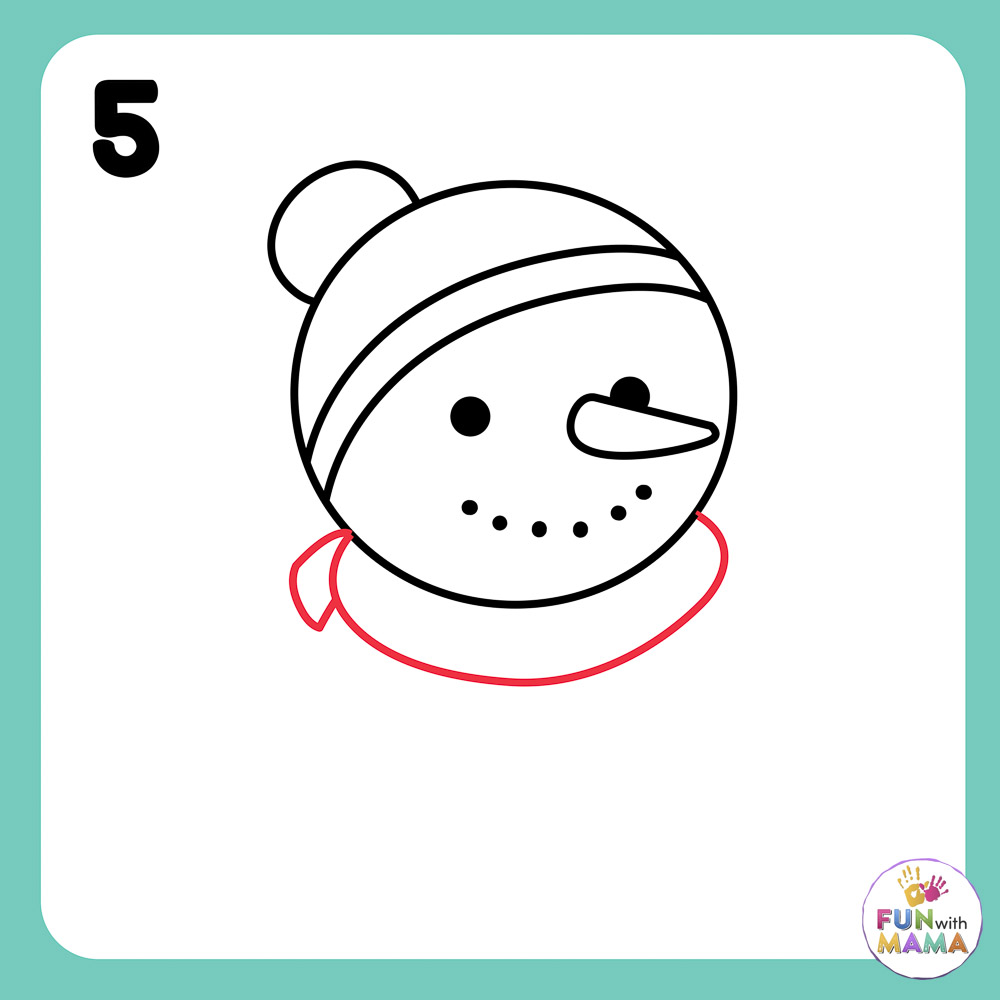
Step 5: It’s time to draw our snowman’s scarf. Draw a curved rectangle around the snowman’s neck. Add a piece of the scarf that will stick out on the left side. It doesn’t have to be perfect! Check the next step for an easier scarf idea.
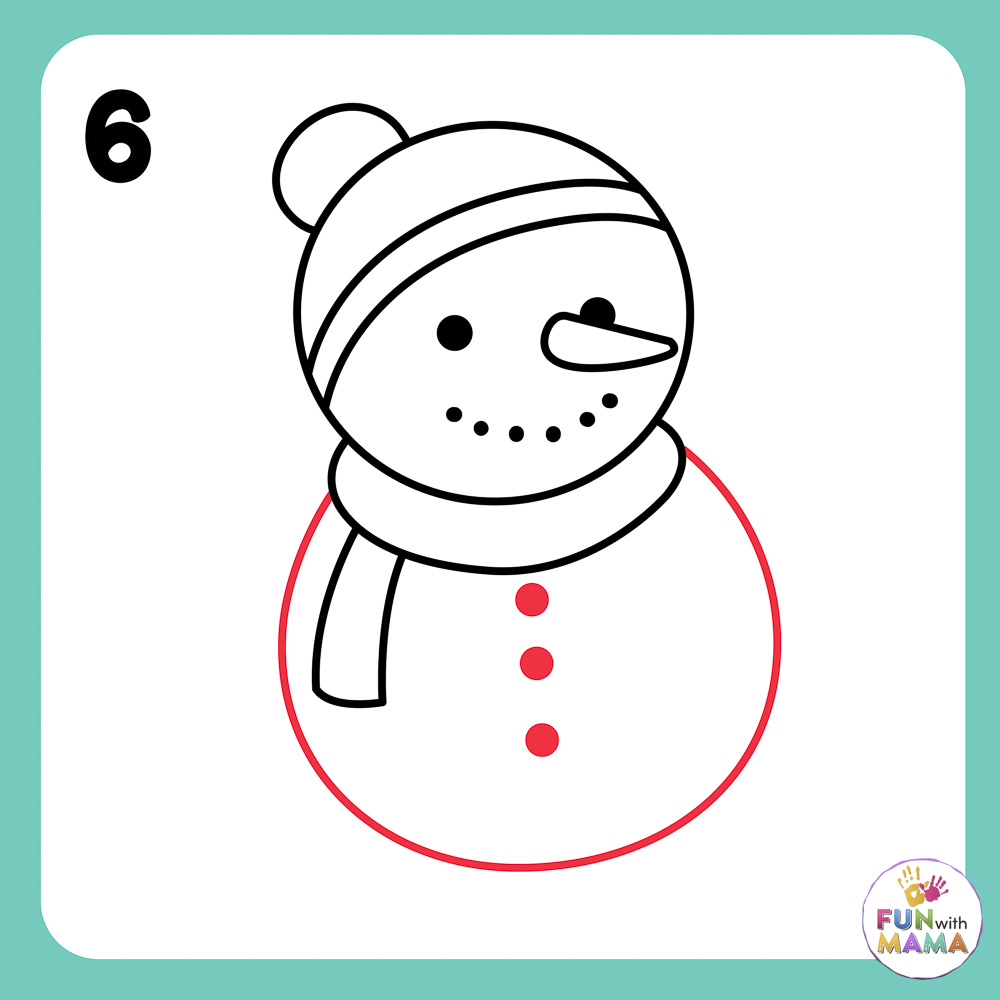
Step 6: Draw the snowman body. First, draw a bigger circle and attach it to the scarf. Add buttons or small circles in the middle of the snowman’s belly. Complete the scarf portion that falls on the body of the snowman by drawing a rectangle. As inspiration, you could bring a scarf out and show the kids to tie one or have them bring theirs!
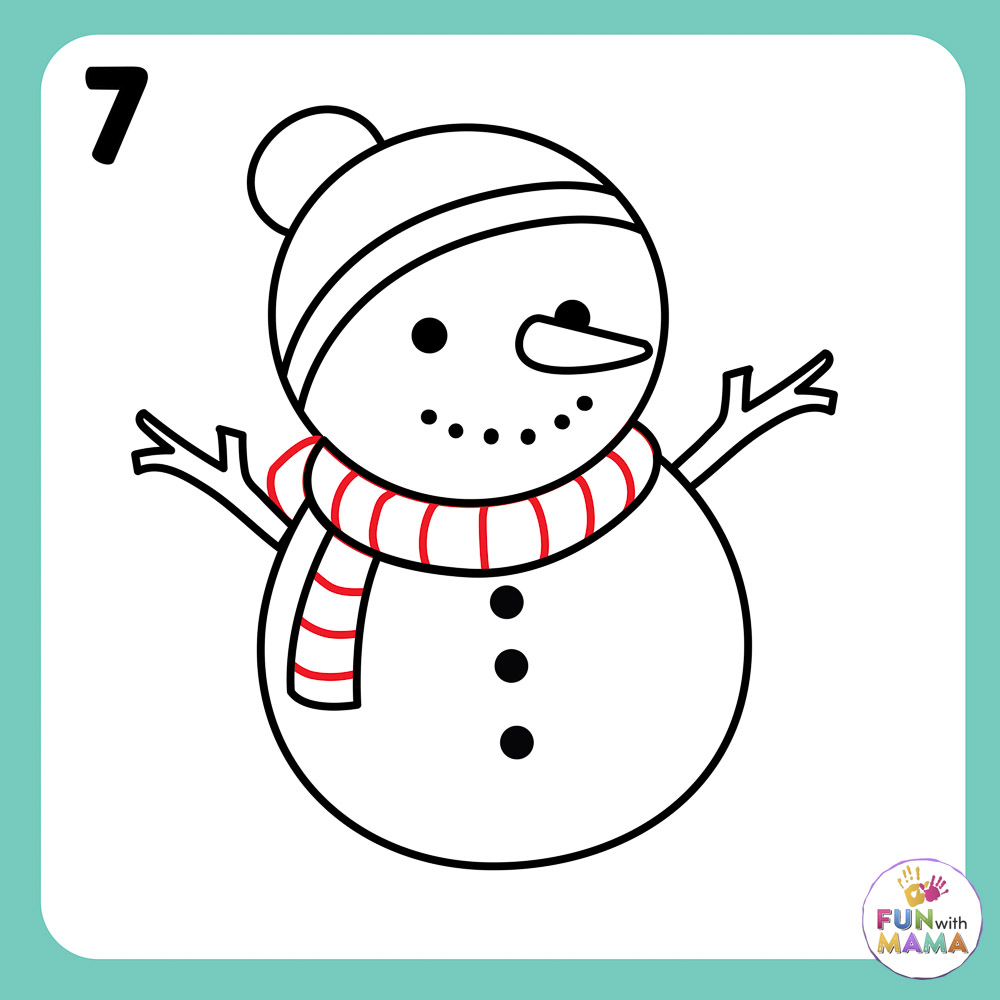
Step 7: Add stripes onto the scarf to give the drawing more dimension.
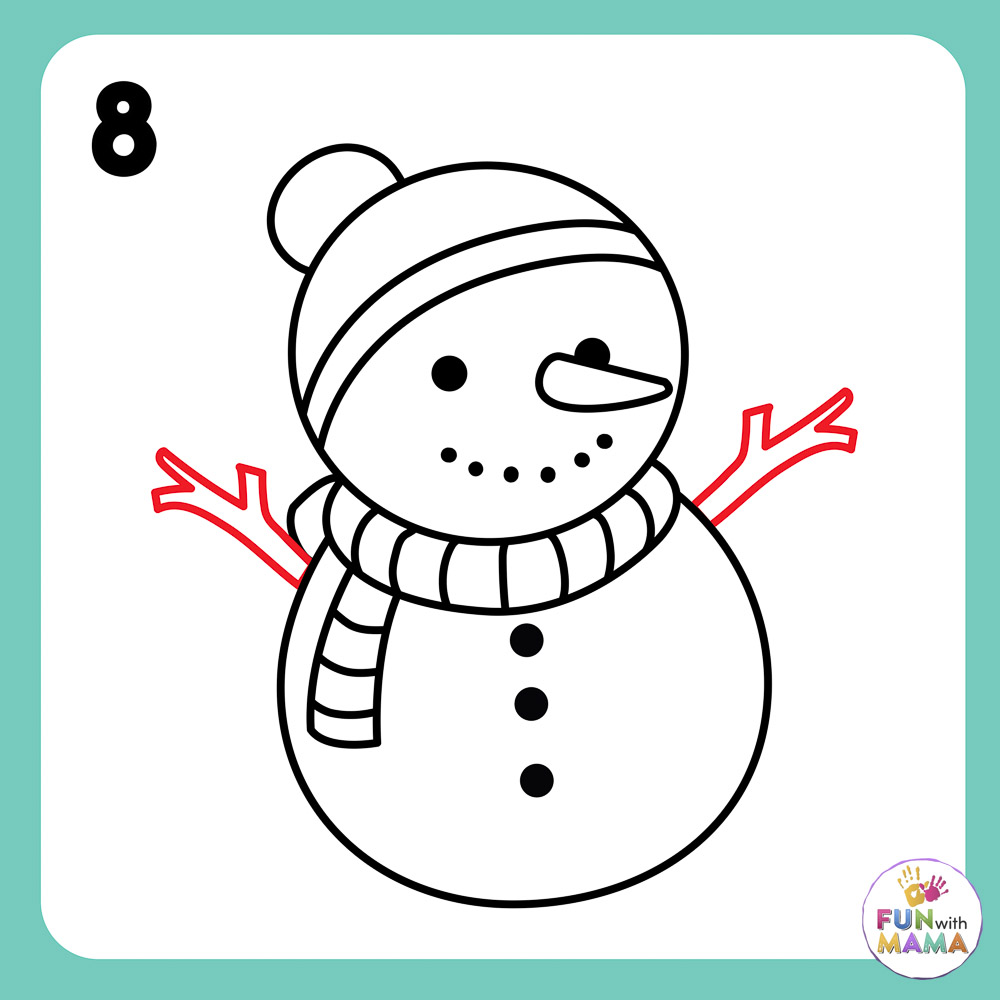
Step 8: Draw twigs to create the snowman’s arms. The stick arms resemble little hands.
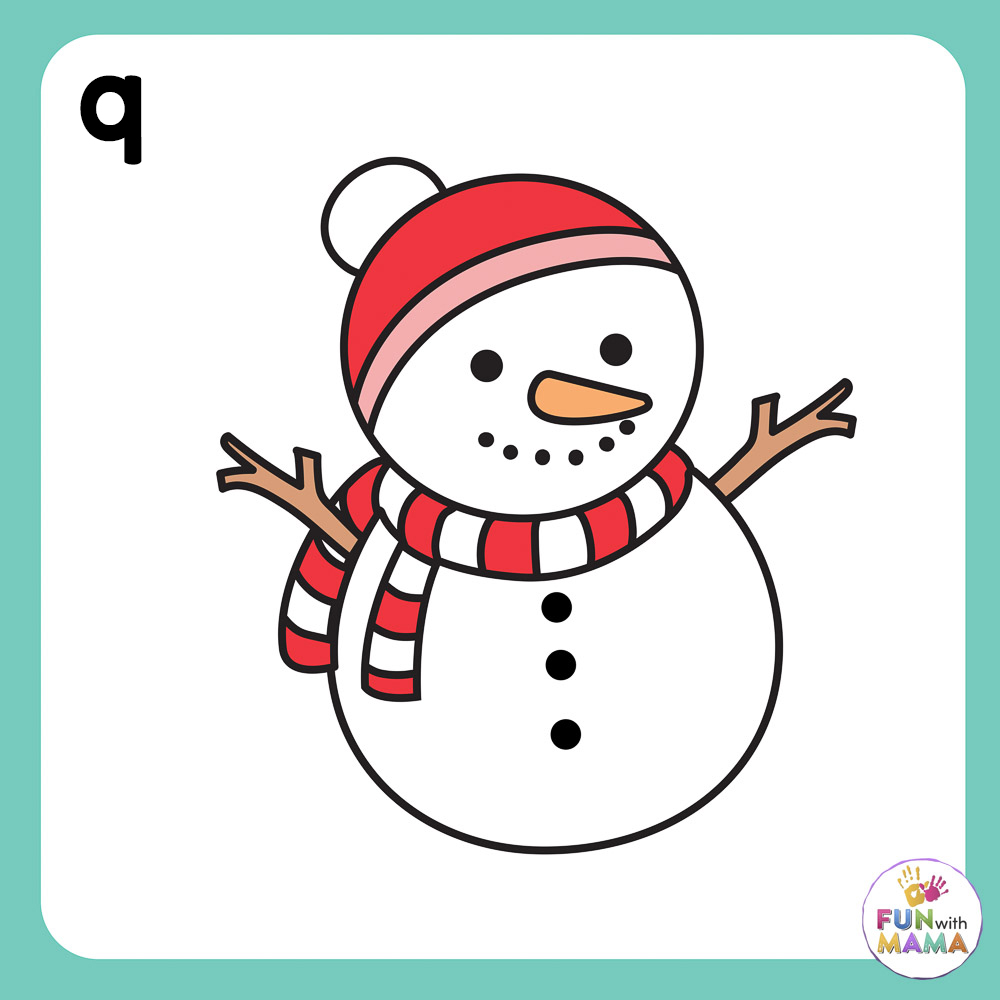
Step 9: The final step of this snowman drawing lesson is adding some color to the kids’ masterpieces. It’s the perfect time to practice shading or adding details to make their drawings to the next level.
Get the free printable here
Click the image below to get your free PDF printable.
Winter Activities Pack
GET THE WINTER ACTIVITIES PACK


Leave a Comment