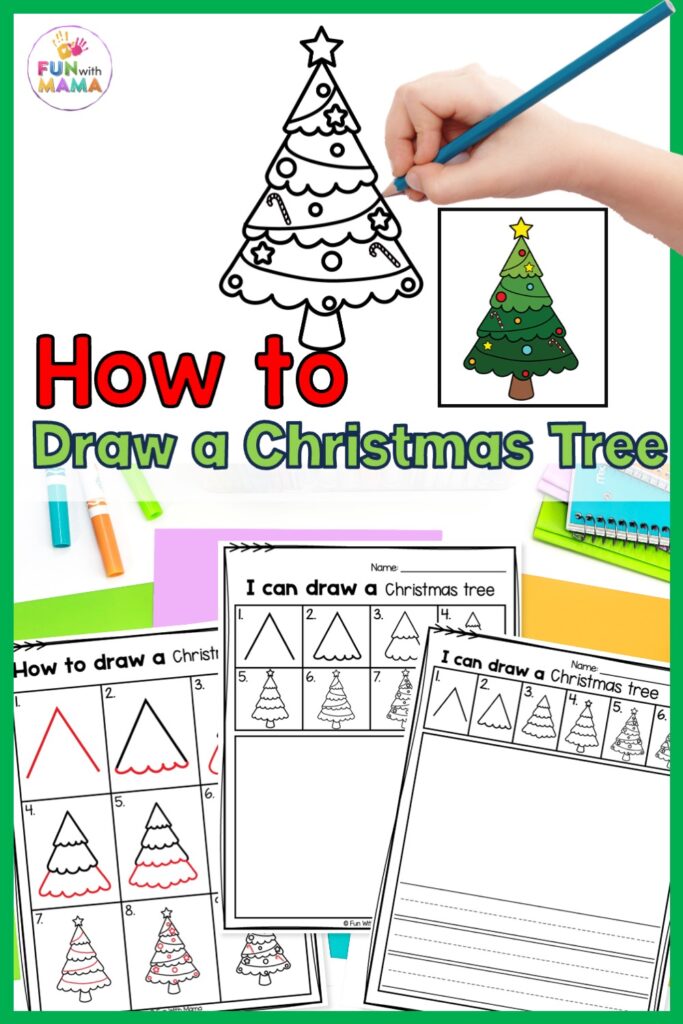
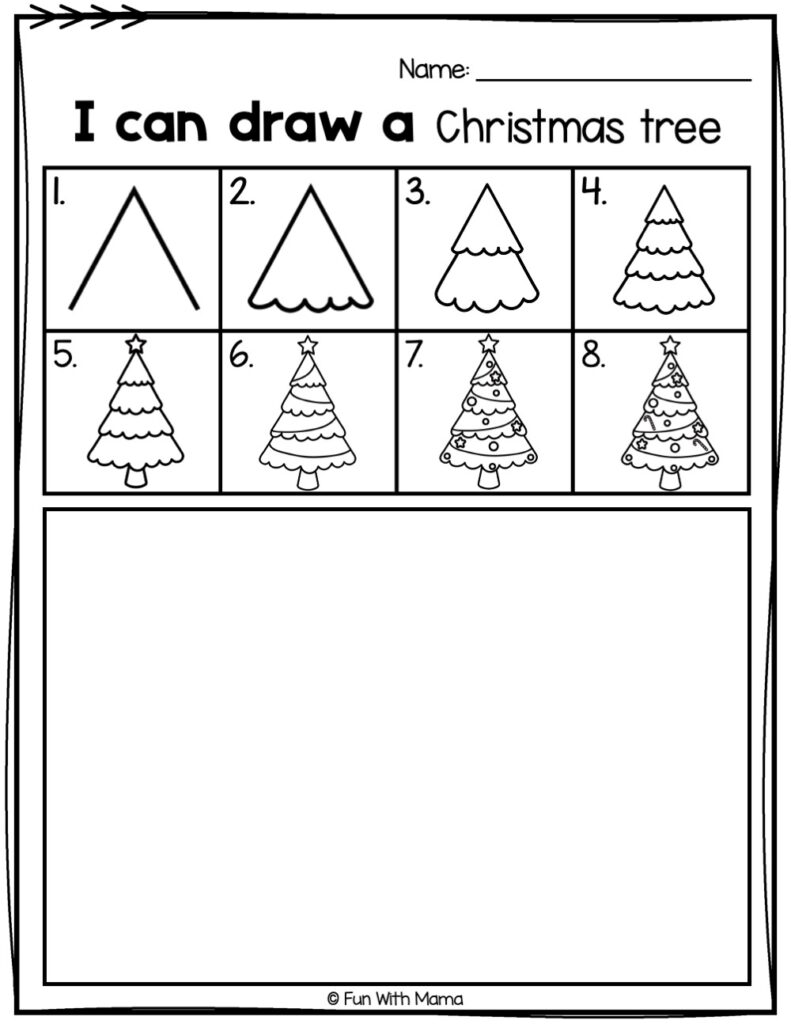
Who’s ready for the holidays? Teach the kids how to draw a Christmas Tree with this Free printable for a super fun art activity they’ll love! Perfect for holiday decorations or a simple Christmas art project at home.
In this step-by-step drawing tutorial, we will draw a Christmas tree step by step. Every adult and child will have a blast drawing this – because everyone loves Christmas! Today, let’s work together to learn how to draw a Christmas tree!
RELATED: Color By Number Christmas Pages
 Get It Instantly In The FWM Members Club
 Get It Instantly In The FWM Members Club
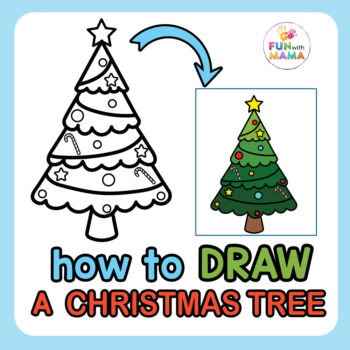
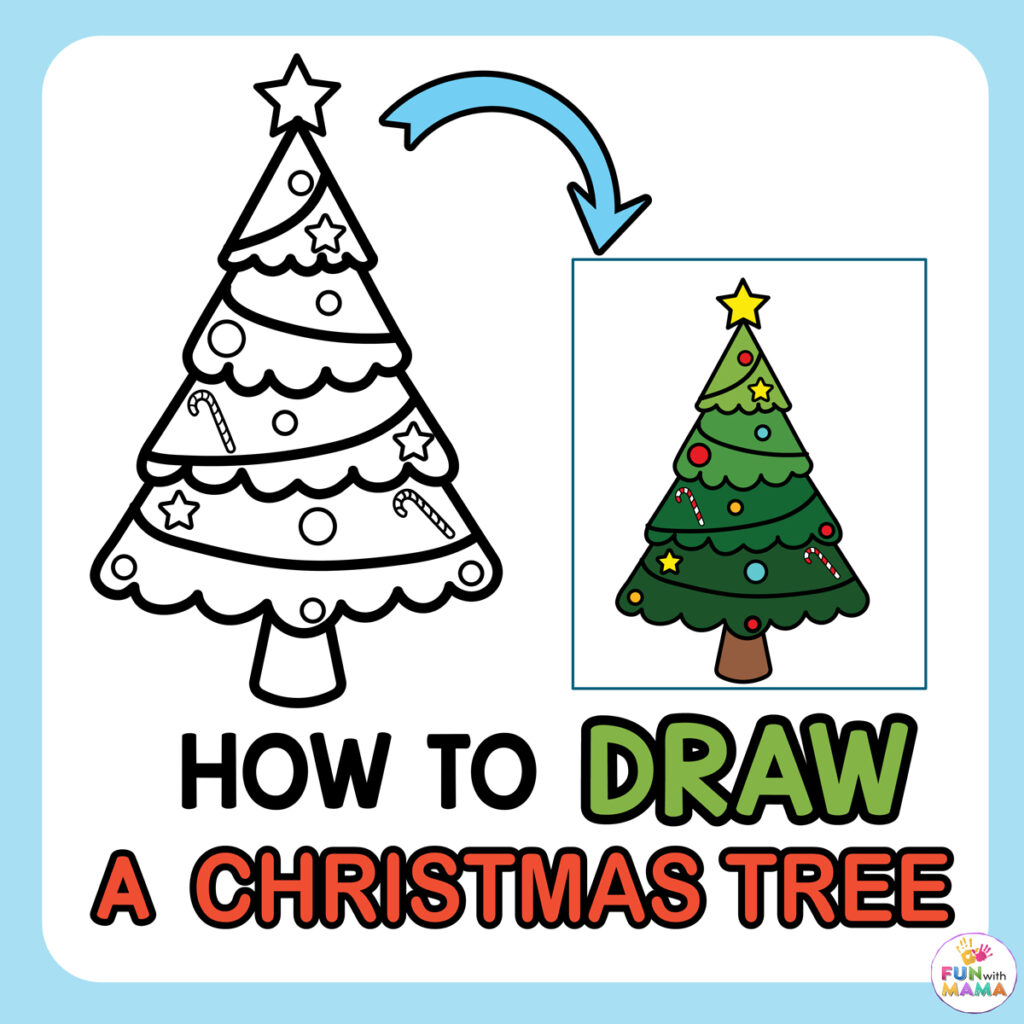
How to Draw a Christmas Tree
This Christmas tree drawing is the perfect way to slow down and enjoy easy step-by-step instructions.
Grab your favorite art supplies and a sheet of paper or two, and let’s get started! This DIY Christmas drawing proves that anyone can be an artist.
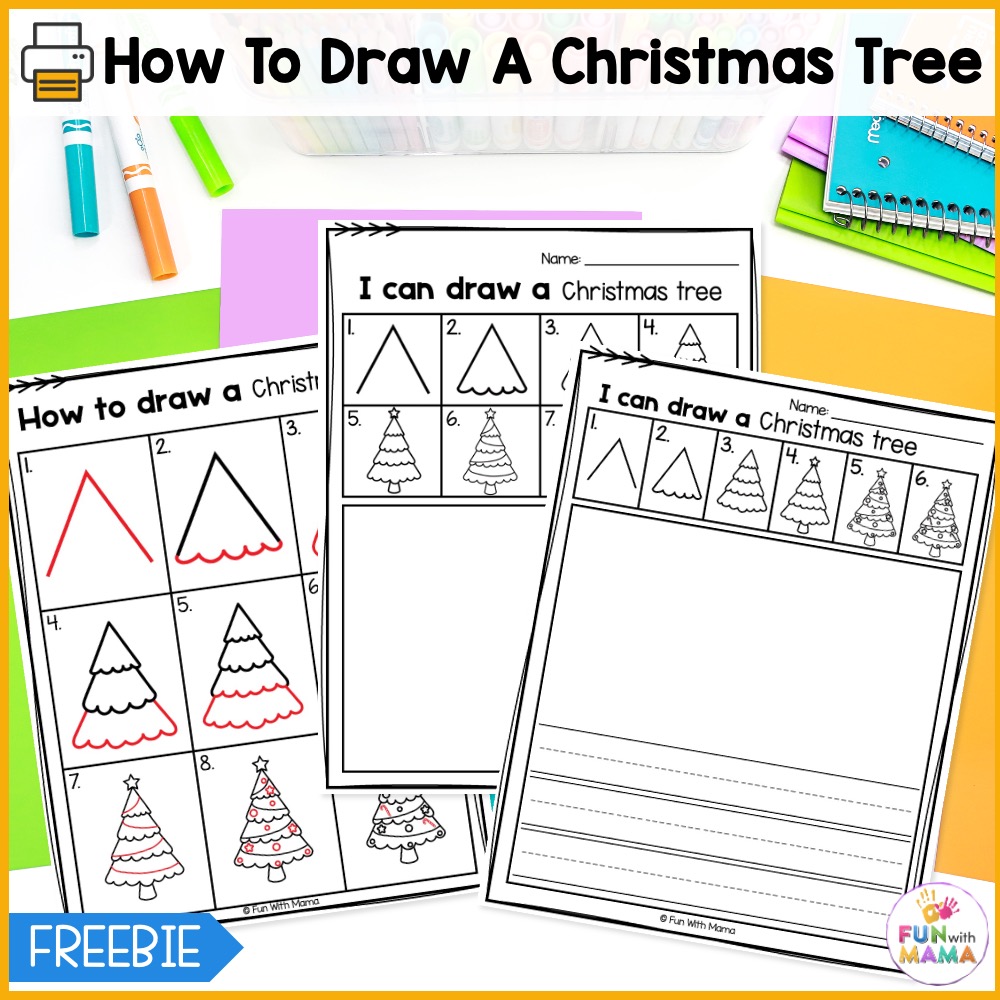
This post includes a step-by-step picture tutorial on how to draw a Christmas tree, as well as a free printable drawing guide that you can grab too.
When it comes to fun art challenges, this one will also get you into the Christmas spirit! A few angled lines, final details, and a Christmas tree will be done!
I can’t wait to hear your thoughts about your Christmas tree drawing. It’s so much fun to do this time of year.
Christmas trees are so magical – I had to create a free directed drawing guide!
You can find links to our favorite drawing supplies here.
Check out more drawing tutorials in our how to draw series.
Video Tutorial
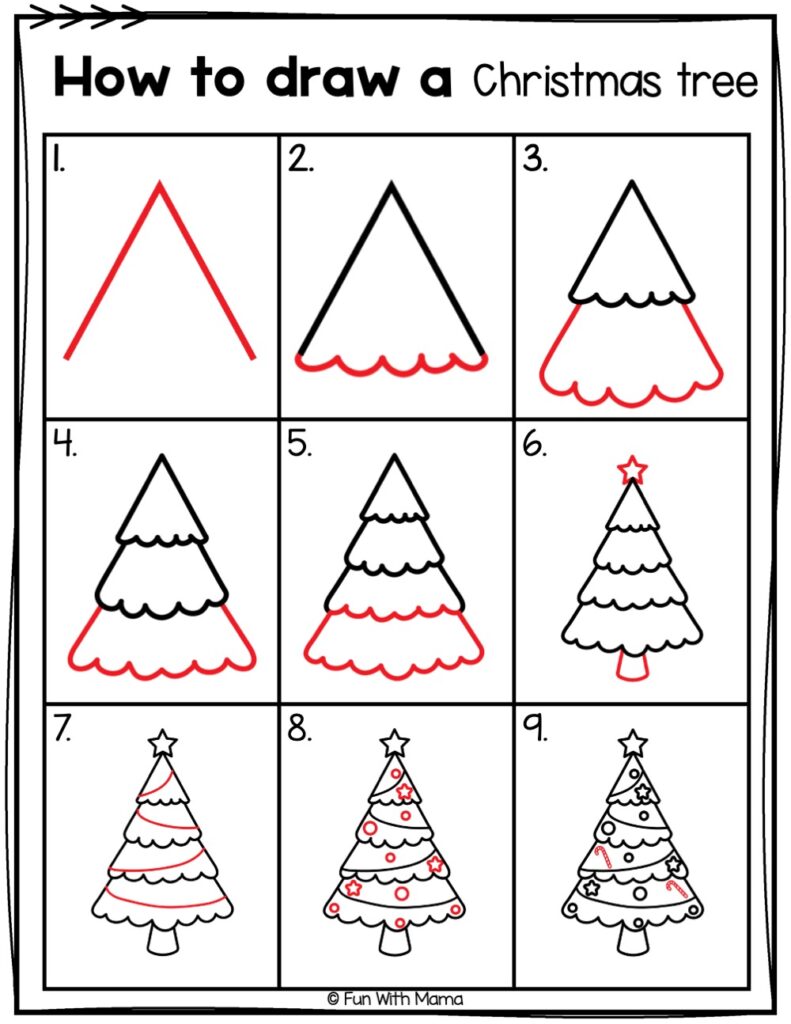
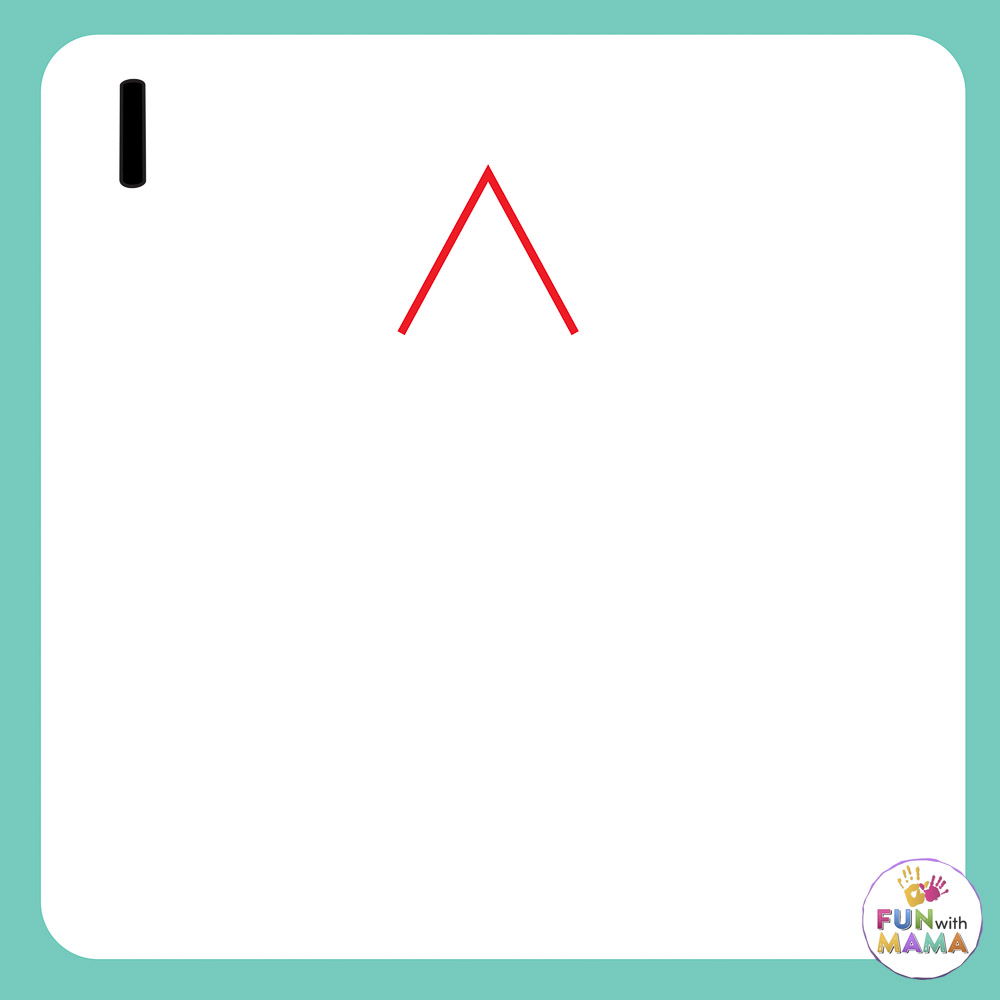
Step One: Draw the top of the tree
Start by drawing the very top of the tree. A triangle without a bottom line is the easiest way to do this quickly.
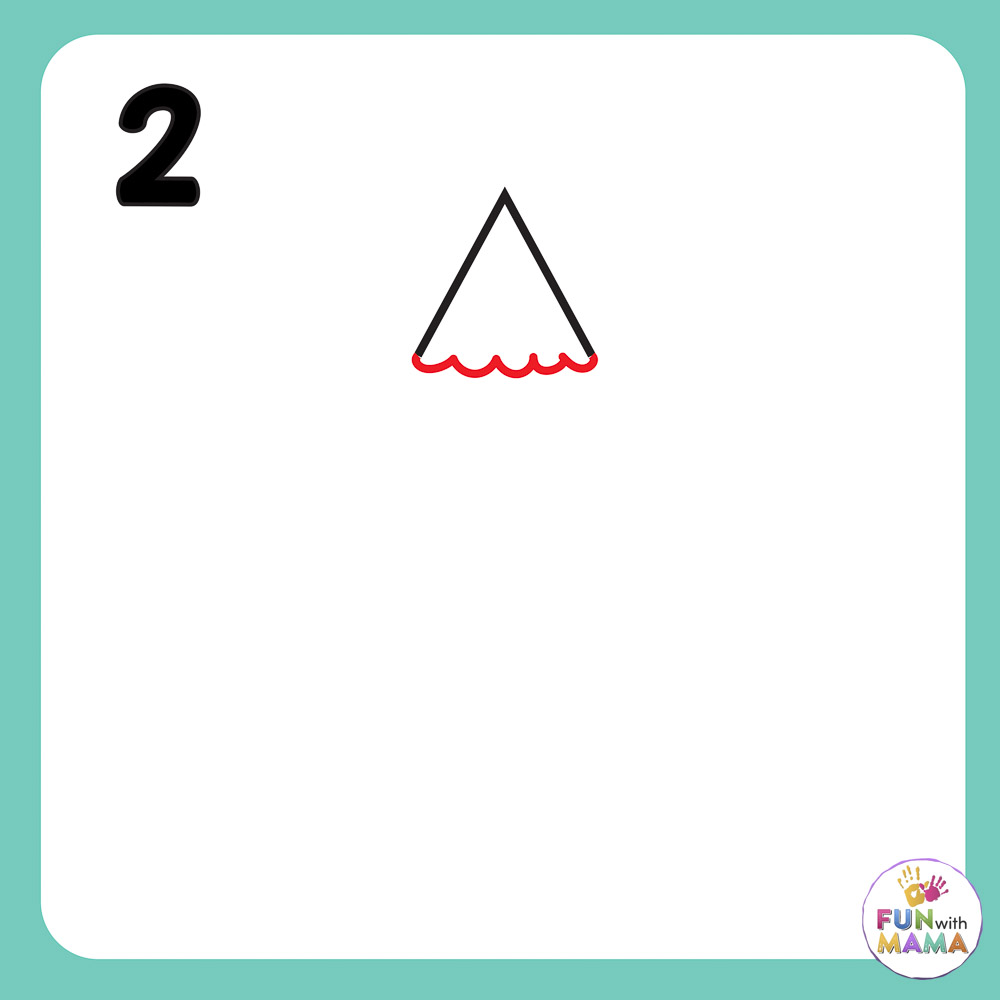
Step Two: Draw the first tree layer
Remember that bottomless triangle you drew a few minutes ago? Draw a ruffled edge at the bottom to close it off and make the first layer for the tree.
Step Three: Draw the second tree layer
Since you’re making an evergreen tree, you need to make another layer. Just draw an angled line down from the bottom of the top layer, and then make that same ruffled bottom as you did above.

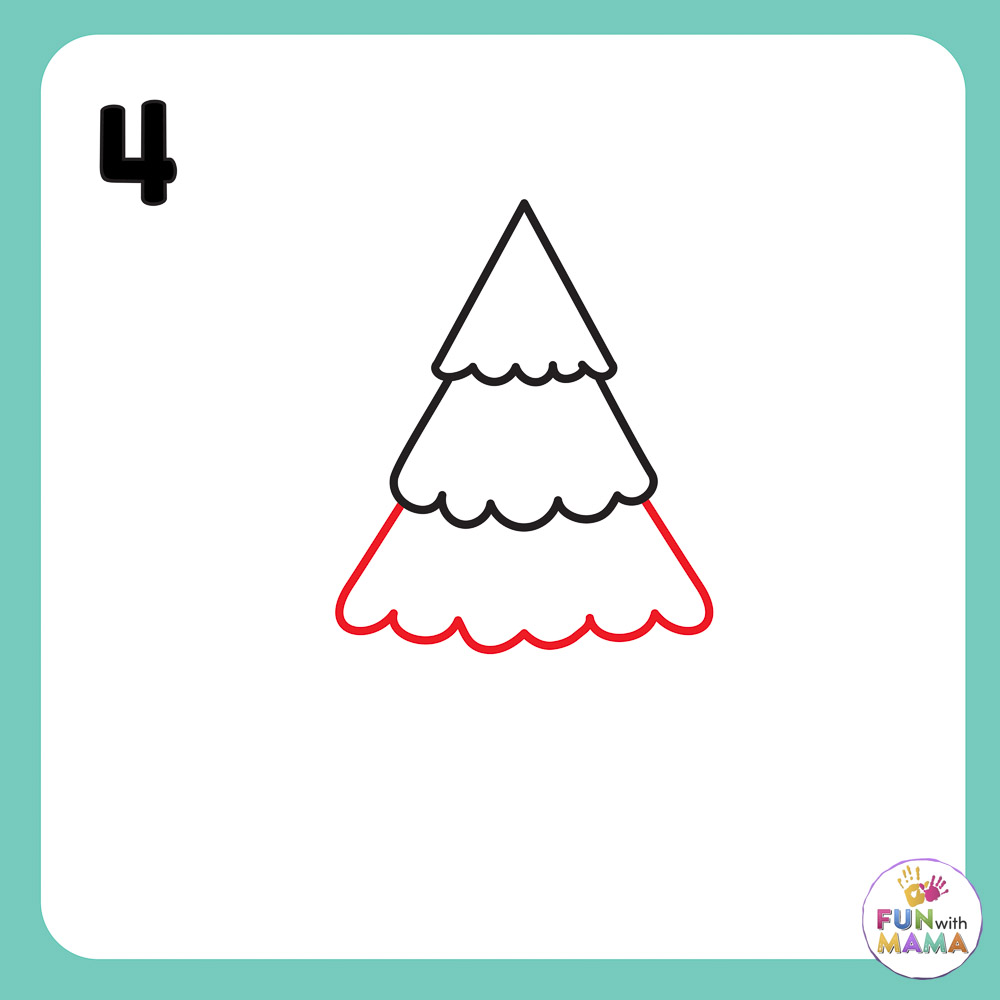
Step Four: Make another tree layer
You can’t have a holiday season with a small tree, right? Make two more angled lines for this step, and then draw a ruffled bottom.
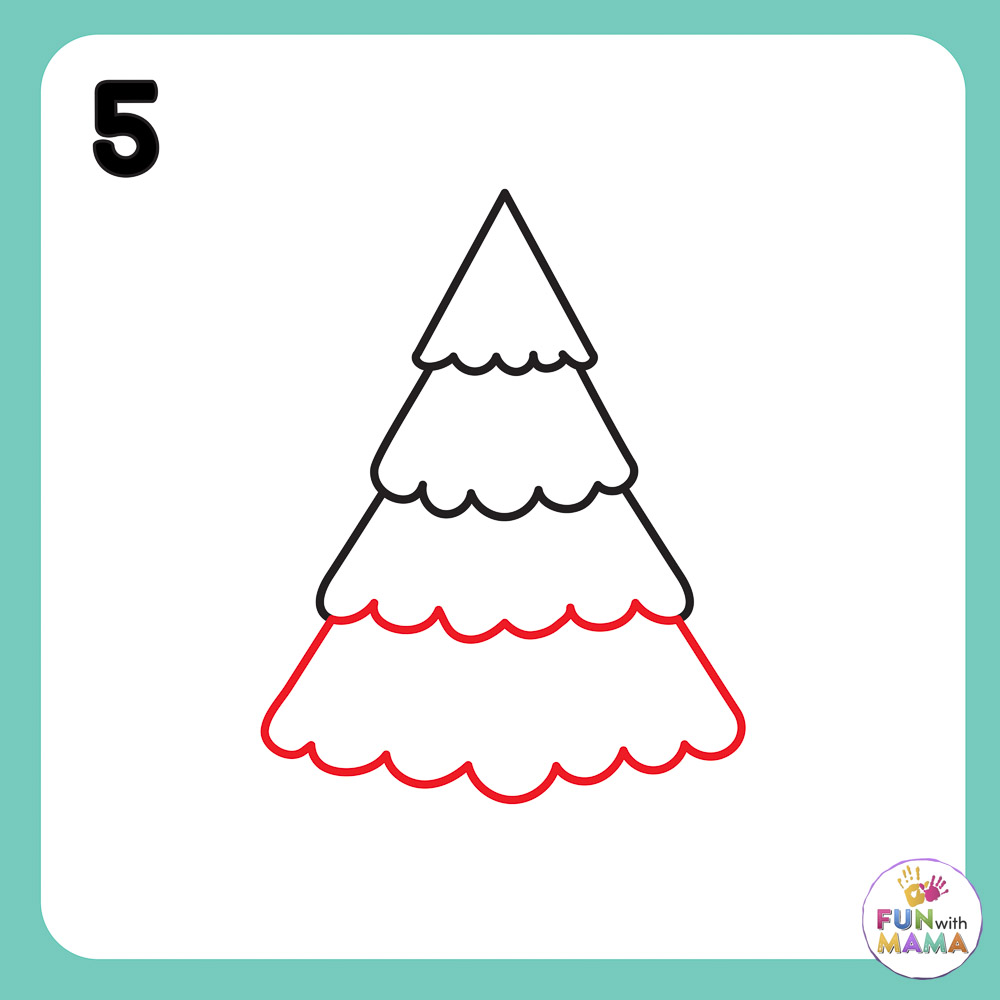
Step Five: Make the bottom portion of the tree
As you can see, there is nothing complex about this easy drawing. Make a horizontal line going down from the third layer, and then draw the ruffled bottom.
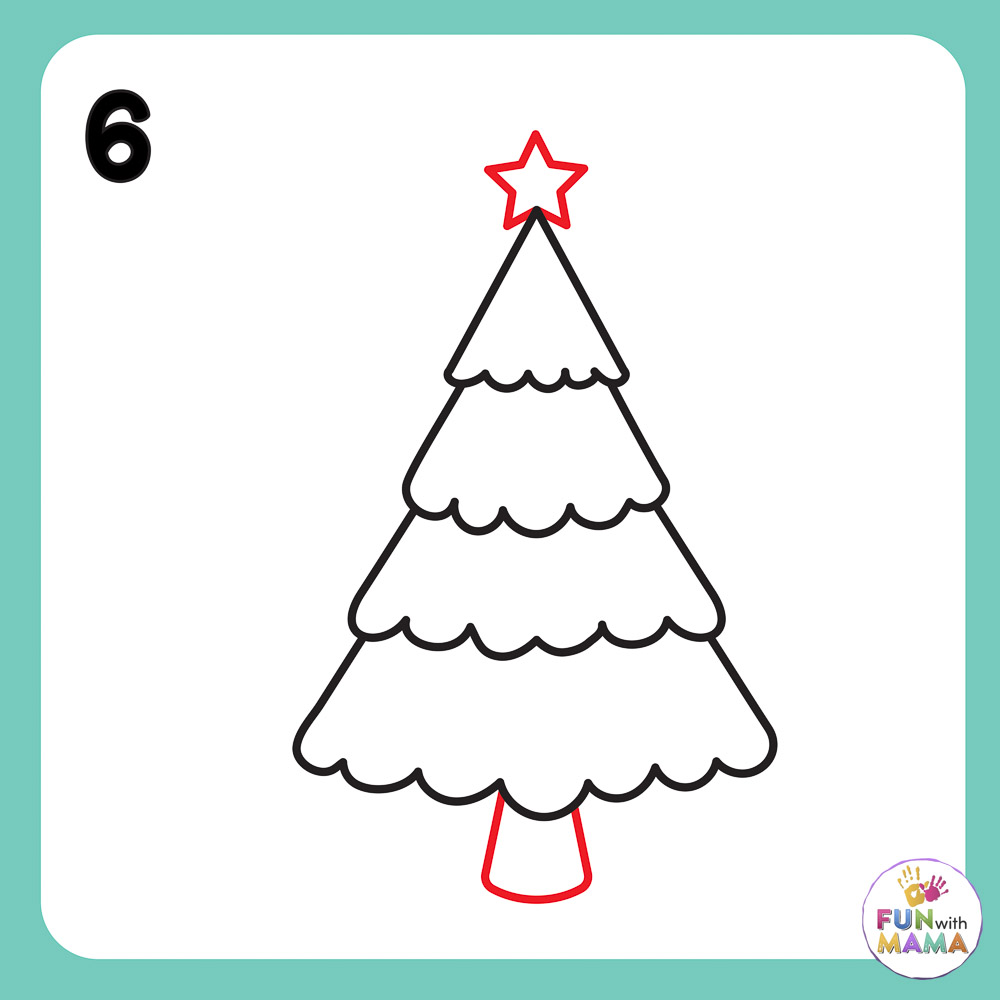
Step Six: Add the star on top
Draw a star right on top of the tree. Also, draw the bottom stump for the holiday tree, too.
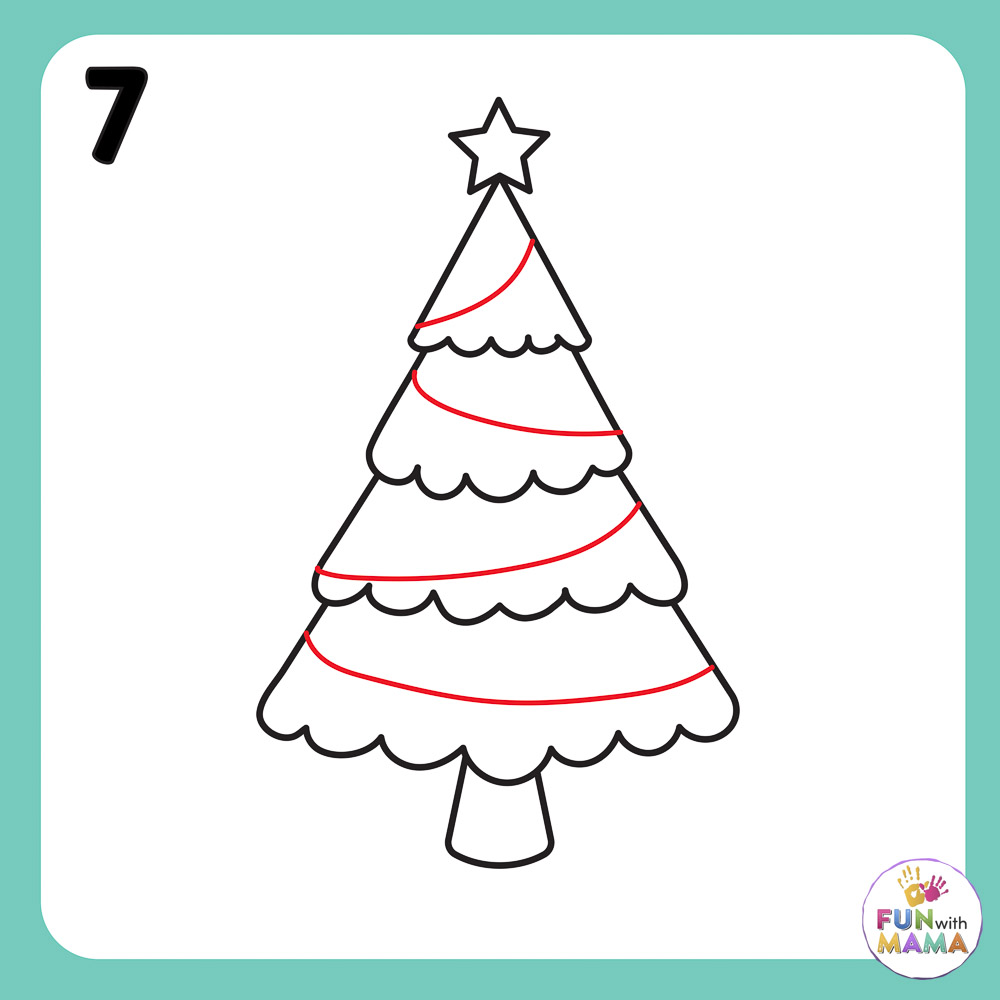
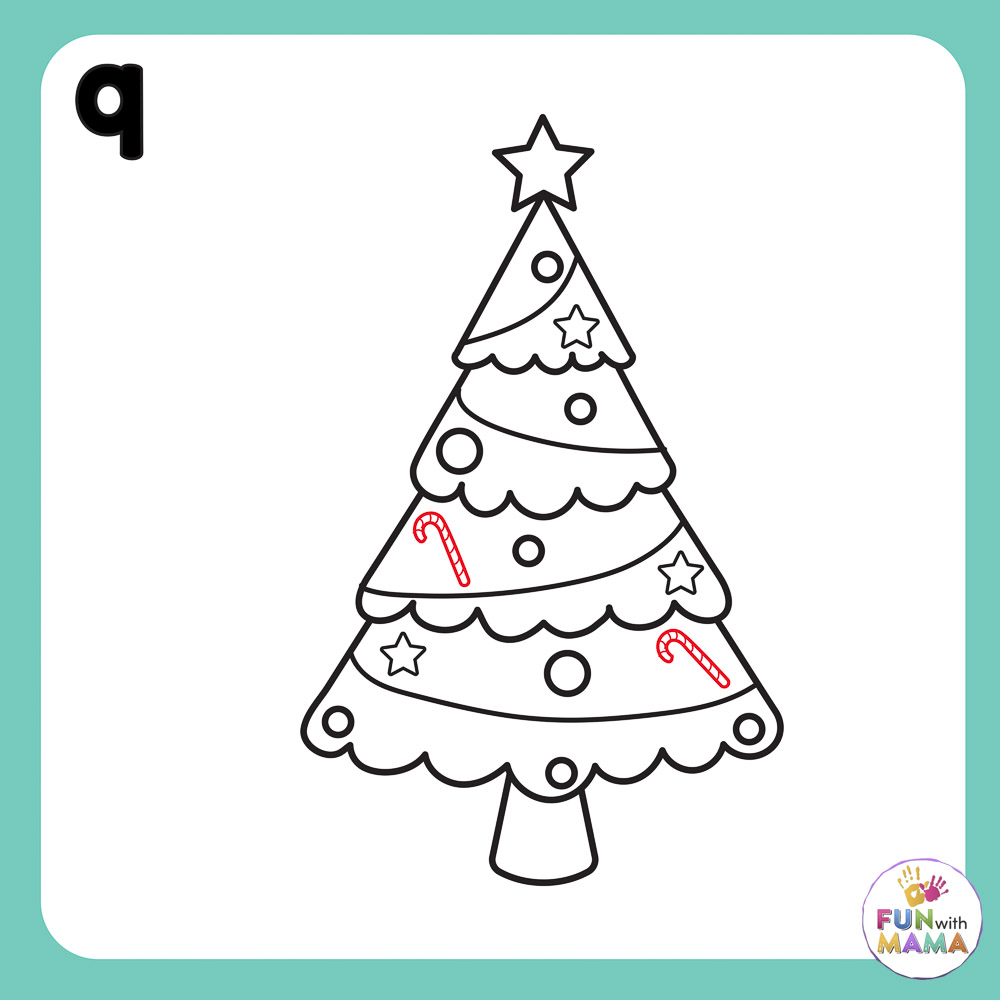
Step Seven: Add the tree decorations
Draw lines on each layer of the tree, switching directions back and forth. If you’re nervous, use a pencil and have an eraser handy to redo.
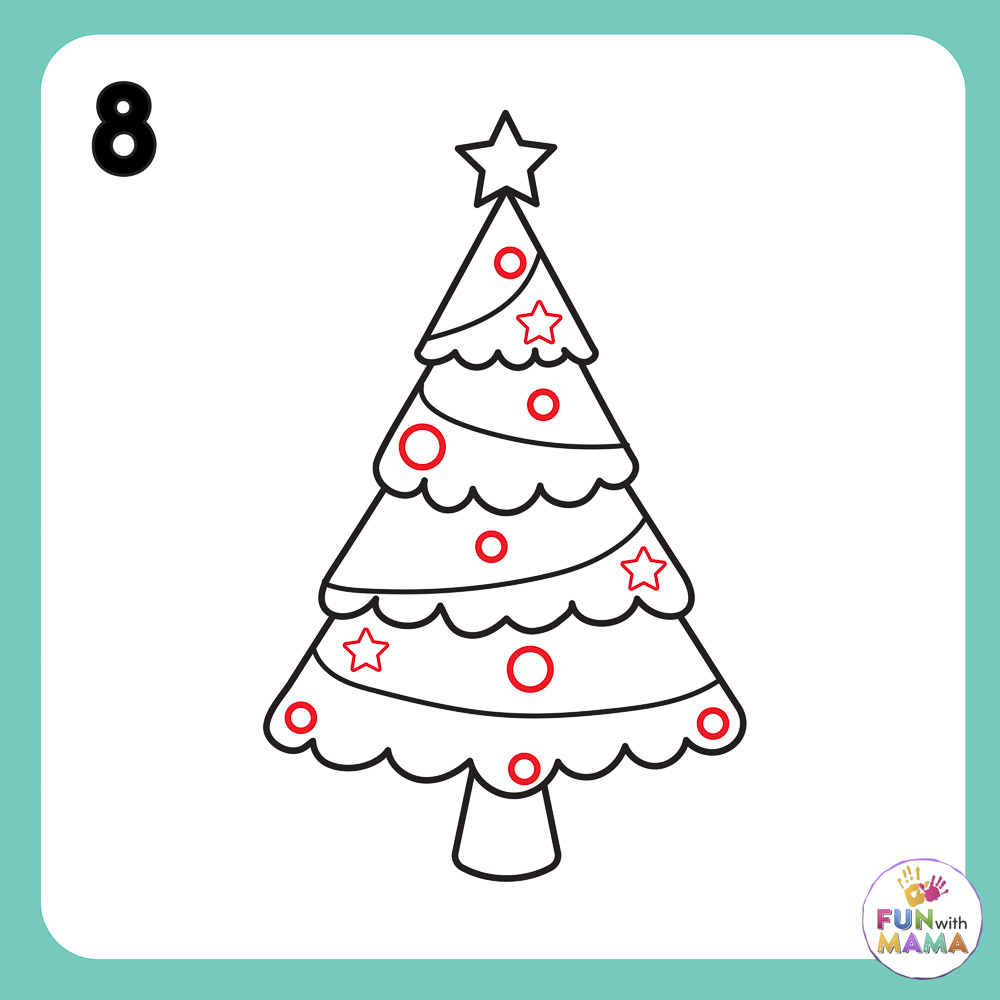
Step Eight: Draw on the Christmas ornaments.
Draw circles and stars and various shapes all over the tree. This represents the hanging Christmas ornaments.
Step Nine: Add candy canes
You can add as many candy canes as you want! Add some to each layer!
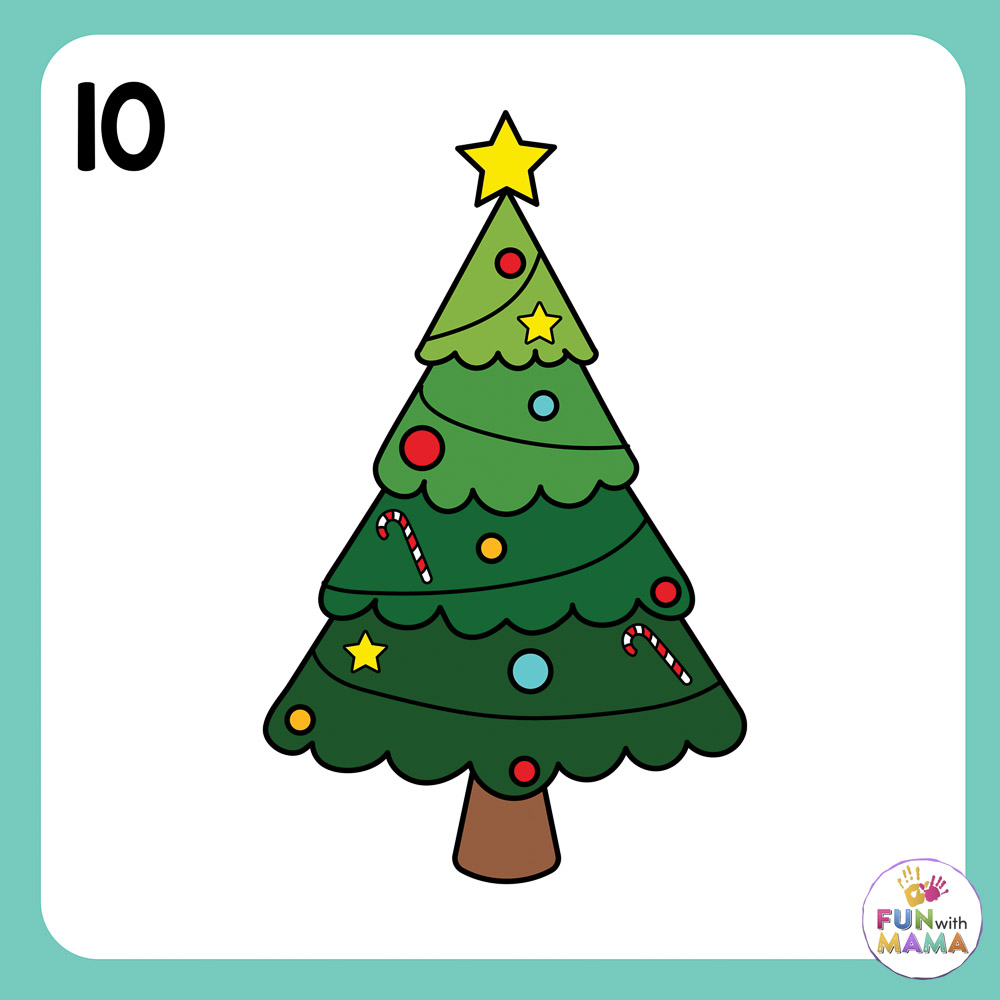
Step Ten: Color the tree
Grab the markers and the crayons and color the tree, star, and ornaments.
Get the free Christmas Tree drawing tutorial pages here
More Related Free Drawing Guides
Now that you’ve learned how to draw a Christmas Tree, learn how to draw a Santa Sleigh or draw a gingerbread man.


Some Christmas Activities For Kids that are on repeat here annually include:
Christmas Science Experiment – Fizzing Christmas Science Baking Soda Experiment
Craft – Craft Stick Reindeer Ornament
Christmas Games
- Free Christmas I Spy printable game
- Play Christmas Would You Rather Game
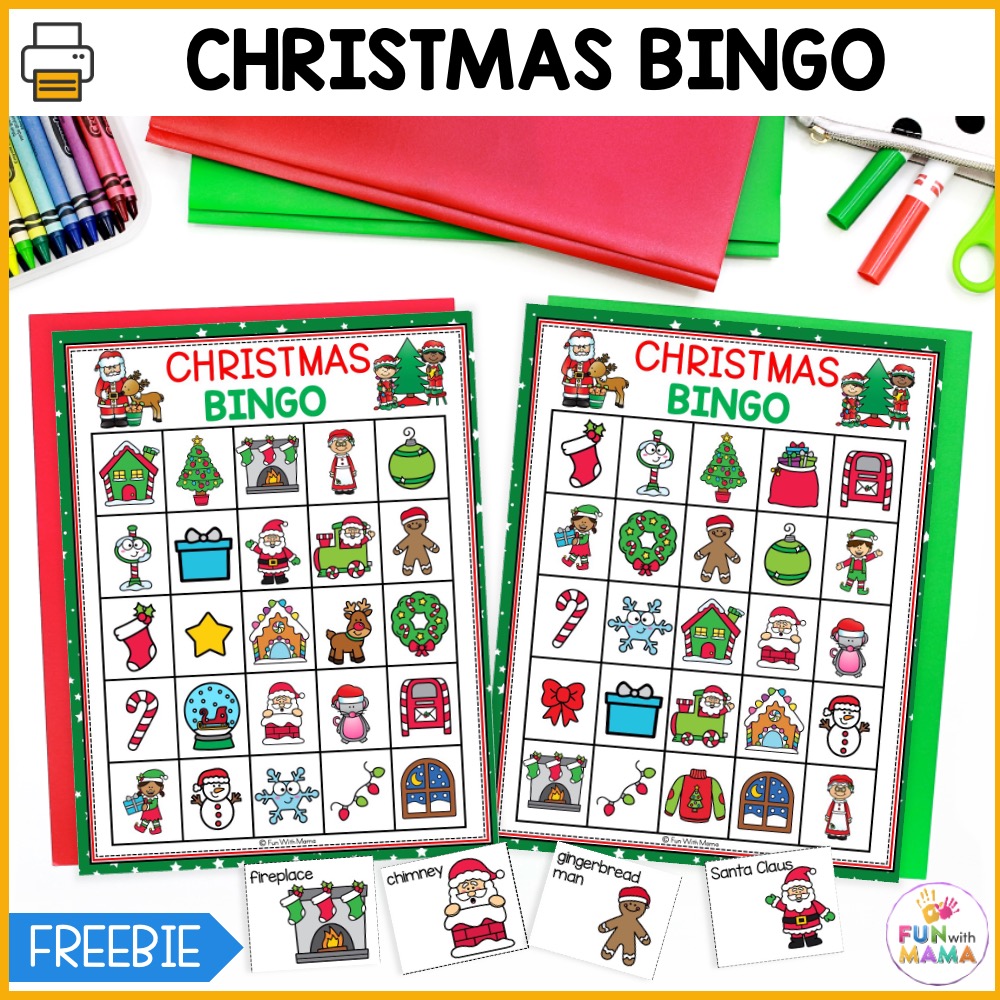
- Free Christmas Bingo game printable
GET THE CHRISTMAS ACTIVITIES PACK

More Christmas Activities
Check out these awesome festive activities to extend the learning fun:
- 16+ Gingerbread Activities
- How to draw a gingerbread man – free directed drawing guide
- Free Christmas Coloring Pages
- Santa Craft Activity including free printable template
- Santas Beard – Christmas Cutting Activity for Preschoolers

Get easy and instant access to ALL our 1000+ printable activities and resources by joining the Fun with Mama Printables Club.
Get the printable directed drawing activity pack here
See how much fun it was to learn how to draw a Christmas tree? It is a great way to show them that creativity can also be so much fun!
You can easily have them make their own Christmas cards, holiday drawings, and more!
More Learn to Draw Activities
Find more step-by-step drawing tutorials below:


Leave a Comment