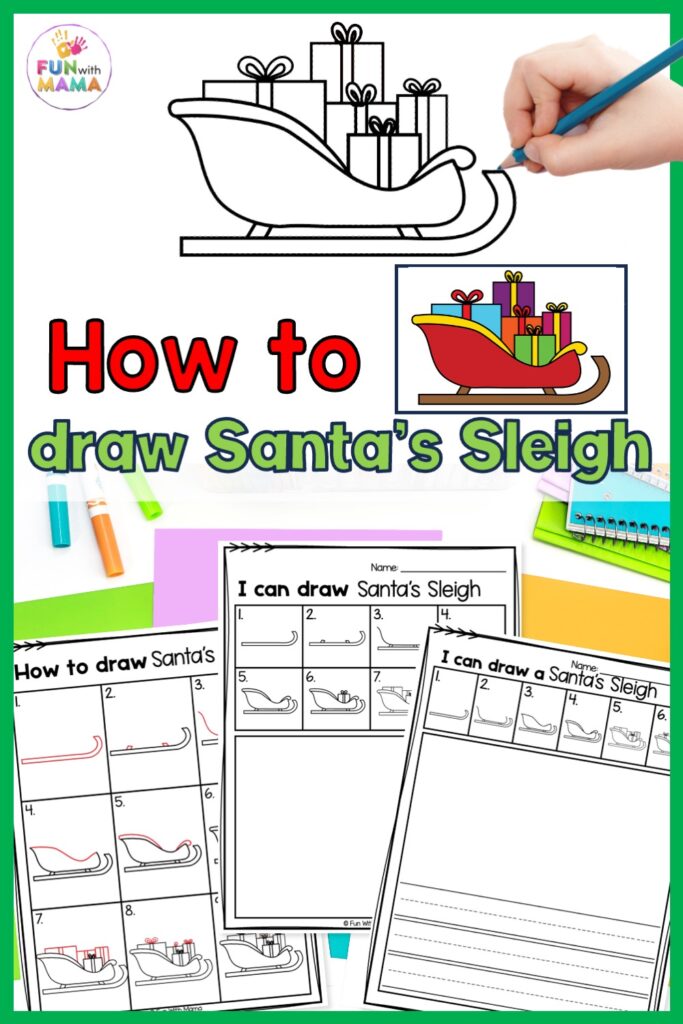
Gifts from Santa are always a favorite, now you can teach the kids how to draw Santa’s sleigh filled to the brim with gifts for all the children! This is a great art activity that is a perfect indoor winter activity for the kids to get them excited for the holiday season and makes waiting on those gifts a little easier.
In this step-by-step Santa sleigh drawing tutorial, we will draw Santa’s sleigh in a few minutes. Simple instructions make for easy drawings – and that is always a win! This is the perfect Christmas activity!
Check out more drawing tutorials in our learn to draw series.
How to draw Santa’s Sleigh
In the latest edition of our learn to draw series, we are going to teach you how to draw a sleigh.
Don’t forget to check out more of our Christmas drawing guides:
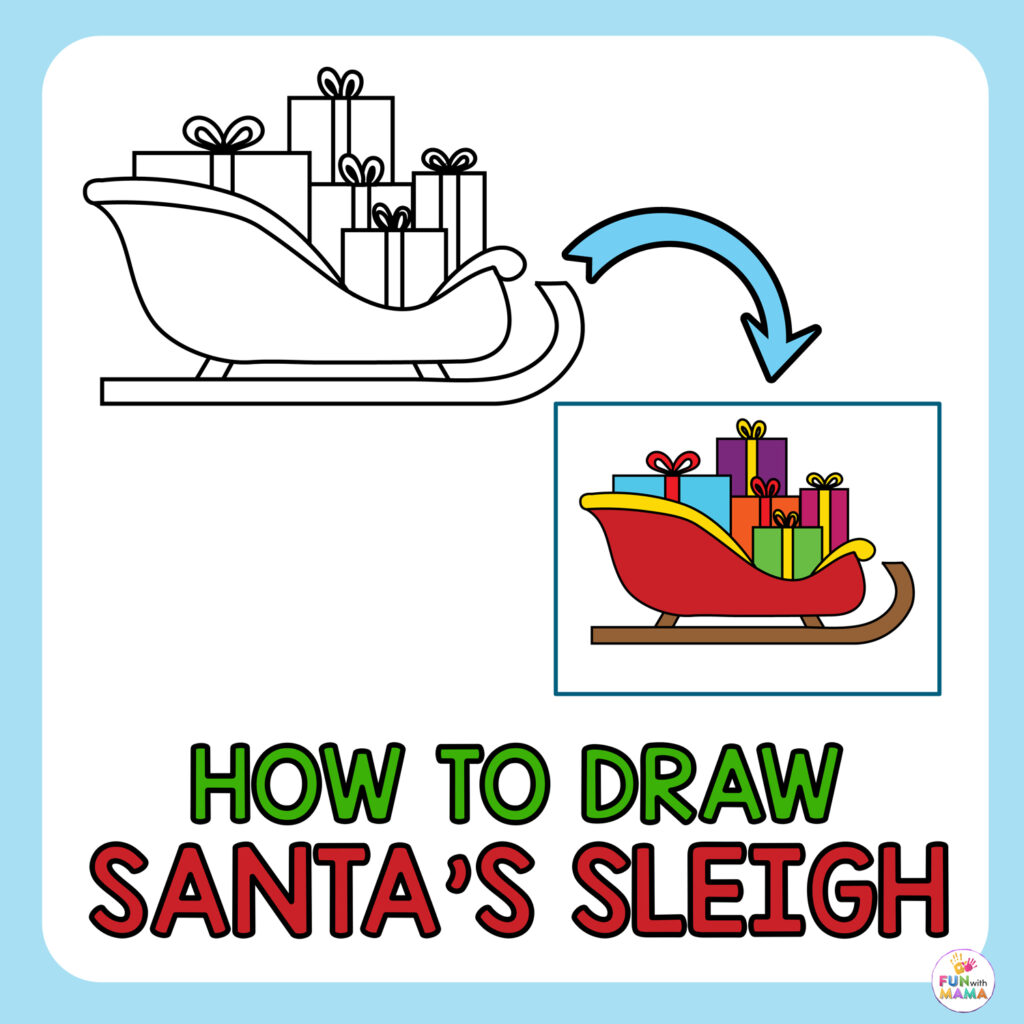
Drawing the sleigh of Santa Claus isn’t hard, and it’s a great way to work on directions of drawing steps and paying attention to details.
You can find links to our favorite drawing supplies here.
Here’s a fun idea! Pair this activity with some elf activities. Print out the directions and have your elf on the shelf sit on top of the paper with a blank paper and pen.
This Christmas sleigh drawing would be great for a Christmas card! The simple steps make it perfect for sending wishes for a Merry Christmas.
This is also a perfect concept to talk to the kids about what they picture being in the magic sled. Do they think about a sack of presents? Do they think that there are Christmas elves on the sleigh as well? Is there enough room for all the toys on Santa’s sled?
These are all great questions and conversations about this fun Christmas theme drawing idea! Combining creativity with conversations is a great way to connect over art during this time of year!
Make drawing Santa Claus’ sleigh fun by talking more about Santa and his sleigh.
Video tutorial
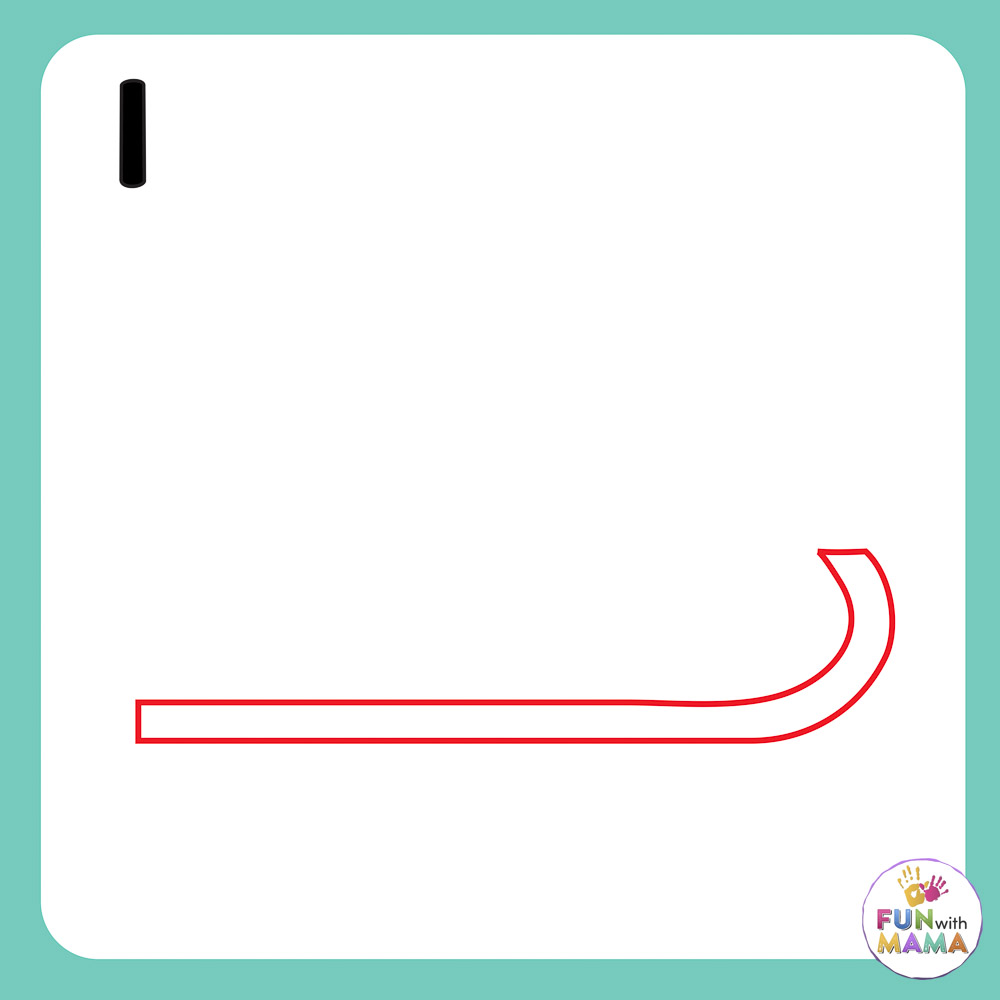
Step One: Draw the bottom of the sleigh
Make a line with a hook on the end, and then close it all the way around. It will look like a skinny candy cane laying on its side.
Step Two: Add the rails
On the bottom of the sled, draw two rails. These will be the connectors to Santa’s sleigh.
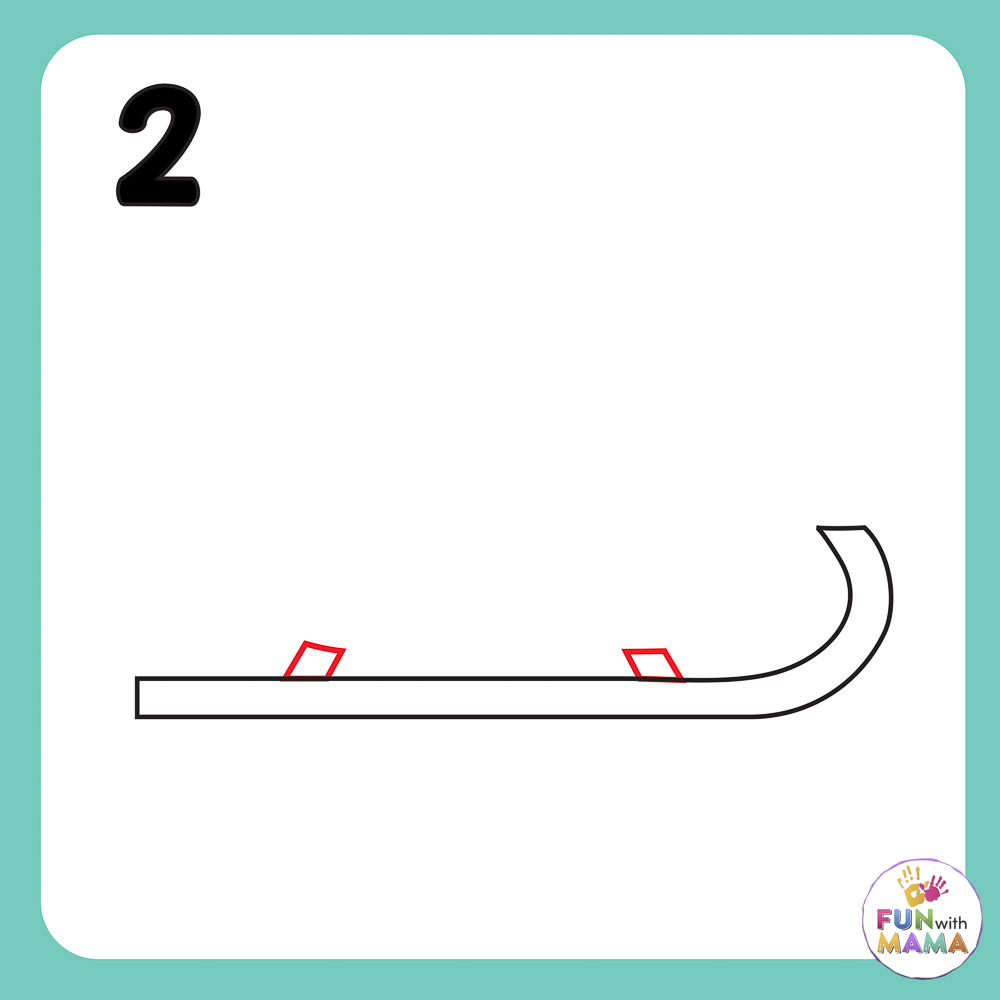
Step Three: Draw the back of the sleigh and the bottom of the sleigh
Make a line going down on the backside of the sleigh to connect the bottom with the rails, and then have it curling slightly upwards.
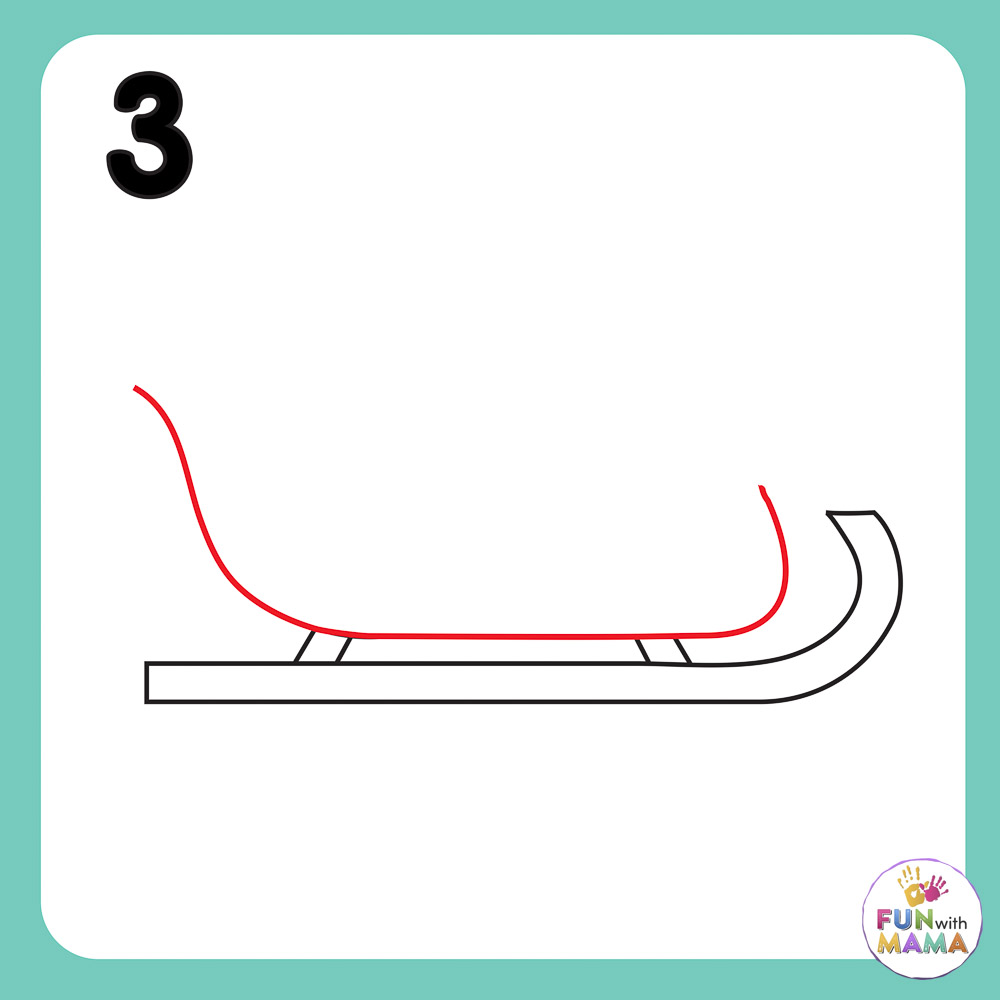
Step Four: Draw the top of the sleigh
Close the sleigh in and draw the top of the sleigh connecting the back to the front.
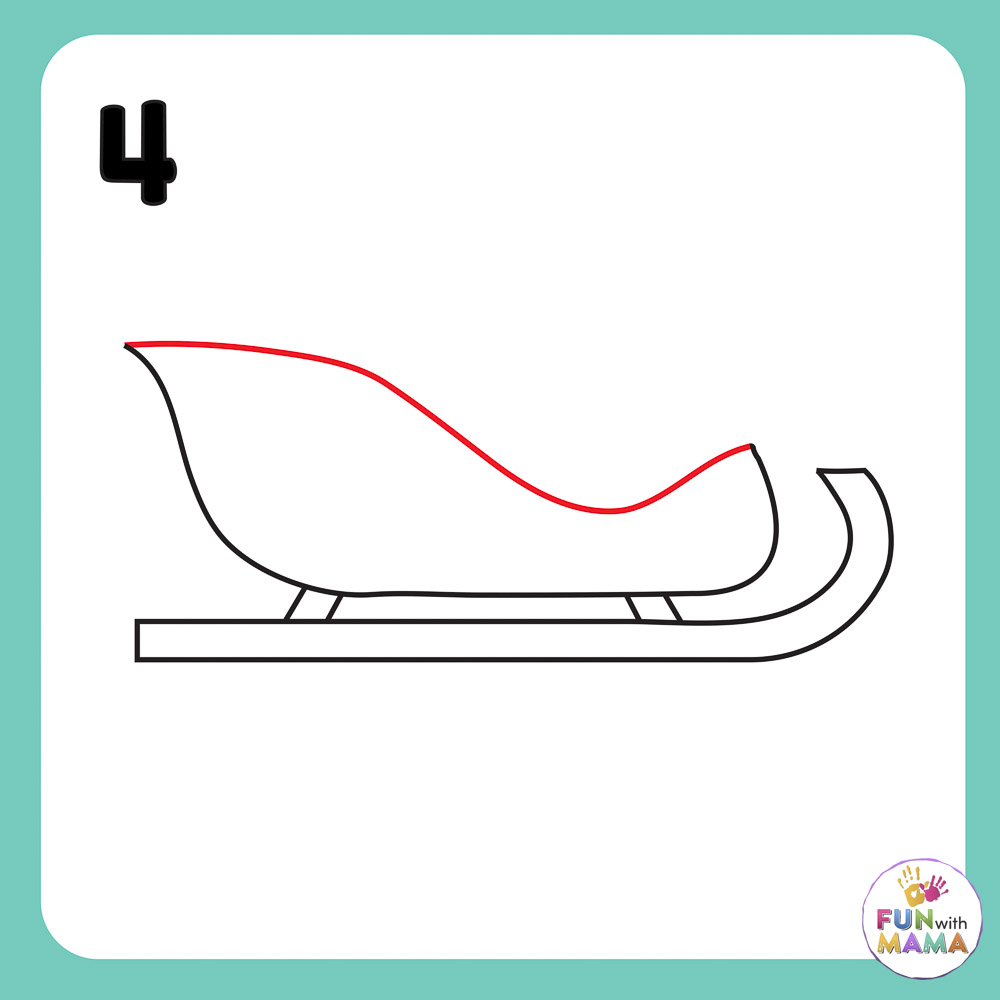
Step Five: Add the edges
Draw an edge on the back and the front of the sleigh.
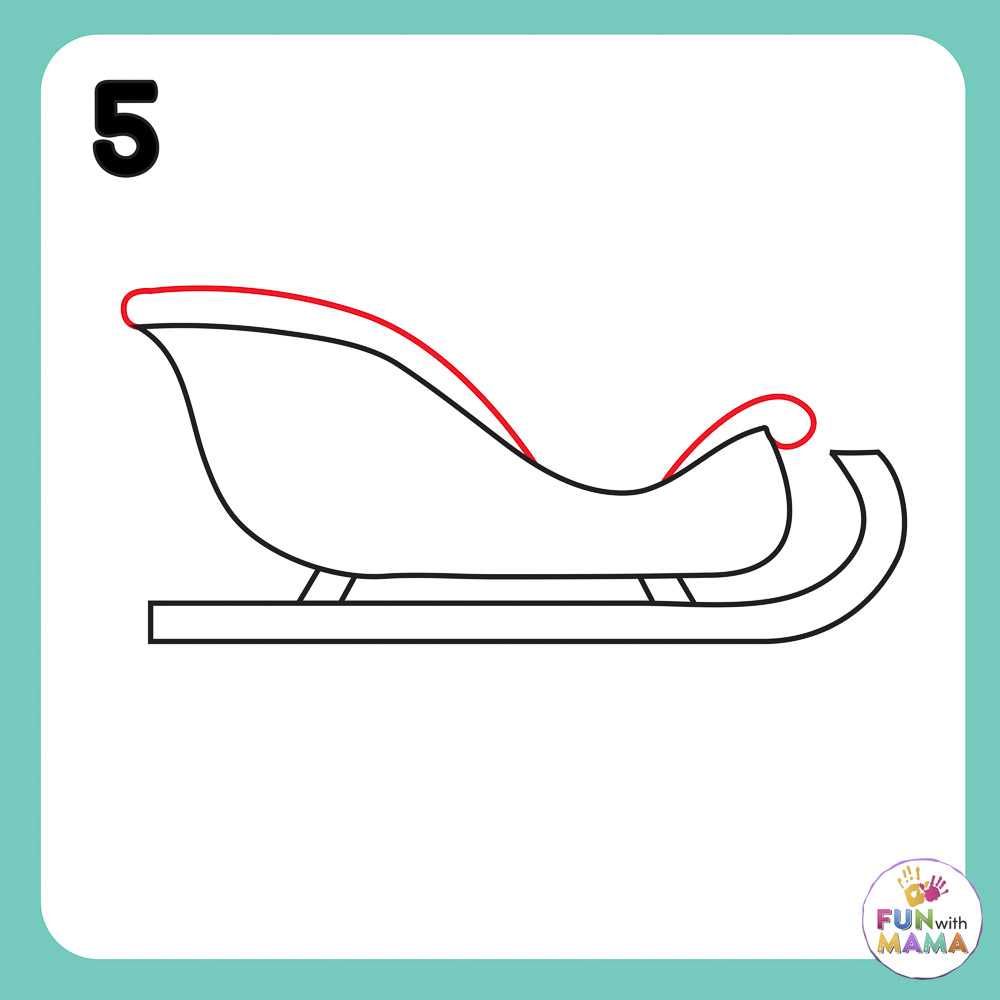
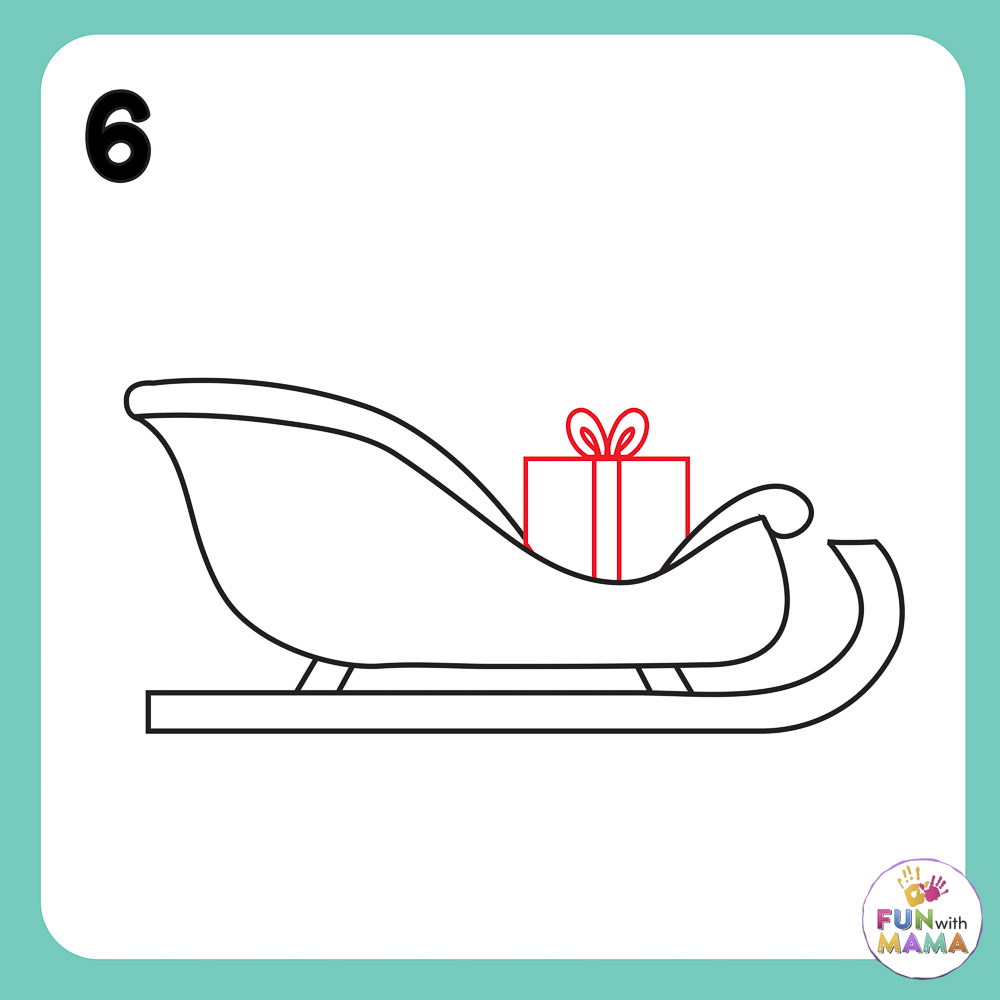
Step Six: Add a present
Draw vertical lines and make a present. Draw a bow right on top of the present.
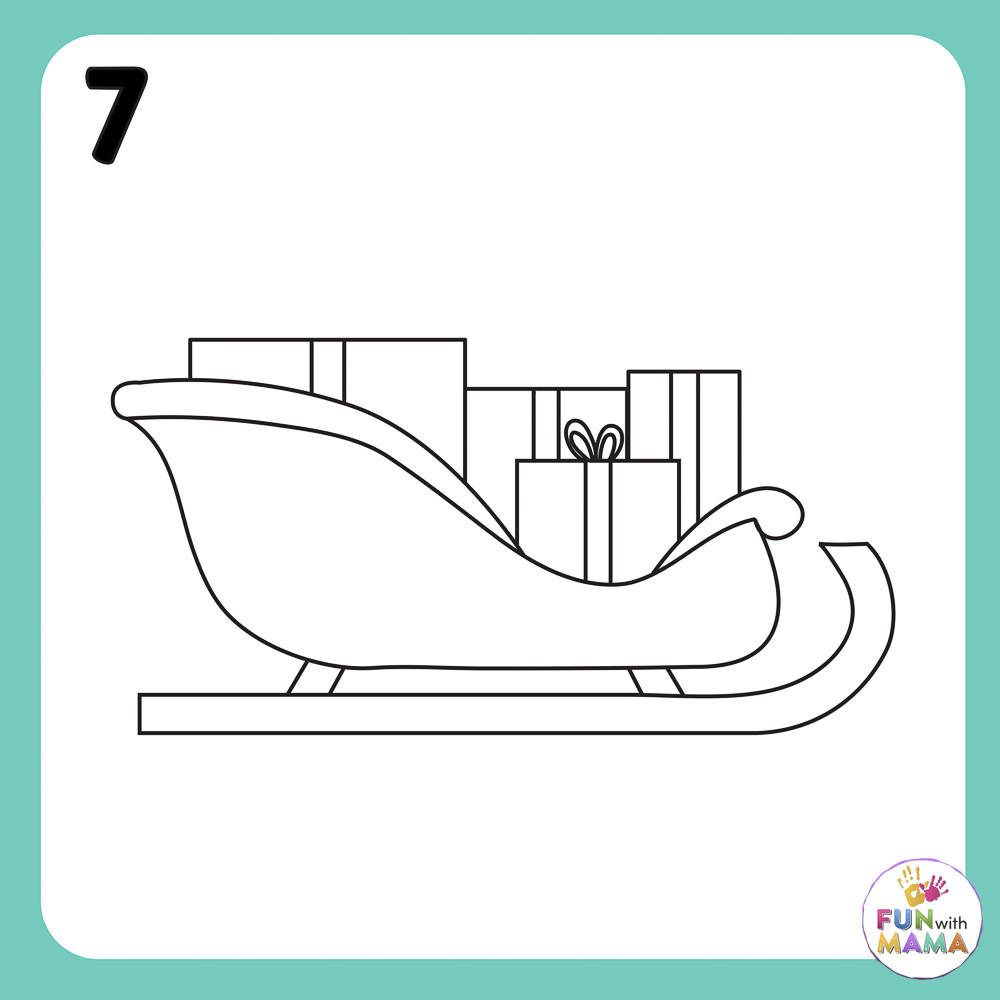
Step Seven: Add more presents
Draw varying sized presents on the sleigh.
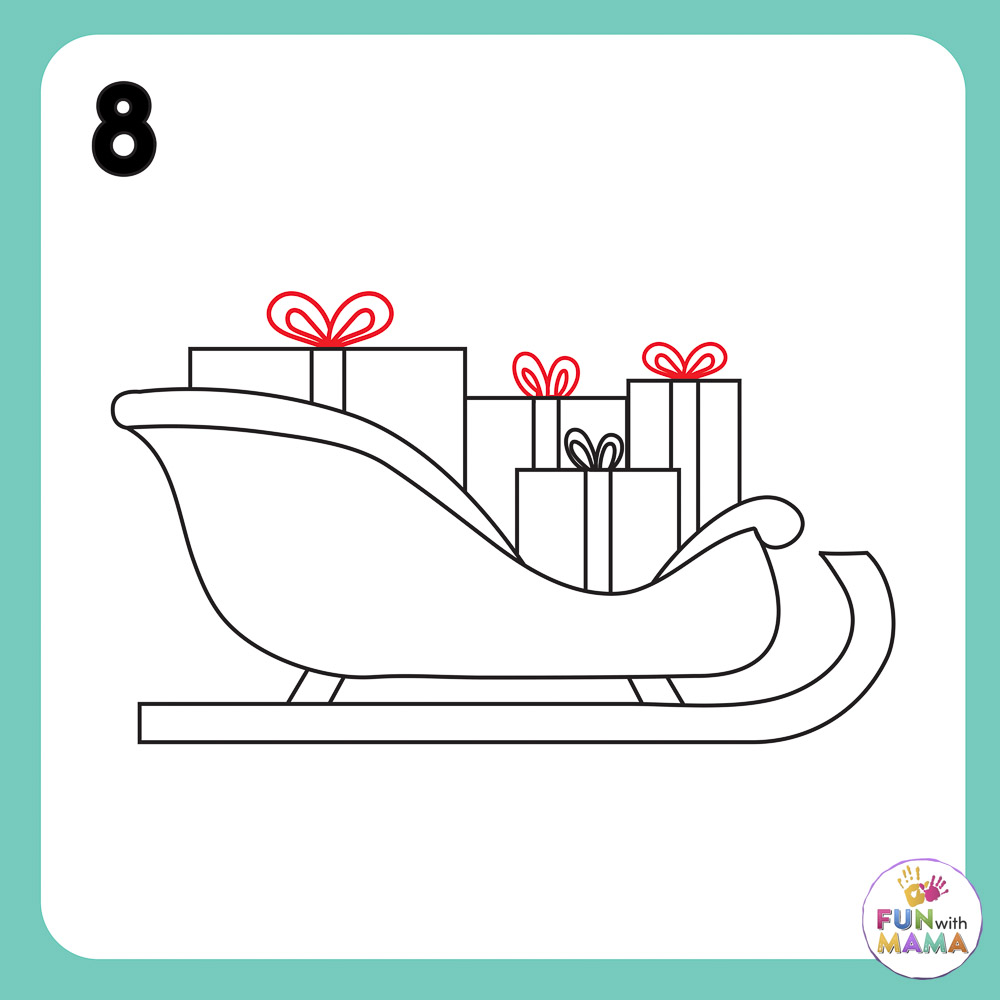
Step Eight: Add bows
Put bows on top of all four of the presents.
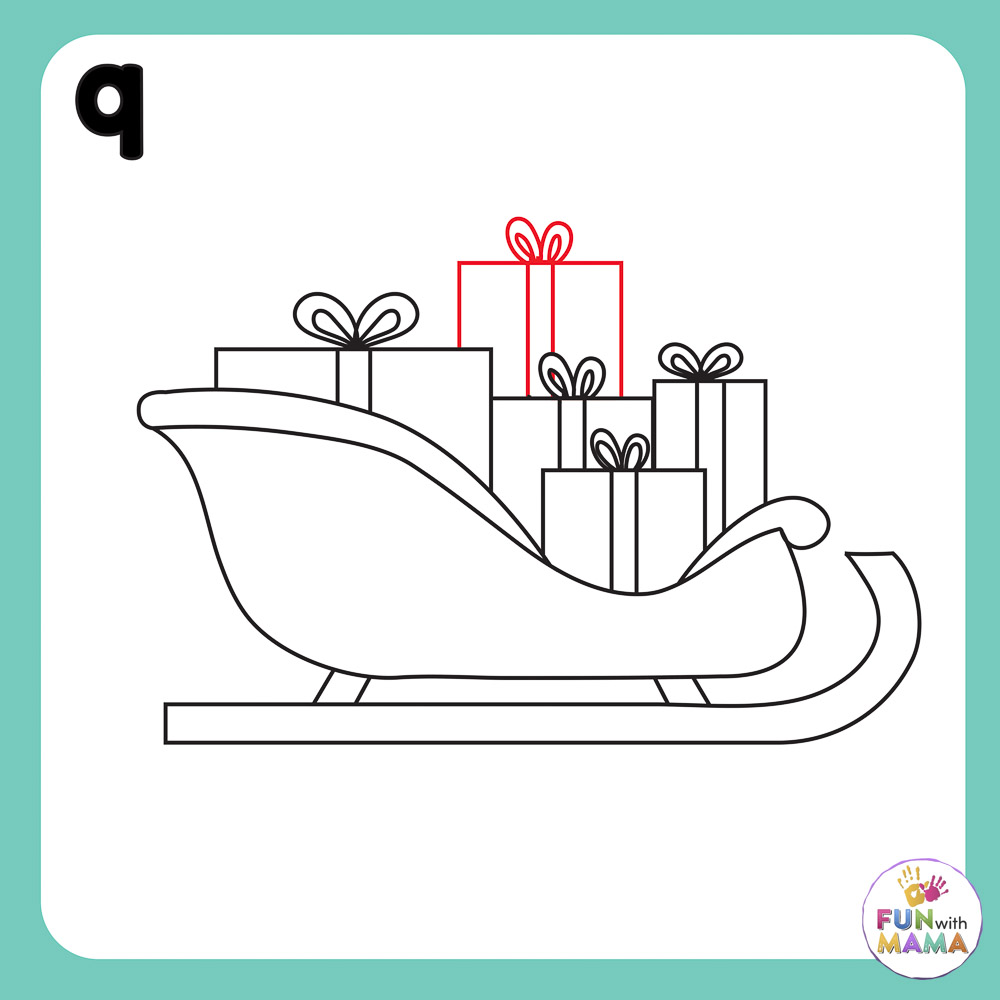
Step Nine: Add one more present
Add the final present on top of the other four. Add a bow.
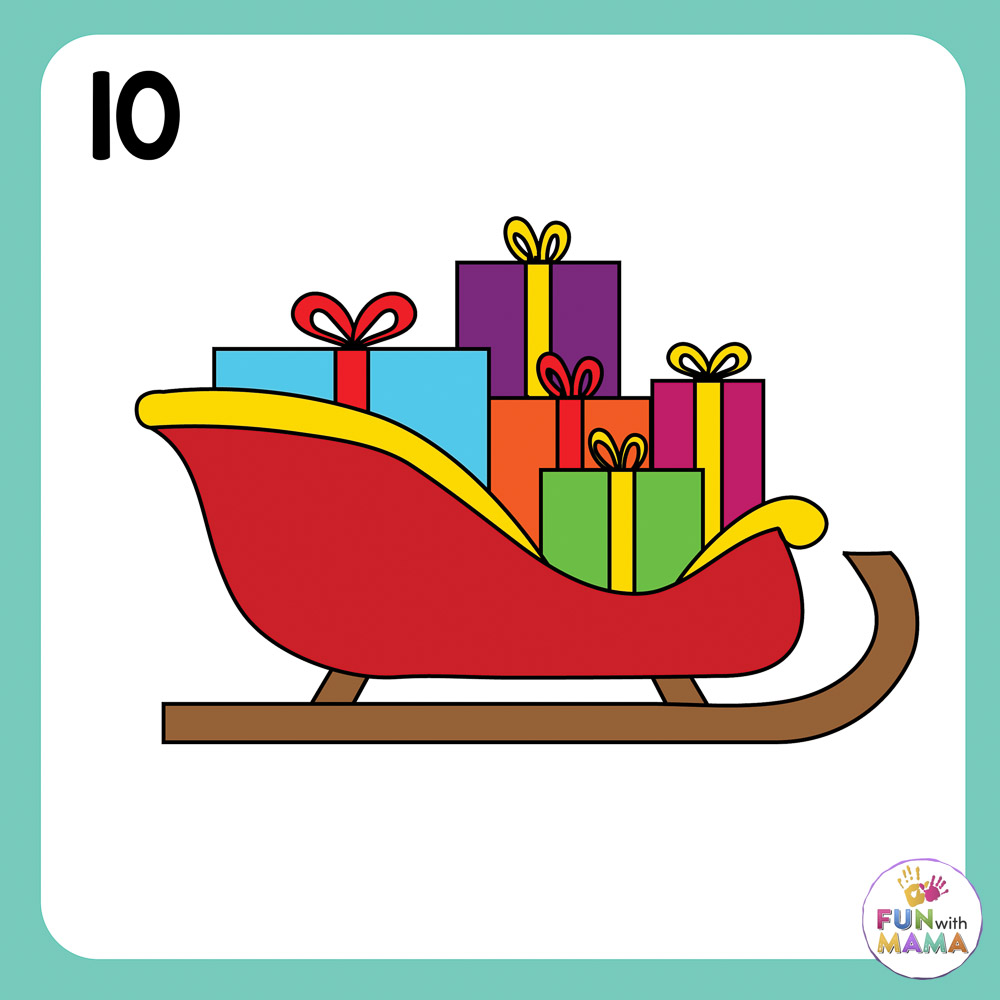
Step Ten: Color the Santa sleigh drawing
The last instruction in this step-by-step drawing guide is to color in all the images. Make the Christmas gifts different colors.
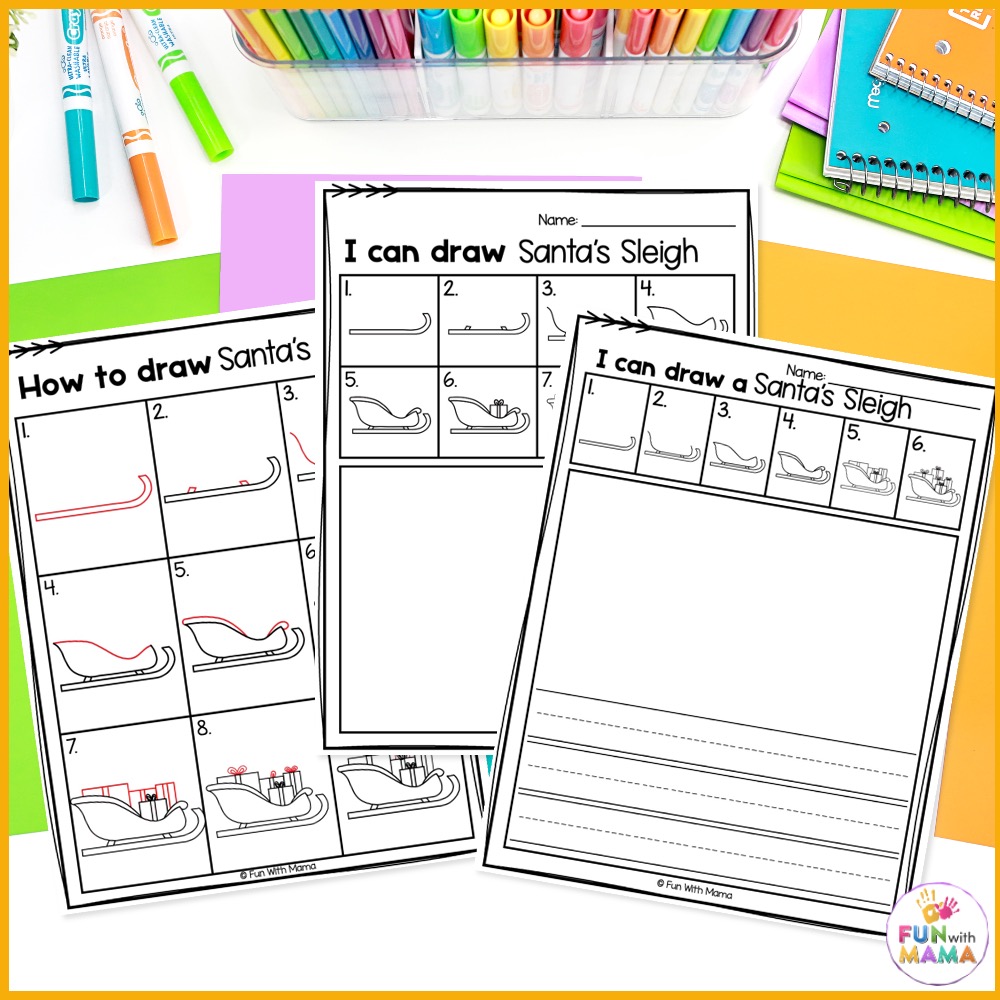
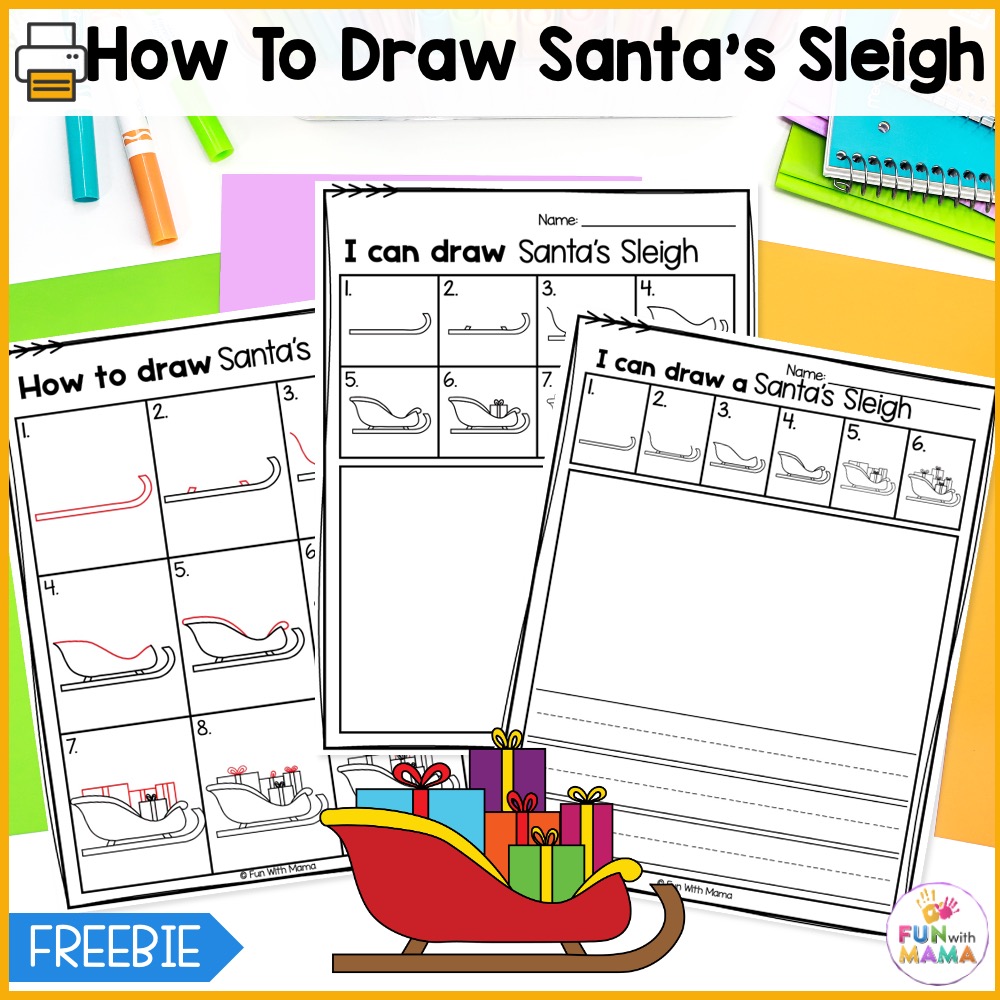
Get the Santa Sleigh Drawing Worksheets here
Get our printable directed drawing activity pack here
Be sure to have a pencil and eraser and any other drawing supplies on hand to get started. I love having the kids start on a sheet of paper and then having extras on hand as needed.
They can also branch out and add elves, a reindeer drawing, a toy sack, and anything else that they think needs to be in Santa’s sleigh!
I can’t wait to hear what everyone thinks about this easy step-by-step tutorial! It’s fun to do on Christmas eve to get excited about Santa coming that night.
More Learn to Draw Activities
Find more step-by-step drawing tutorials below:


Leave a Comment