Pebble painting is a popular activity for kids. In this pebble painting for kids tutorial, you’ll learn how to make poured paint pebbles and rocks that kids can use to give as gifts to teachers, family members, and friends.
These pebble painting rocks are the ultimate kid-made Christmas gifts!
We like this craft because it inspires creativity and the designs come out differently every time!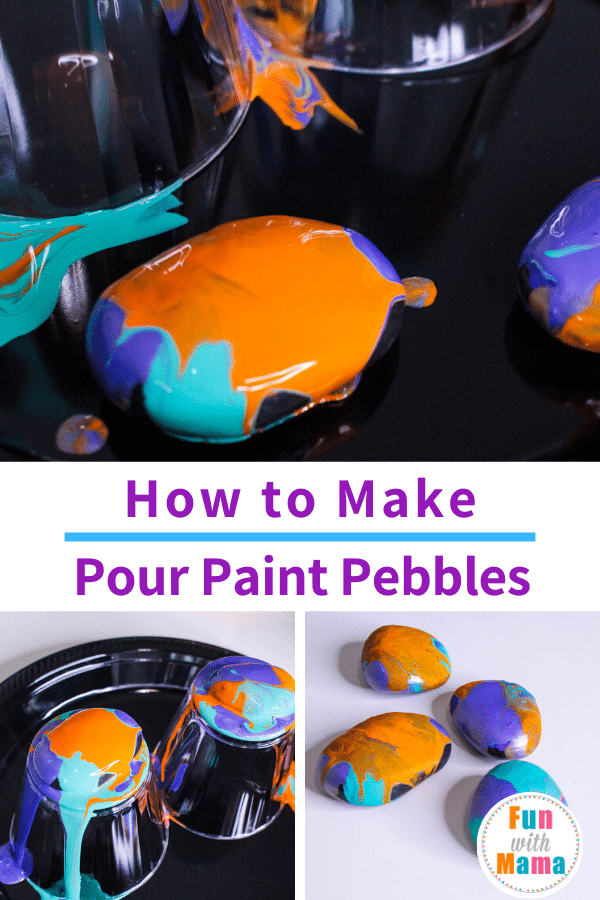
PEBBLE PAINTING
This rock painting activity is great because it allows the children to really get to use their imagination. Plus, who doesn’t love to paint pebbles? You can think of this as a simple preschool activity that everyone in the family will love. It’s a great way to combine messy play with fine motor skills as well.
Let them pick out their favorite colors of paint and combinations to see what they can really come up with. There’s really no wrong way to make a painted pebble.
One word of warning: This painting activity and craft is messy. Make sure your kids are wearing clothes that can get messy and working on a surface covered in newspaper or some other protective material. Pouring the paint over the pebbles is very messy.
WHAT YOU WILL NEED TO MAKE PAINTED PEBBLES:
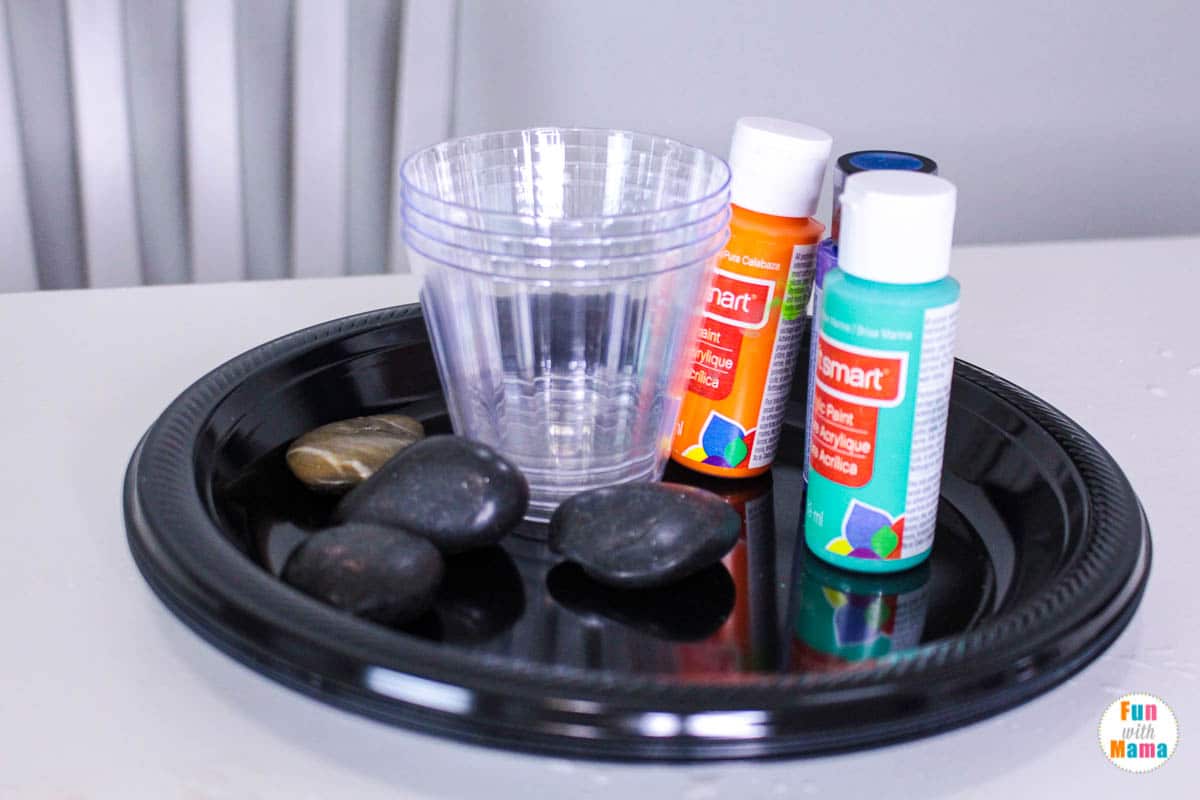
- Rough pebbles (smooth pebbles work well with nail polish, but if you’re using acrylic paint, you’ll want a rougher surface)
- Acrylic paint, enamel paint, or nail polish
- Acrylic outdoor sealer (if you’ll be using the rocks outdoors)
- Plastic cups
- Plastic plates
CHOOSING YOUR MATERIALS FOR THIS PEBBLE PAINTING TUTORIAL
There are several types of paint that you can use for pouring pebble painting.
Enamel paint: If you want the rocks to live outside, then you will need real enamel paint from a hardware store or paint store. This paint is sticky, takes a while to dry, and stains clothing, so it is important to have a controlled environment if you use this kind of paint. This paint style will create the most long-lasting paint, but it is also the hardest to use.
Nail polish: If you have extra nail polish lying around, nail polish is a fun, fast-drying paint that can be used for this task. However, nail polish chips easily and you’ll want to make sure to seal the paint.
Acrylic paint: Acrylic paint is the least durable paint. Only use acrylic paint if you have natural texture rocks. Acrylic paint does not work well with river stones that have a smooth texture. Acrylic paint will stick better if you use an acrylic sealer once the rocks are completed. This will make it durable enough for indoor play, but not outdoor environments.
MAKING THE PAINTED PEBBLES
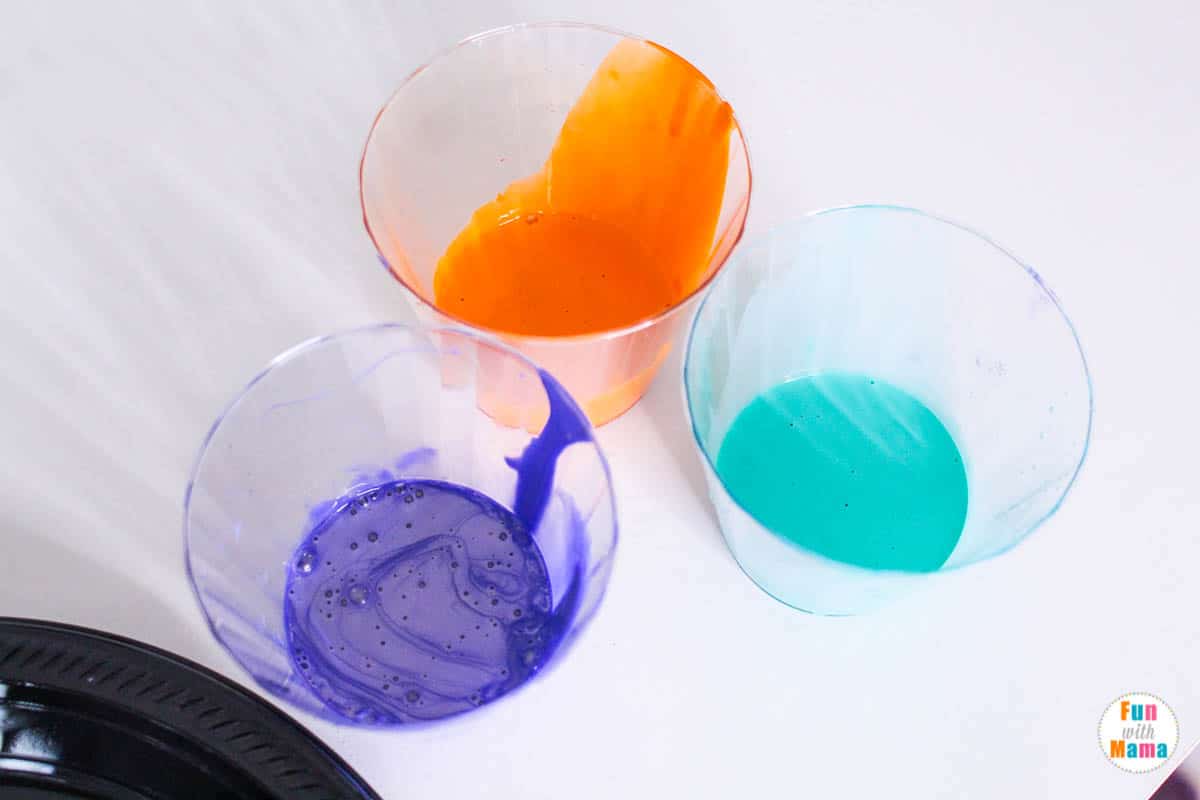
If you’re using acrylic paint, pour each paint color into a plastic cup. Add a little bit of water to each color to thin the paint just a bit to make pouring easier. You won’t need to do this step for the other paint colors.
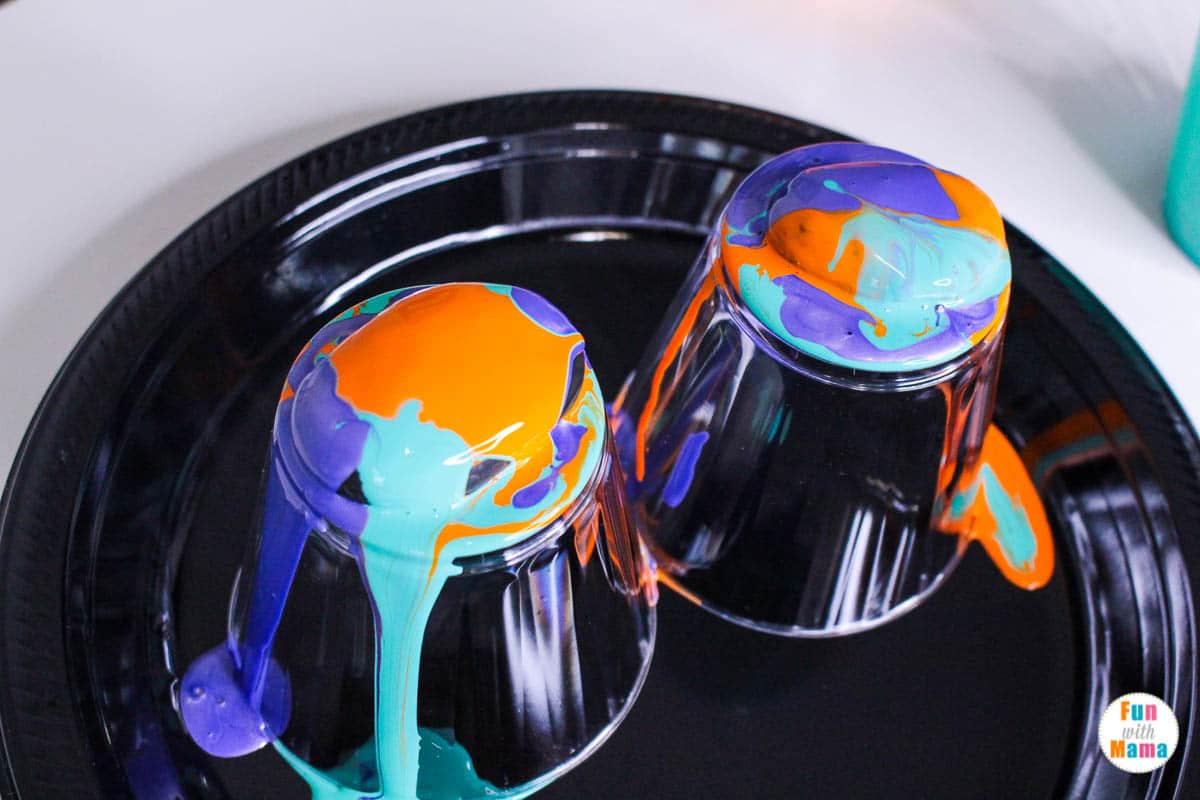
Place your pebbles onto plastic cups turned upside down placed on plastic plates (we use plastic plates because the paint didn’t soak into the plate and they kept the rocks from sticking to the plate as they dried).
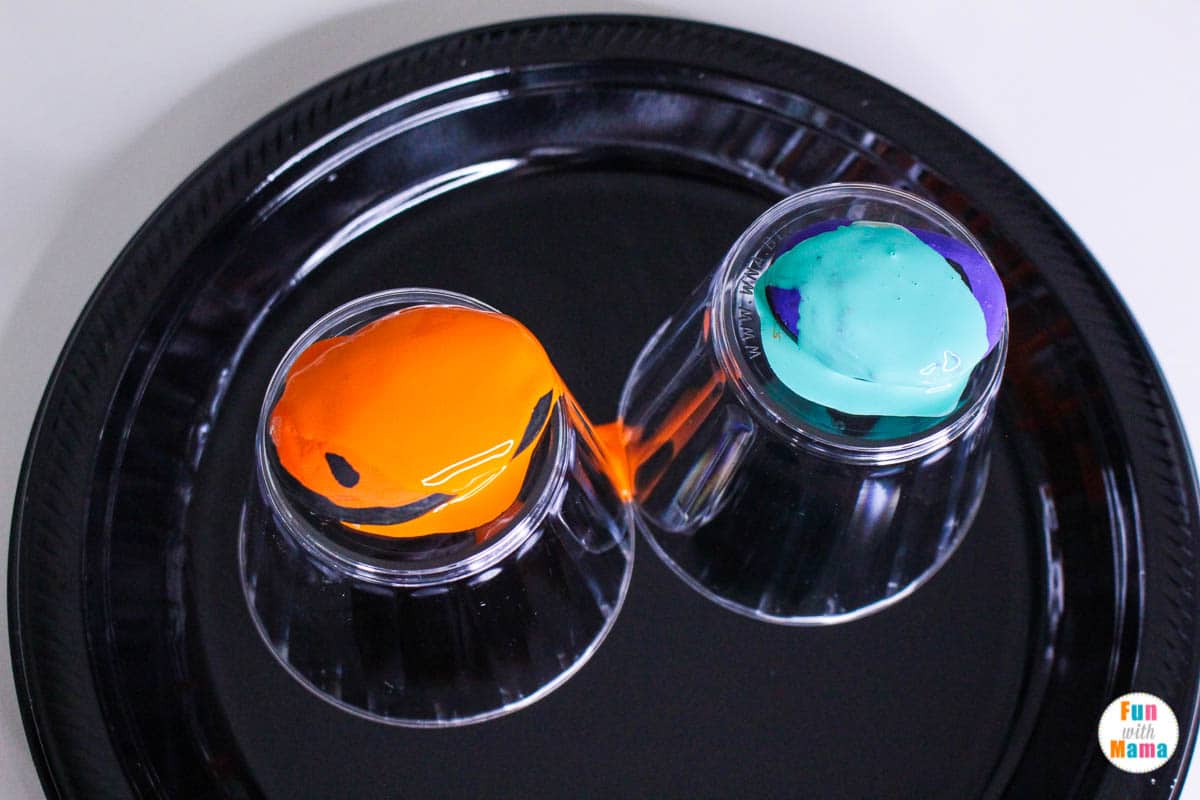
Pour a little bit of each color over the pebbles one at a time.
Keep adding additional paint until the desired pattern occurs. The more paint you add, however, the muddier the design can get, so be careful.
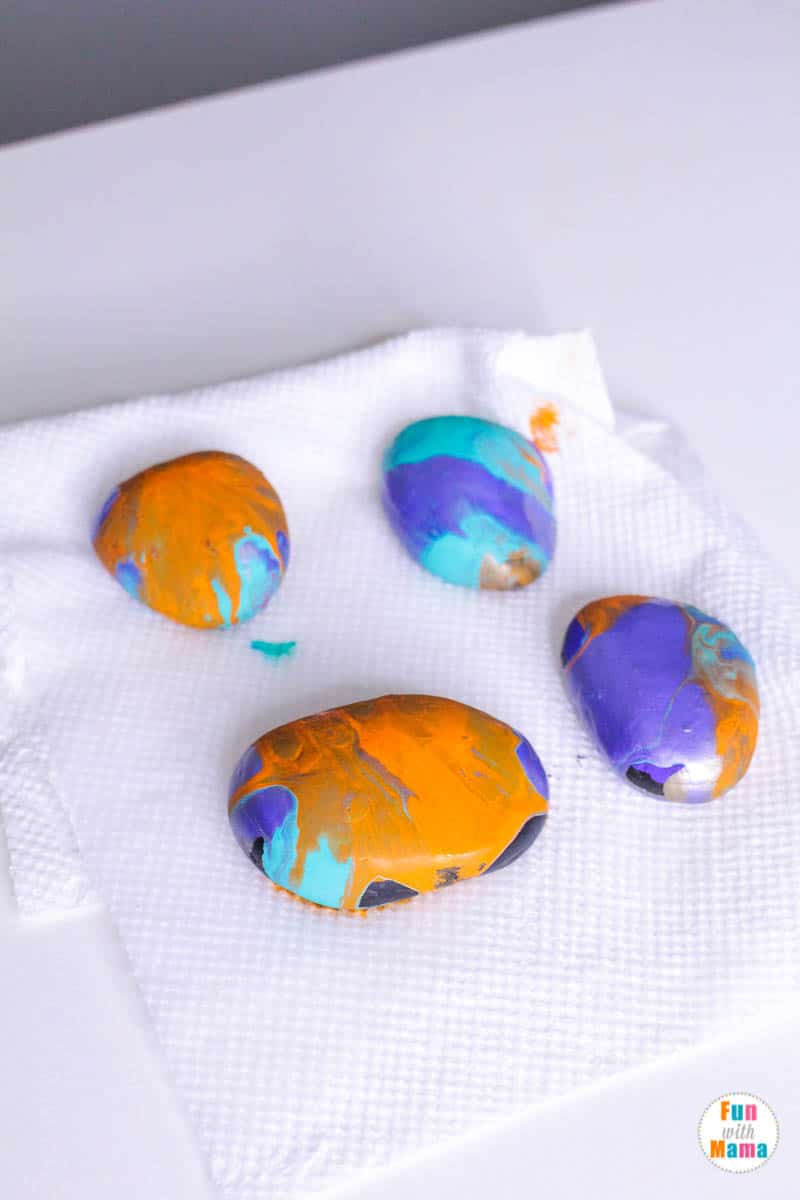
Once the design has stopped dripping, pick up the rock off the cups and put them onto a new plastic plate.
This will prevent the creation of a painted lip at the bottom of each rock. You can use a paper towel to wipe the bottom of each rock clean.
Let the paint dry.
Once the paint is fully dry, apply a sealer over the rock, overlapping the paint on the outside edges to discourage chipping. You won’t need to apply a sealer if you’re using enamel paint.
Let the sealer dry for 24 to 72 hours before storing or gifting the painted pebbles.
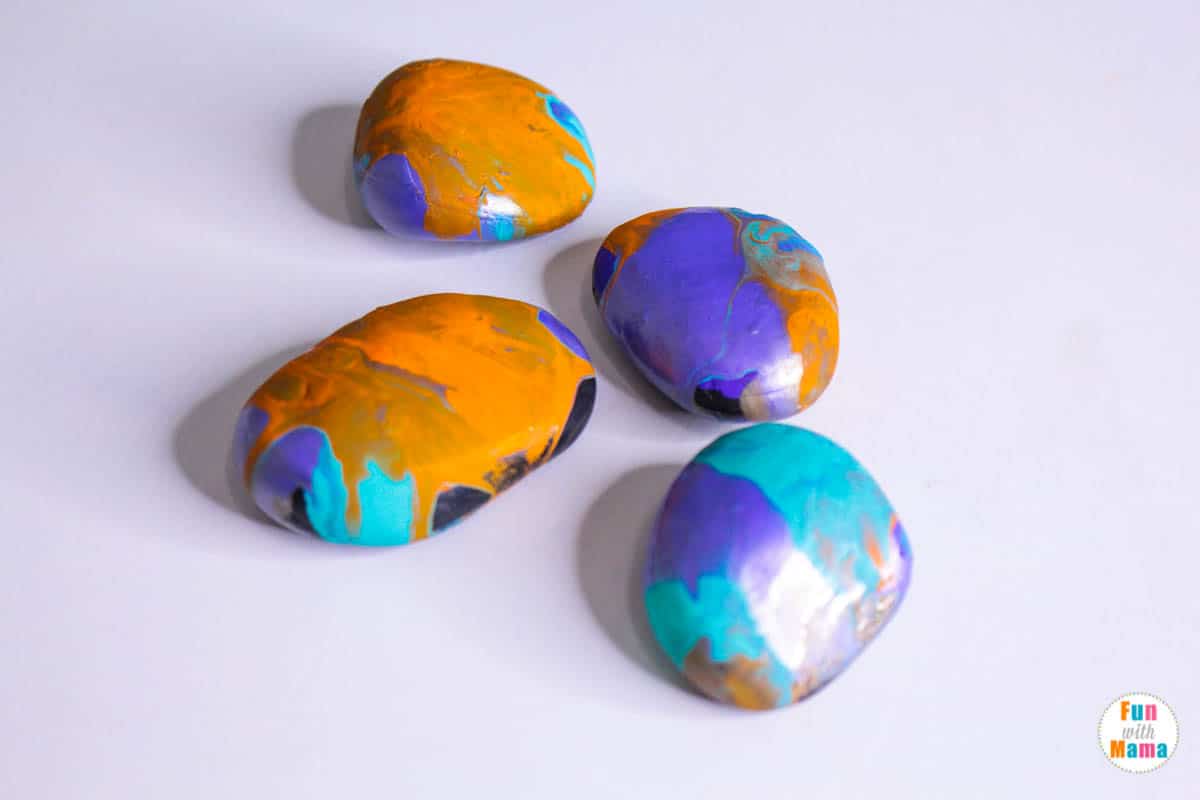
These poured paint rocks are the perfect way to introduce pebble painting for kids!
More painting activities for kids:
Earth Day Crafts – Coffee Filter Earth Paintings
Homemade Paint For Finger Painting
Alphabet Printables Q-Tip Painting
Action Art Spin Painting For Kids


Leave a Comment