
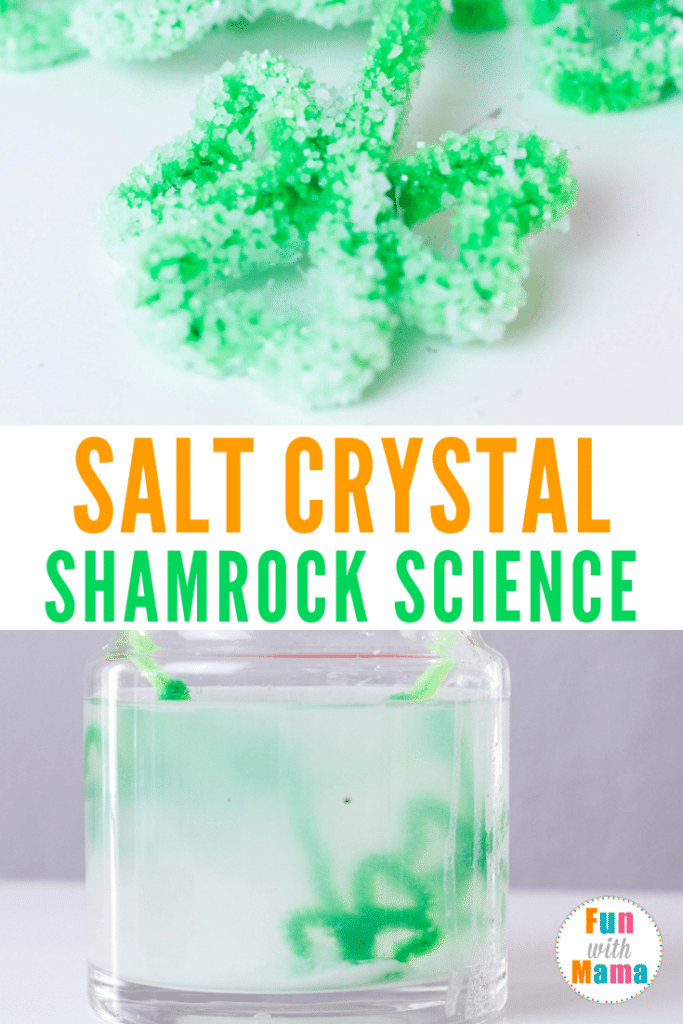
Learn how to make crystals with salt in this Salt Crystals activity. This St. Patrick’s day science experiment is the perfect addition to your St Patrick’s day activities for kids. What I love about the salt crystals science experiment, is that it can be adapted to ANY holiday or ANY classroom theme just by changing the design of your pipe cleaner. (You can find more science experiments here.)
This preschool science activity is a fun twist on crystal science. In this activity, kids will learn about how crystals form, saturation, dissolving, and other fun science themes all while creating beautiful sparking shamrocks!
This activity would be fun to do at a St. Patrick’s Day party or at home to celebrate the holiday with kids!
The best thing about salt crystal shamrocks is that the development time for the crystals is just an hour or two, meaning you can complete this science experiment in one sitting.
This makes it the perfect activity for little scientists who may be short on patience.
Your kids will ask to do this experiment over and over again with tons of other shapes!

Salt Crystals
MATERIALS REQUIRED:
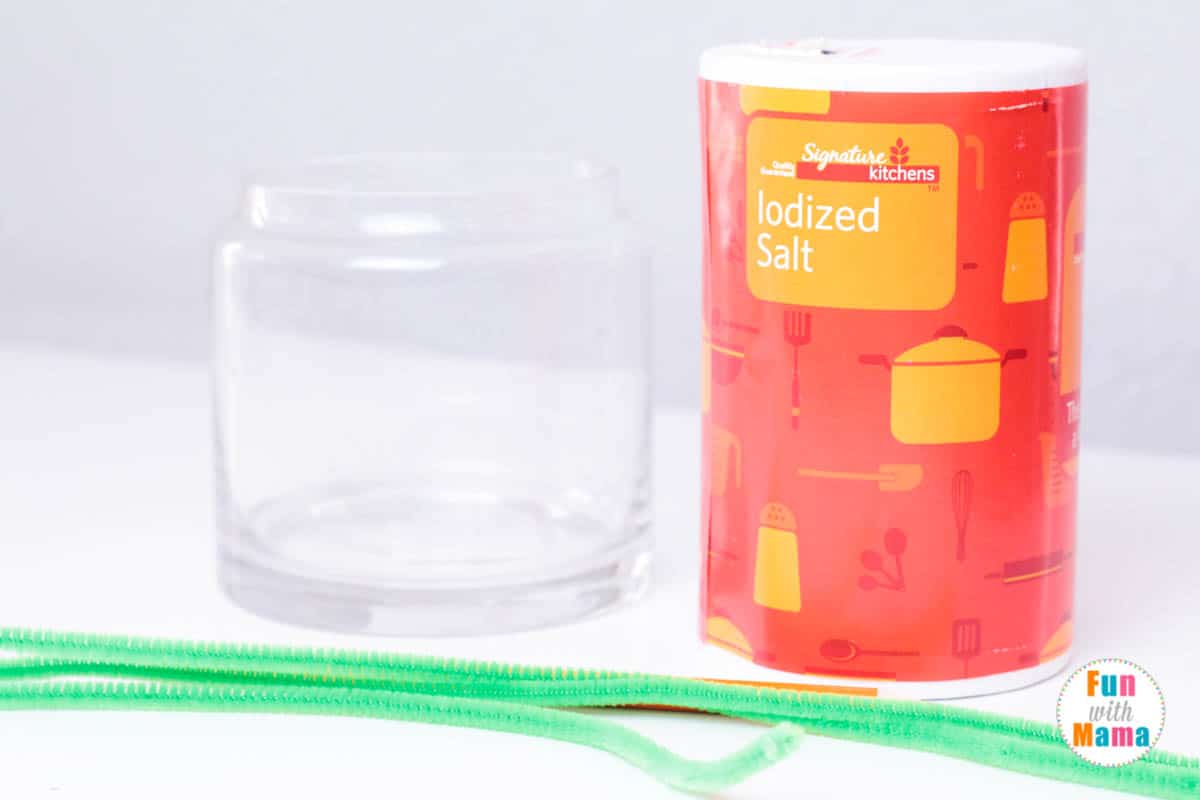
- Glass jar or container
- Pencils
- Pipe cleaners (green) – if you are doing it with a classroom, you’ll want to buy a classroom set.
- Salt
- Stove and pot (for adult use only)
- Magnifying glass
Salt Crystals Science Experiment:
Here is how you make your salt crystals shamrocks.
Salt Crystal Shamrock Science Experiment Set-Up
Before bringing kids into this experiment, you’ll want to make the super-saturated salt solution.
Boil enough water to fill your jar. Add just enough salt so that crystals start to form on the surface of the boiling water.
Pour the water into your jar and let cool.
Once the water is cool, you can bring the kids in for the rest of the experiment.
Doing the Salt Crystals Shamrock Science Experiment
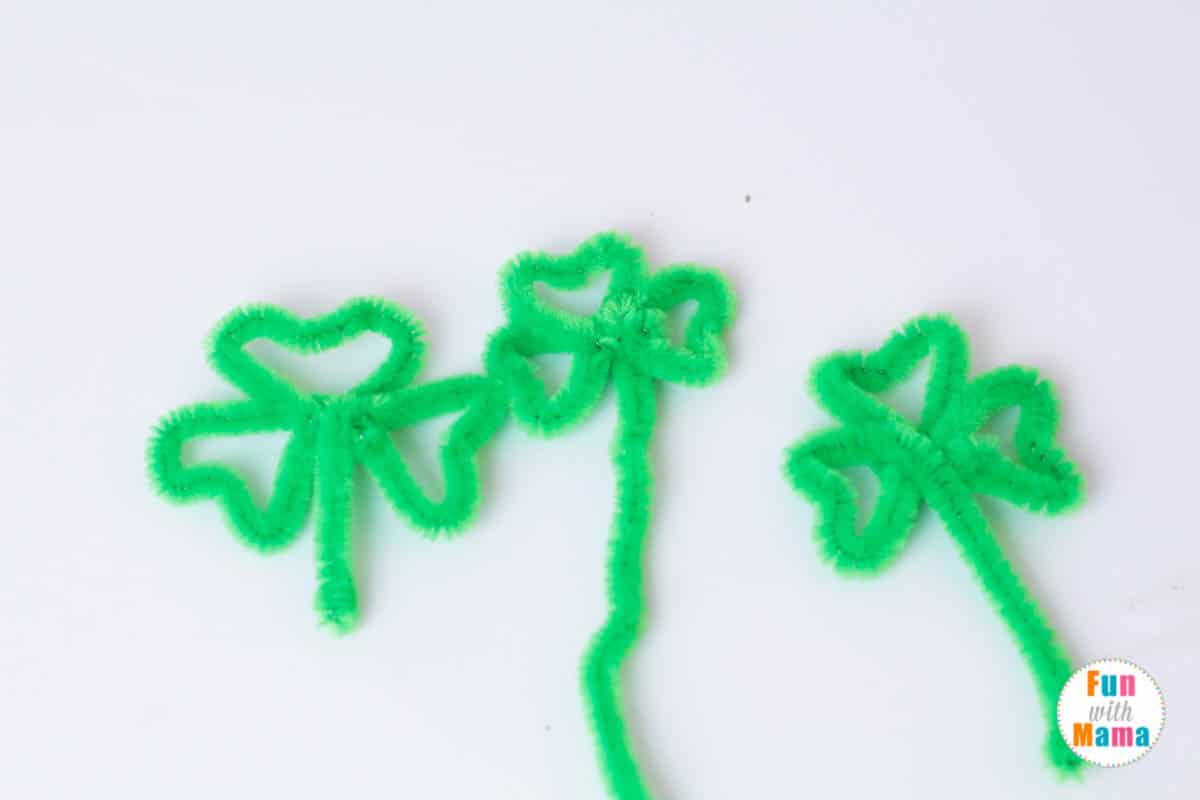
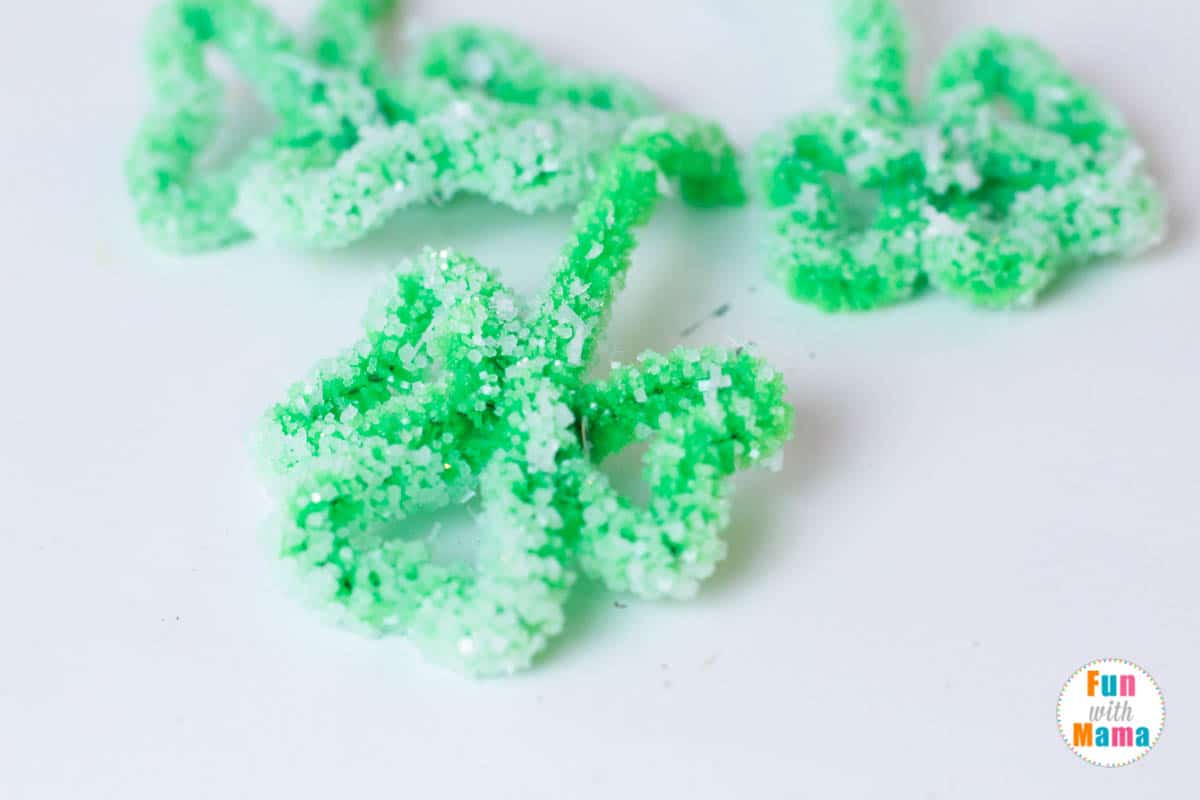
Show the kids how to twist their pipe cleaners into the classic three leaf clover (you can also do four leaves if you are ambitious!).
Wrap the end of each shamrock onto the center of a pencil.

Dip the shamrocks into the jar.
Let the jar sit for at least an hour and up to 2 days in the salt solution.
Pull the shamrocks out and lay them on a paper towel to dry.
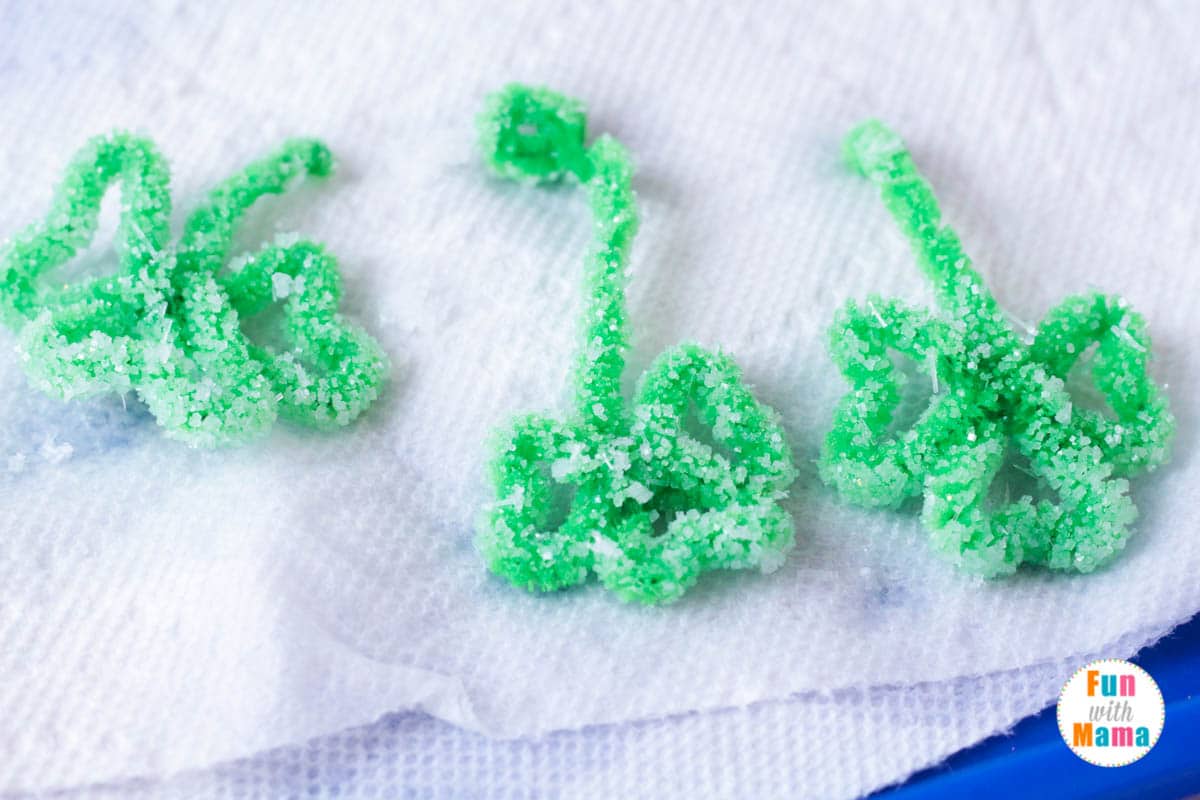
When the crystals dry, you can see the square and rectangle shapes of salt crystals.
Observe the crystals up close with a magnifying glass.
I hope you enjoyed the salt crystal shamrock science experiment.
Find more of our YouTube science experiments video’s here:

More Science Activities:
Taffimatter glitter slime
More Printable Activities:
Don’t forget to check out all of our Printable Packs and our Alphabet packs.


Leave a Comment