Looking for an easy homemade paint recipe that you can make today? You’ll love this easy DIY paint recipe for parents or teachers that will save you money, and it’s taste safe too!

How to make paint
When I was a kid, I LOVED messy art. Finger paints were my favorite. It turns out I passed on my love for messy art to my kids. They go through whole sets of finger paints in one sitting.
I don’t want to keep buying expensive fingerpaint from the craft store every two days, so, I had to come up with another plan. I did a little research and learned how to make fingerpaint. Now we use this recipe ALL the time.
Today, I’m sharing my homemade paint recipe with you!
If you’re new to painting with kids, especially toddlers, then read my painting with toddlers guide. It includes everything you need to know to get started.
Painting for kids. is a very relaxing process while also being a wonderful way to stimulate their senses.
Ingredients
Learn how to make paint at home using a few ingredients.
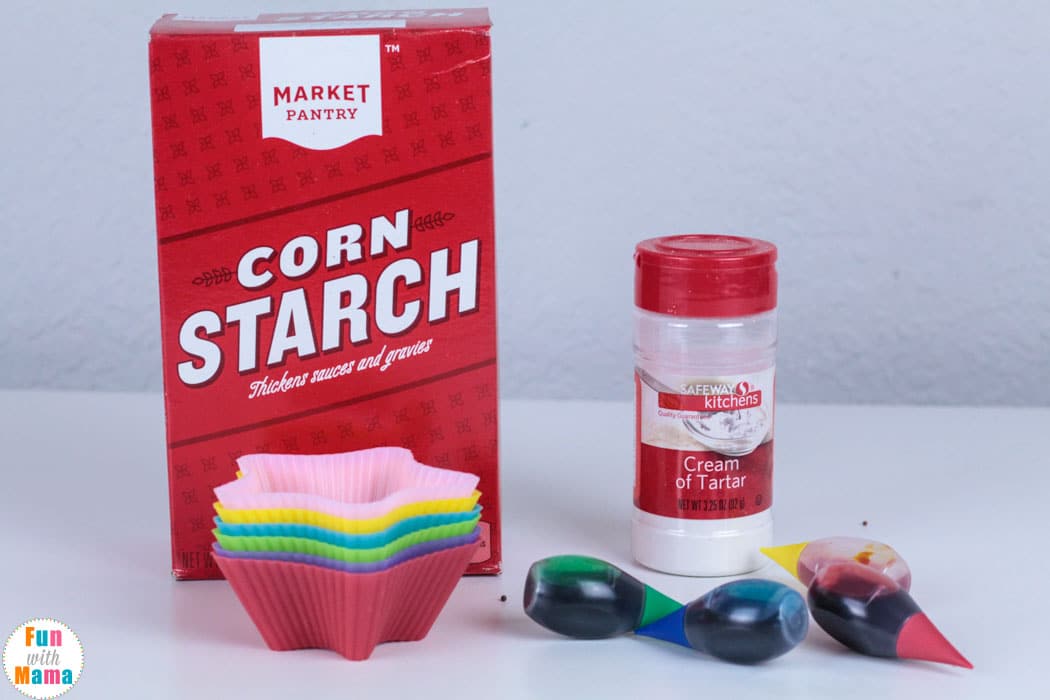
- Corn starch
- Sugar
- Water
- Food Coloring
- Container for paints (We used silicone muffin liners)
- Optional: You can add cream of tartar if you want to make it a little shinier.
Learn more about painting for kids.
Tip: How much cornstarch you use will determine how thick your paint is. If you want to use this paint for finger paint, use the recommended 1/2 part of cornstarch as we did in this tutorial.
If you want it to be a bit more runny, adjust the cornstarch by using less.
The taste-safe fingerpaint will be mixed using the following ratios:
- 2 parts water
- ½ part corn starch
- 1 teaspoon or a tablespoon of sugar, depending on how much paint you’re making
Fingerpainting has many benefits for children, and we like to incorporate some sensory play in our home multiple times a week.
Learn more about Watercolor Painting For Kids and how we incorporate it into our week.
How to make homemade paint

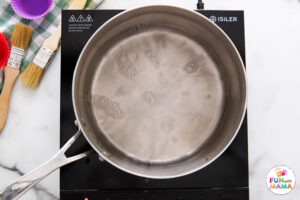
1. Boil your water on the stove.
You can make as much or as little homemade paint as you want using this recipe, but it won’t keep for very long, so I recommend only making enough to use in one session. We used 2 cups of water.

2. Add sugar to the boiling water.
We used 1 teaspoon of sugar. Wait for the sugar to dissolve.
You can also add cream of tartar here if you want to make it a little shinier. (I didn’t in the pictures + video)
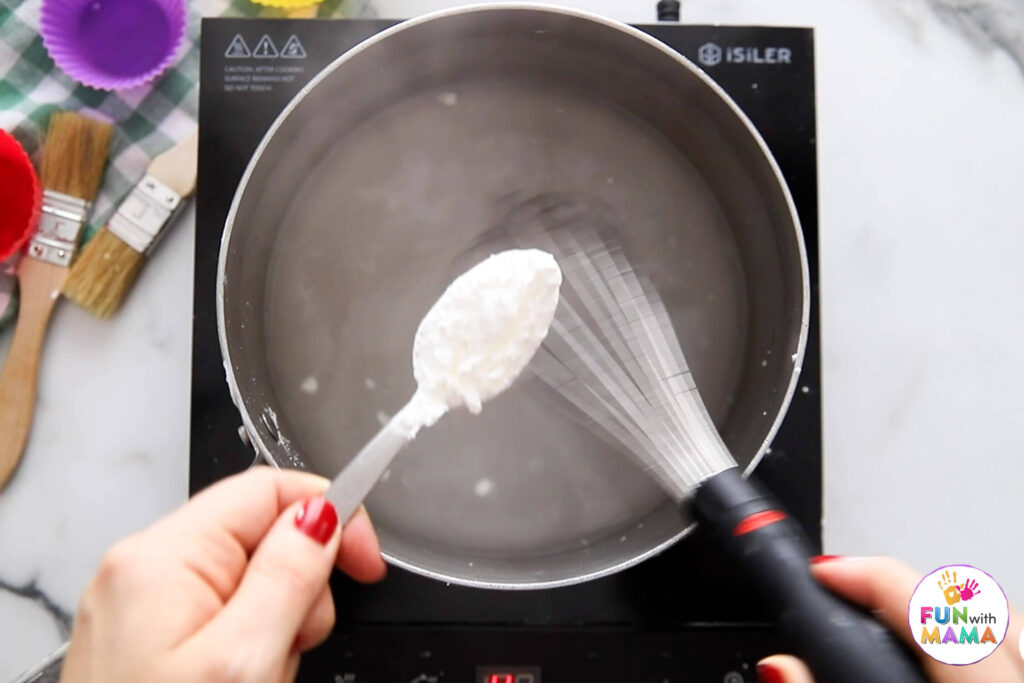
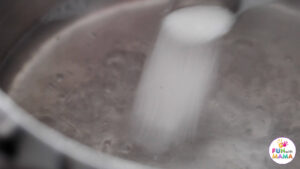
3. Add your cornstarch
Sprinkle in your 1/2 cup of cornstarch slowly while continuously whisking. This will help you achieve a smoother consistency and prevents clumping.
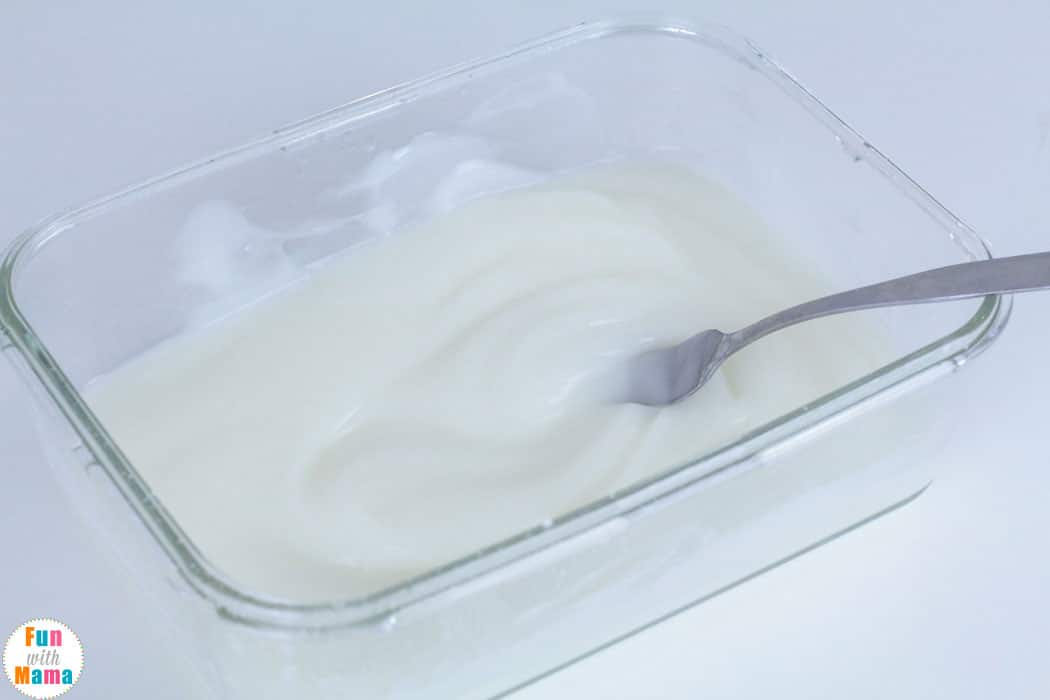
The mixture will begin getting a bit thicker and will take on a clear slime like appearance.
If you don’t want a thick finger paint texture, use even less corn starch than we did. This will make your paint squeezable and a bit runny, while ours was thicker and felt more like finger paint.
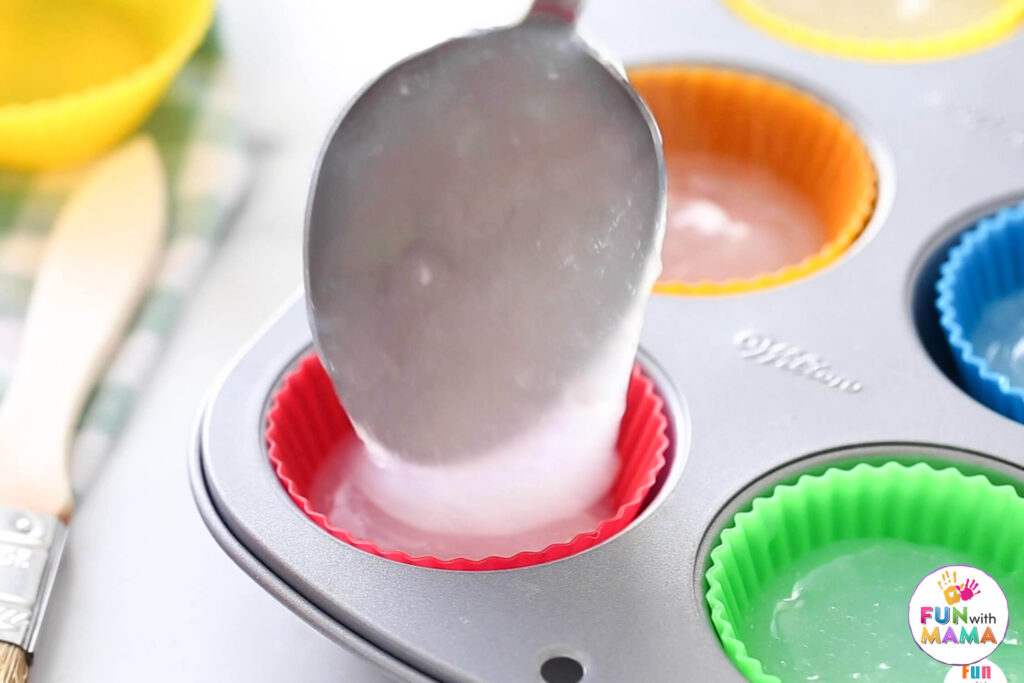
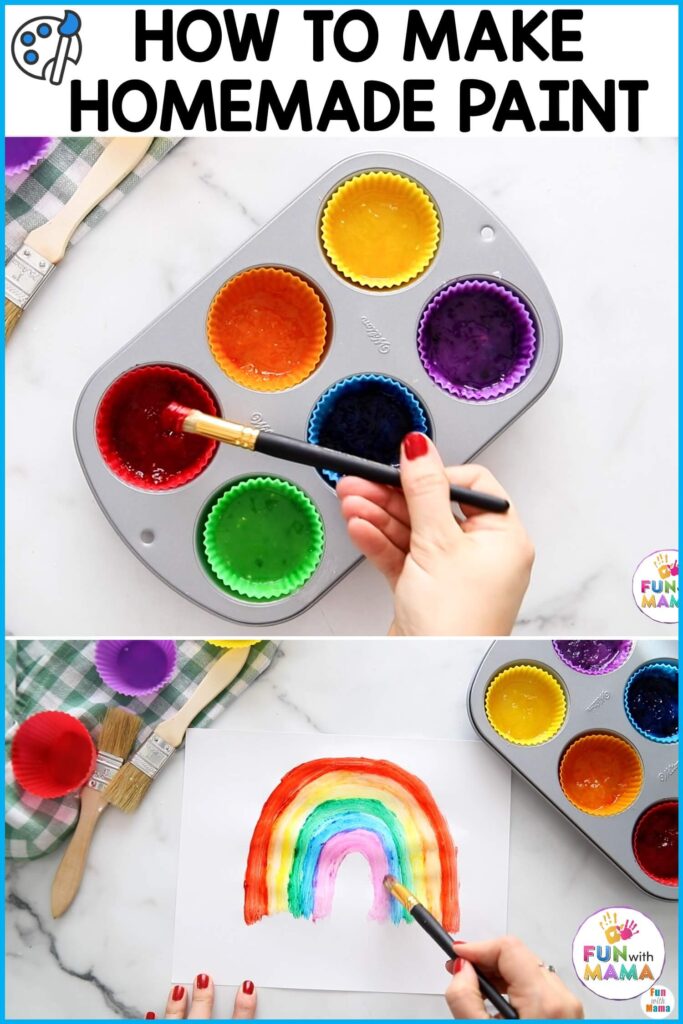
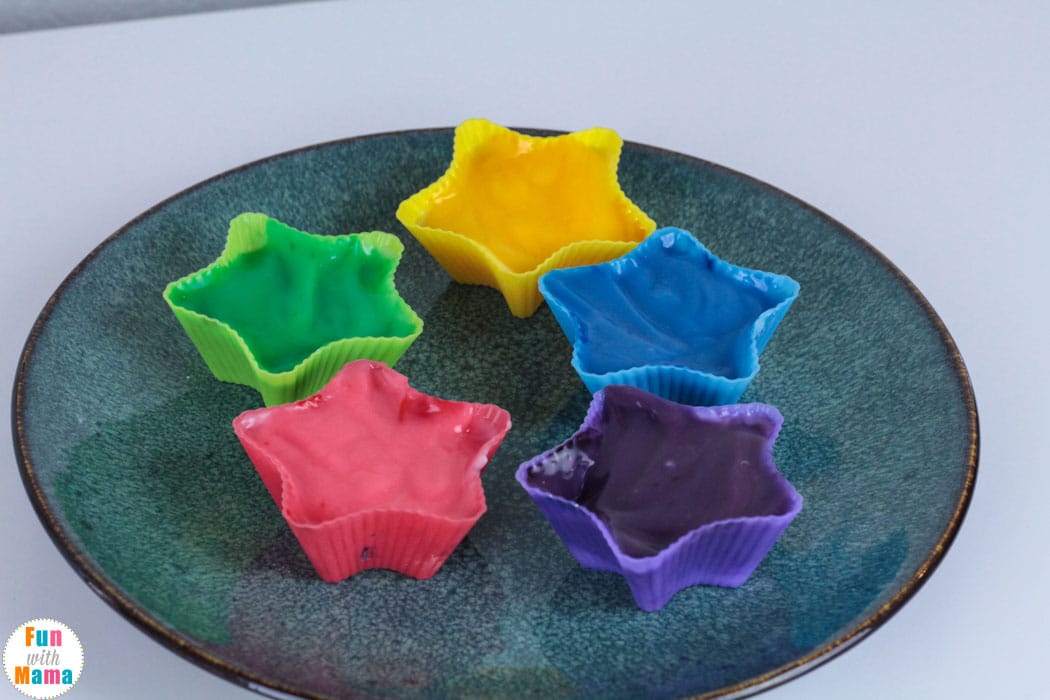
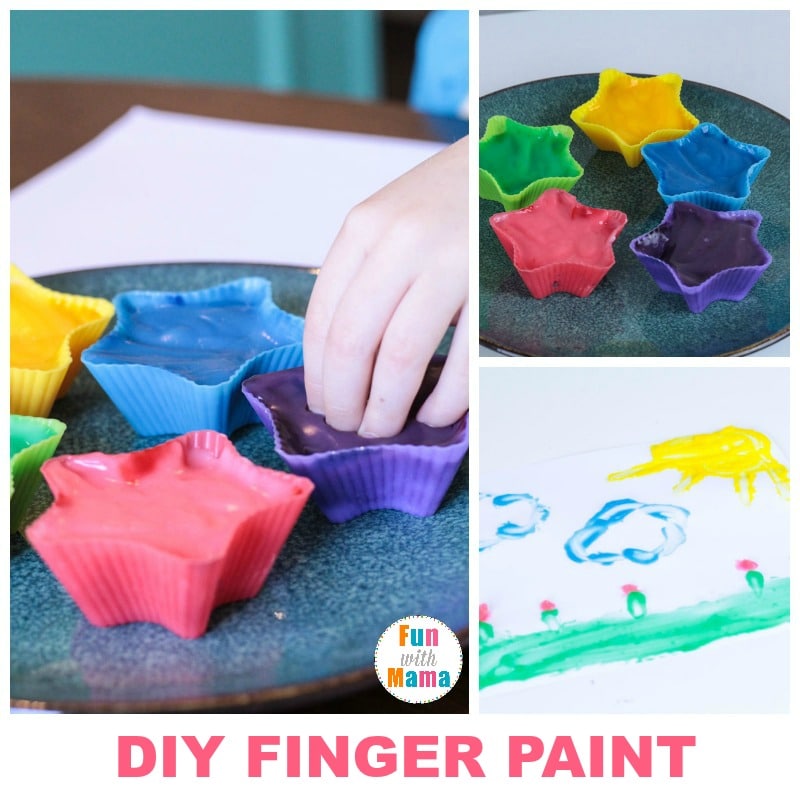
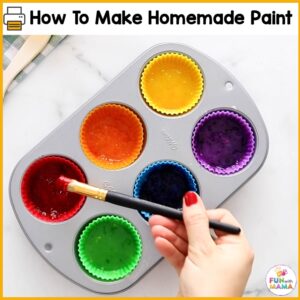
4. Add equal amounts of the mixture to a cupcake pan with silicone liners
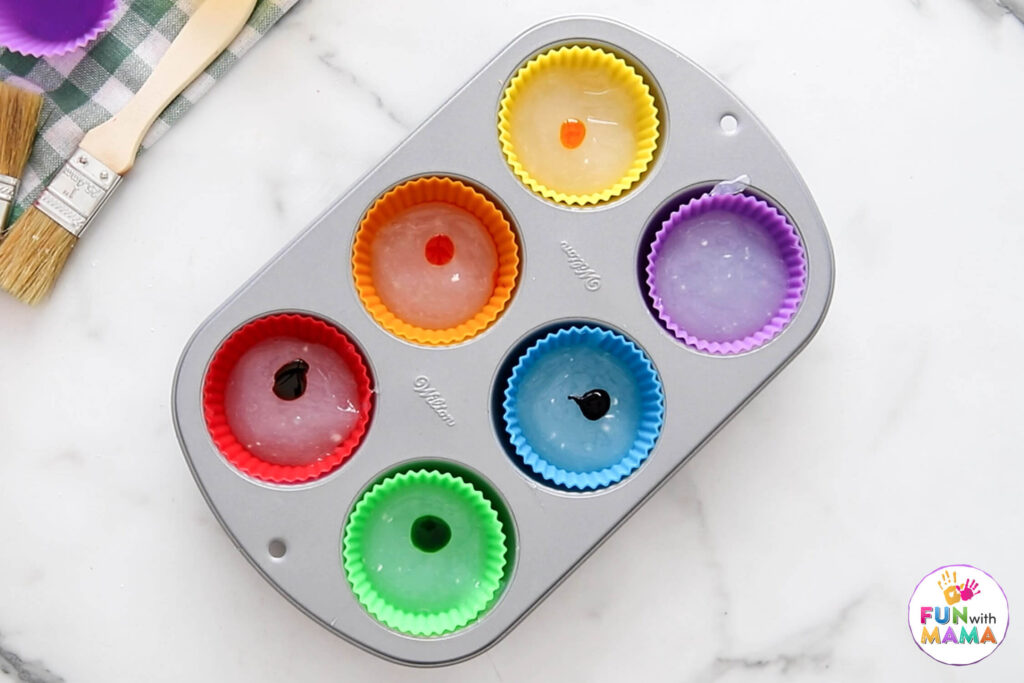
5. Add drops of food coloring to each liner.
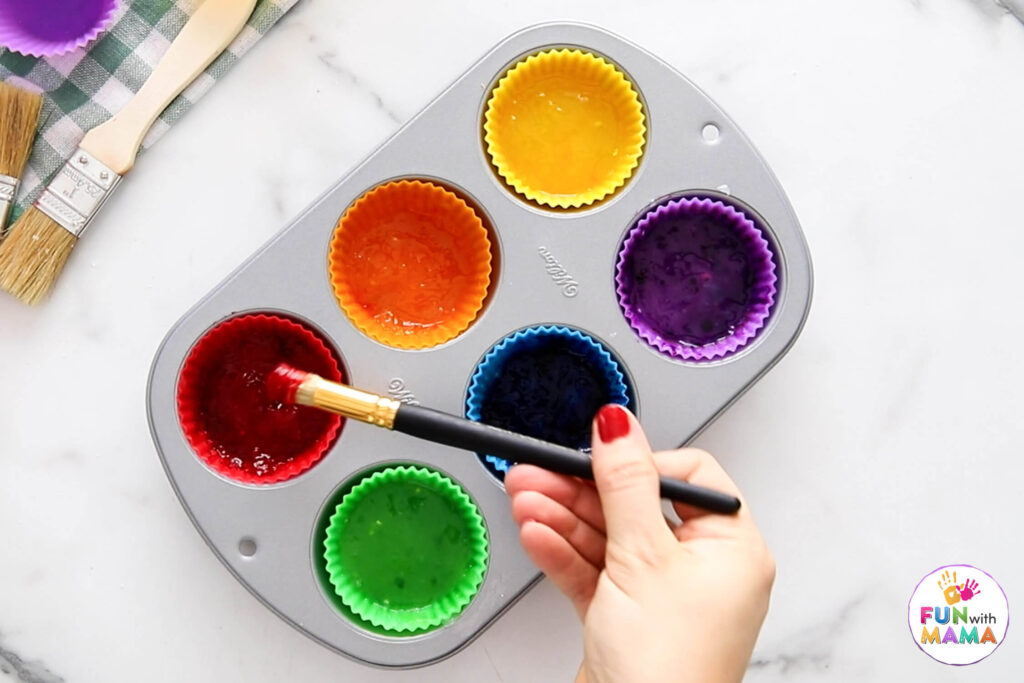
6. Mix the colors in then allow the mixture to cool down.
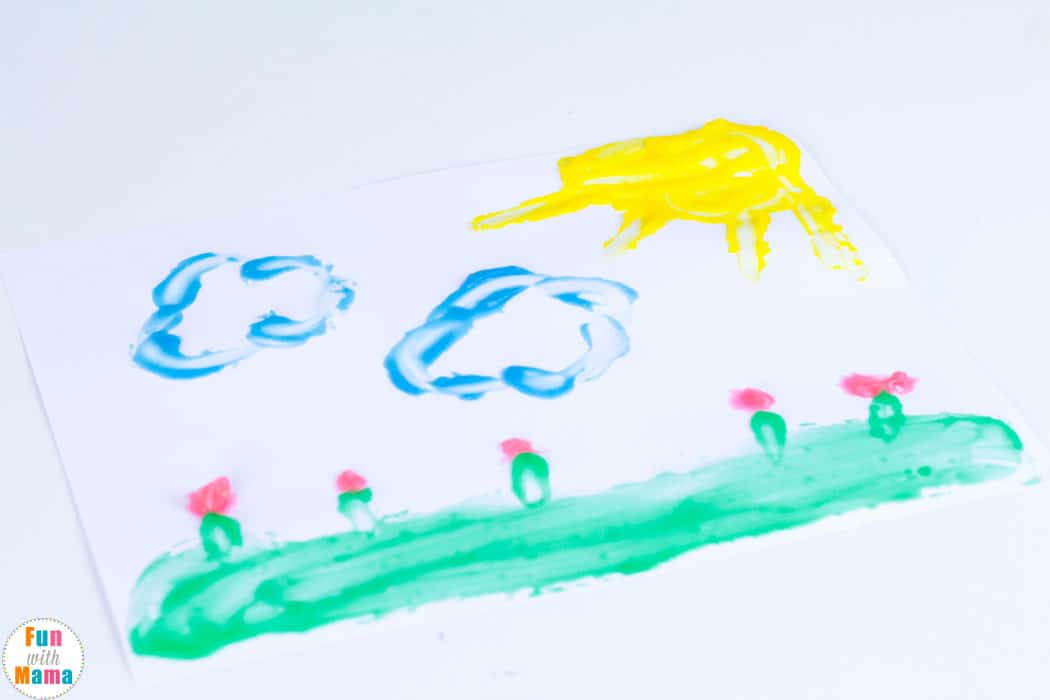
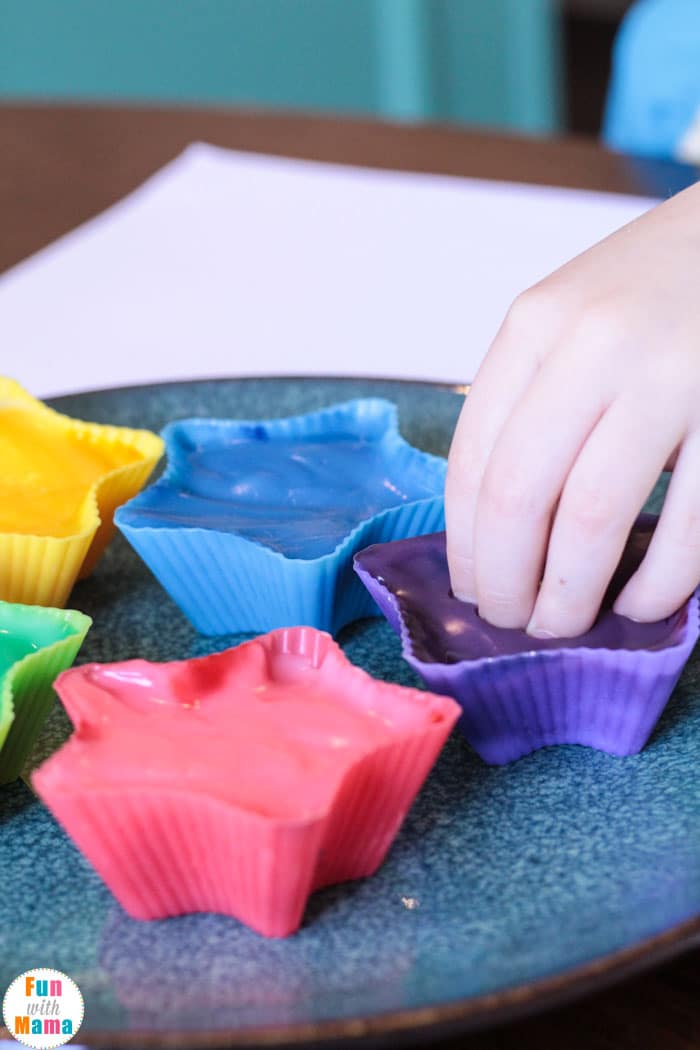
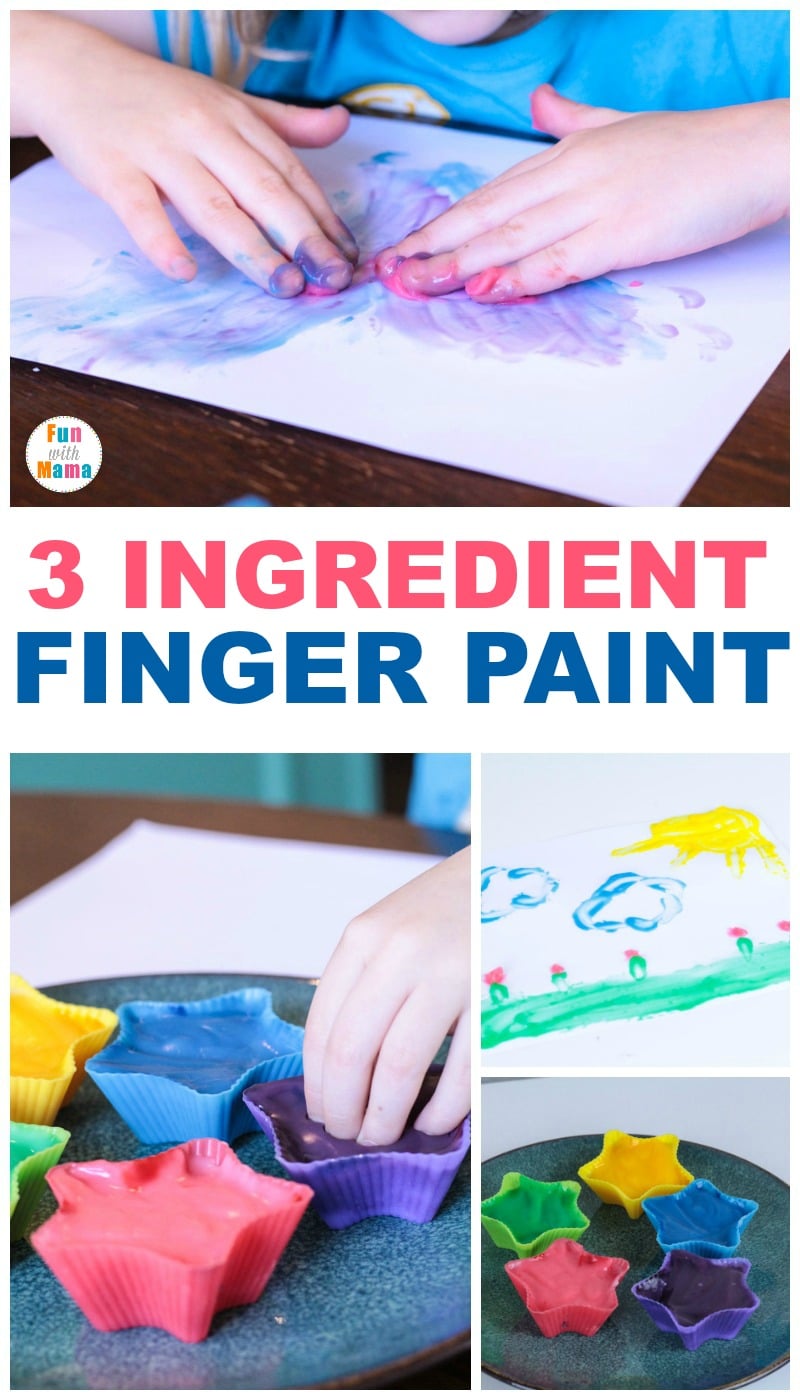
7. Start painting and have fun!
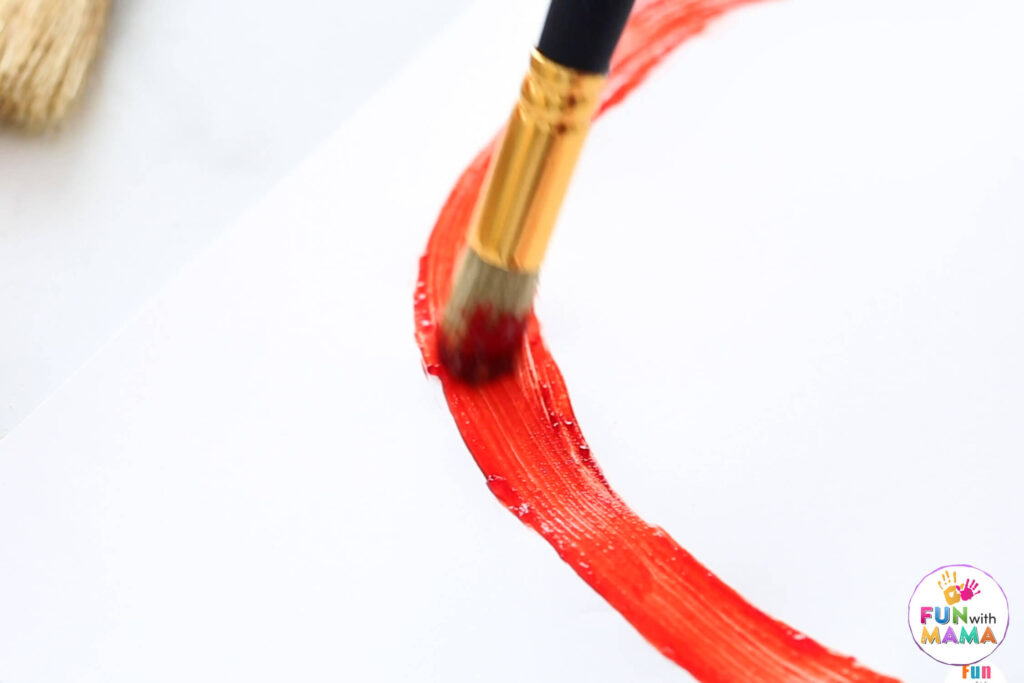
Here is a closer look at the texture of the paint.
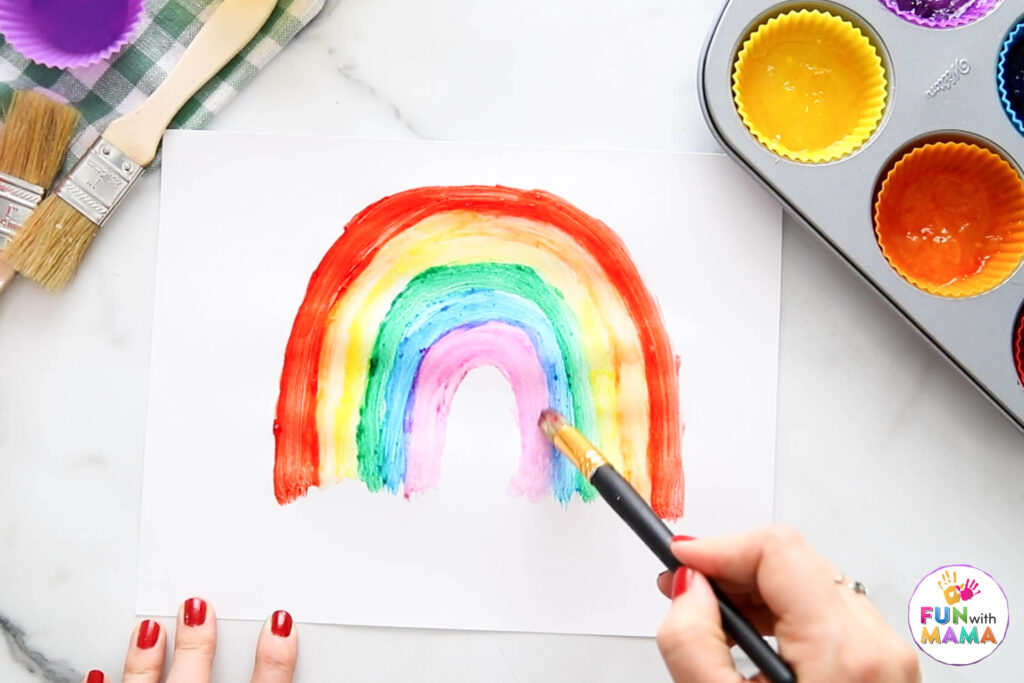
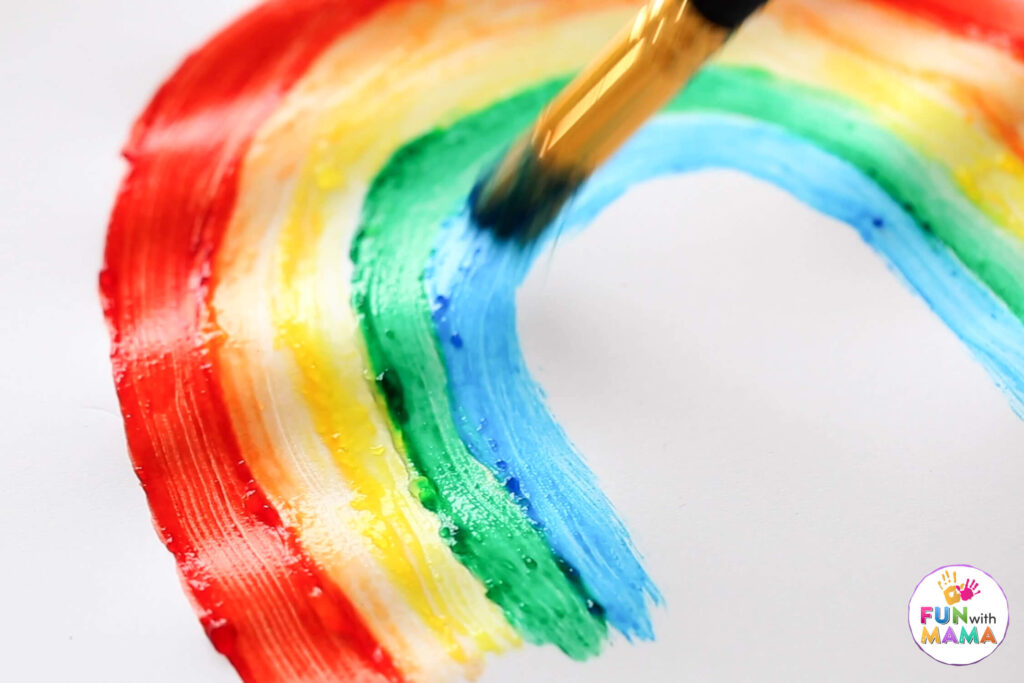
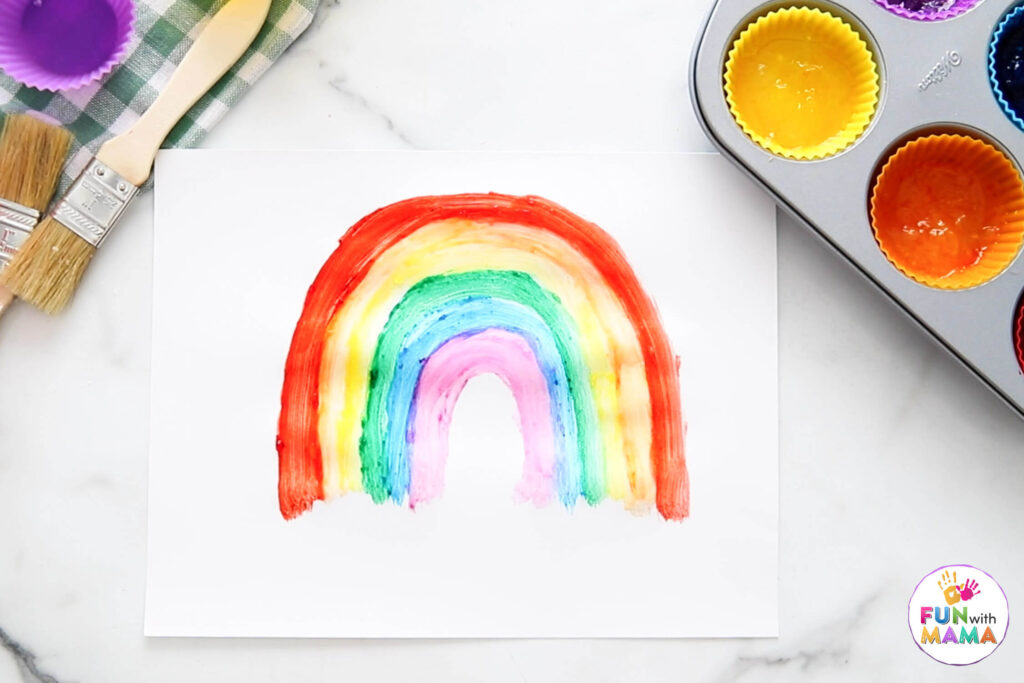
We painted a rainbow.
This paint is a safe enough edible paint for babies using ingredients from your kitchen. While I don’t encourage eating a lot of it, it’s taste safe so you don’t have to worry
If you haven’t already seen it and want to try a MAGICAL art activity, then you HAVE to try this Magic Art With Paper Towels. It’s one of our favorites!
Variation to make fingerpaint
In a bowl, mix 1/4 cup of corn starch and 1/4 cup of water.
On the stove, heat 1 cup of water until simmering, but no need to boil it.
Pour the warm water into the corn starch water and stir.
Very quickly, it will form into a pudding-like texture. At this point, add in a teaspoon of cream of tartar. This gives the cornstarch a shiny, flexible texture and makes it more like paint.
Once the goo cools, pour it into silicone baking cups and color them your desired colors. Use more food coloring for more vibrant colors. Voila! You have created some fingerpaint!
Please note that gel food coloring will likely stain hands for a little bit, especially if using it for fingerpainting. You can opt to use liquid food color (but the colors won’t be as vibrant) or squirt a little bit of washable paint just for color.
When the homemade paint is completely cool, let your kids dip their fingers into the taste safe paint and go to town.
We used cardstock paper because it is a little slicker than a computer or art paper, and it holds up to the thickness of the baby-safe paint.

Once the paintings are done, let them dry for a few hours before displaying them or letting kids take them.
Try another paint recipe, learn How to make chalk paint
Need some fingerpainting ideas? Well, I have many!
- Fancy Monster Finger Paint
- Finger Paint Butterfly Craft + Butterfly Printable
- Happy/Sad Pumpkin Finger Painting
- Fingerprint Art Drawing Ideas with Printable Drawing Frames
More recipes:
The BEST Playdough Recipe EVER
Homemade Paint Recipe
Ingredients
- 2 cups water
- 1 tsp sugar
- 1/2 cup cornstarch
- Food coloring
Instructions
- Boil 2 cups of water

- Add 1 teaspoon of sugar and mixed until dissolved.

- Slowly add in 1/2 cup of cornstarch while whisking the mixture.
- Once it is a gooey consistency separate mixture into silicone muffin liners.
- Add food coloring to each liner.
- Mix the food coloring in.
- Once cooled, begin painting.


Do you think this would work with an 11 month old without them just wanting to eat it the whole time? Also, would this paint stick to pumpkins for a pumpkin painting craft with baby? Thanks!