Rock painting is a popular activity for kids. In this rock painting for kids tutorial, you’ll learn three ways to paint rocks that will help minimize chipping and improve the durability of the rocks.
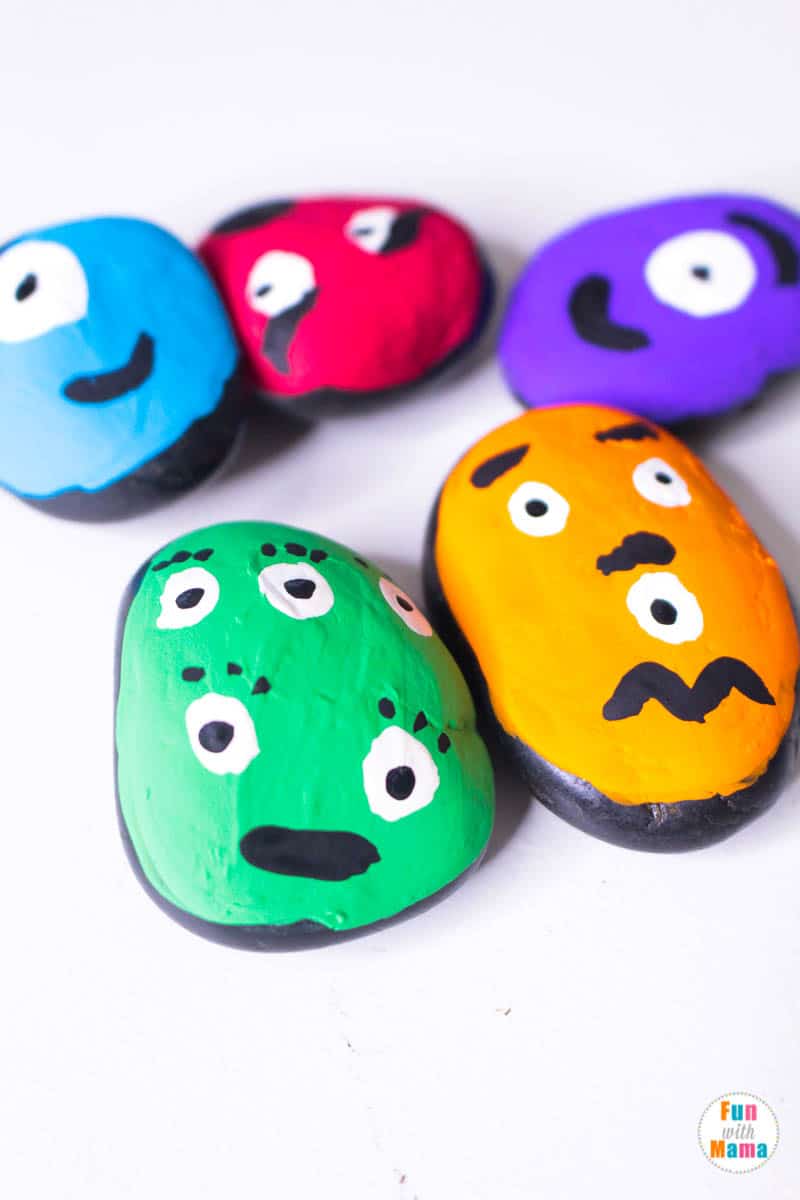
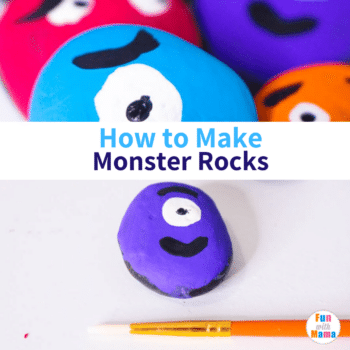
We chose to make friendly rock monsters because my kids are having a monster moment, and a monster design is a little easier for kids to make than more complicated designs like animals or flowers.
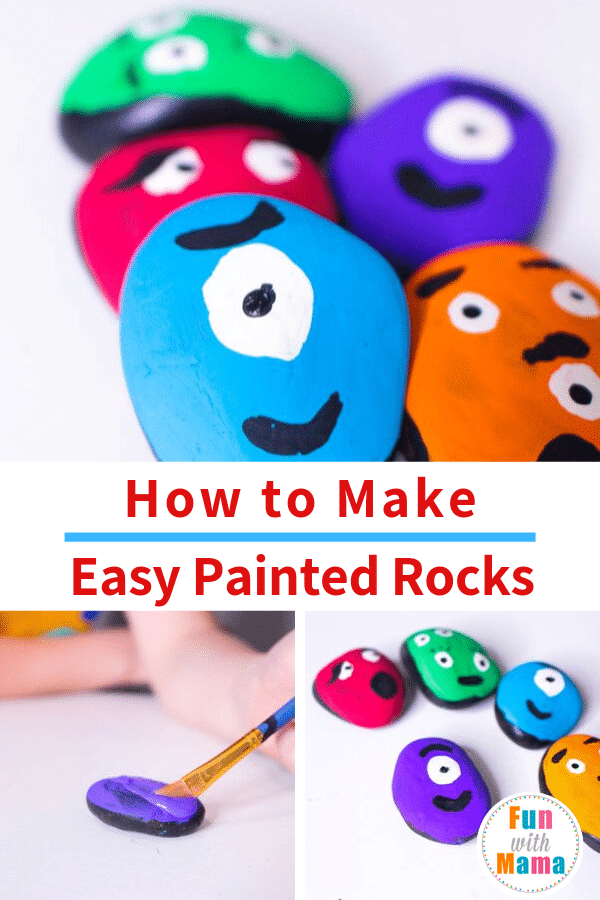
Monster Rock Painting for Kids
This preschool-aged activity is great because it allows the children to really get to use their imagination. Plus, who doesn’t love to paint rocks?
Let them pick out their favorite colors of paint and combinations to see what they can really come up with. There’s really no wrong way to make a rock monster. And letting your kids enjoy rock painting is a great way to also introduce them to the concept of being able to paint on other objects as well. (as long as it’s not your walls!)
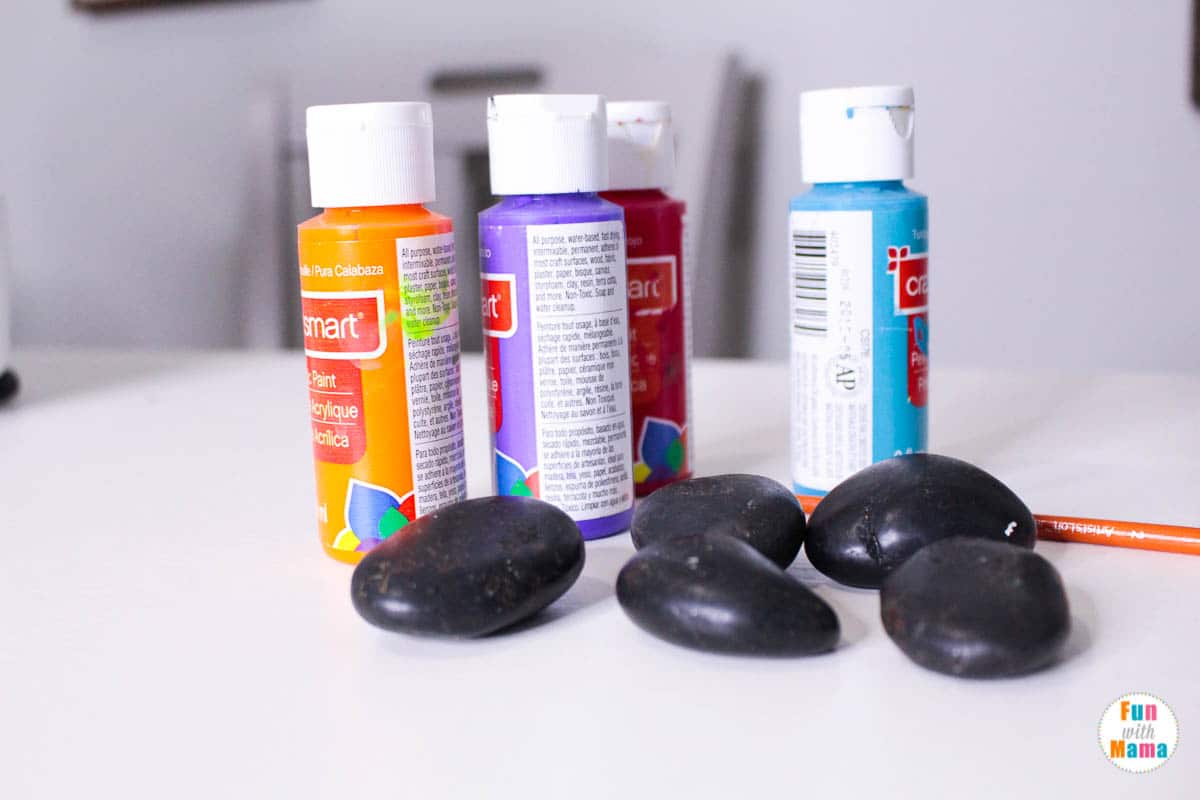
What you will need to make monster painted rocks:
- Rough, small rocks (smooth rocks work well with paint pens, but if you’re using acrylic paint, you’ll want a rougher surface)
- Acrylic paint, enamel paint, or paint pens
- Paintbrushes
- Acrylic outdoor sealer
Choosing your materials for this rock painting tutorial
There are several ways to paint rocks. Each paint method is suited to a different environment.
Enamel paint: If you want the rocks to live outside, then you will need real enamel paint from a hardware store or paint store. This paint is sticky, takes a while to dry, and stains clothing, so it is important to have a controlled environment if you use this kind of paint. This paint style will create the most long-lasting paint, but it is also the hardest to use.
Acrylic paint: Acrylic paint is the least durable paint. Only use acrylic paint if you have natural texture rocks. Acrylic paint does not work well with river stones that have a smooth texture. Acrylic paint will stick better if you use an acrylic sealer once the rocks are completed. This will make it durable enough for indoor play, but not outdoor environments.
Paint pens: Paint pens have a medium durability if you use them inside only. The paint will eventually chip off if you don’t seal it, but paint pens can be used on smooth rocks in addition to rougher stones.
Making the Monster Painted Rocks
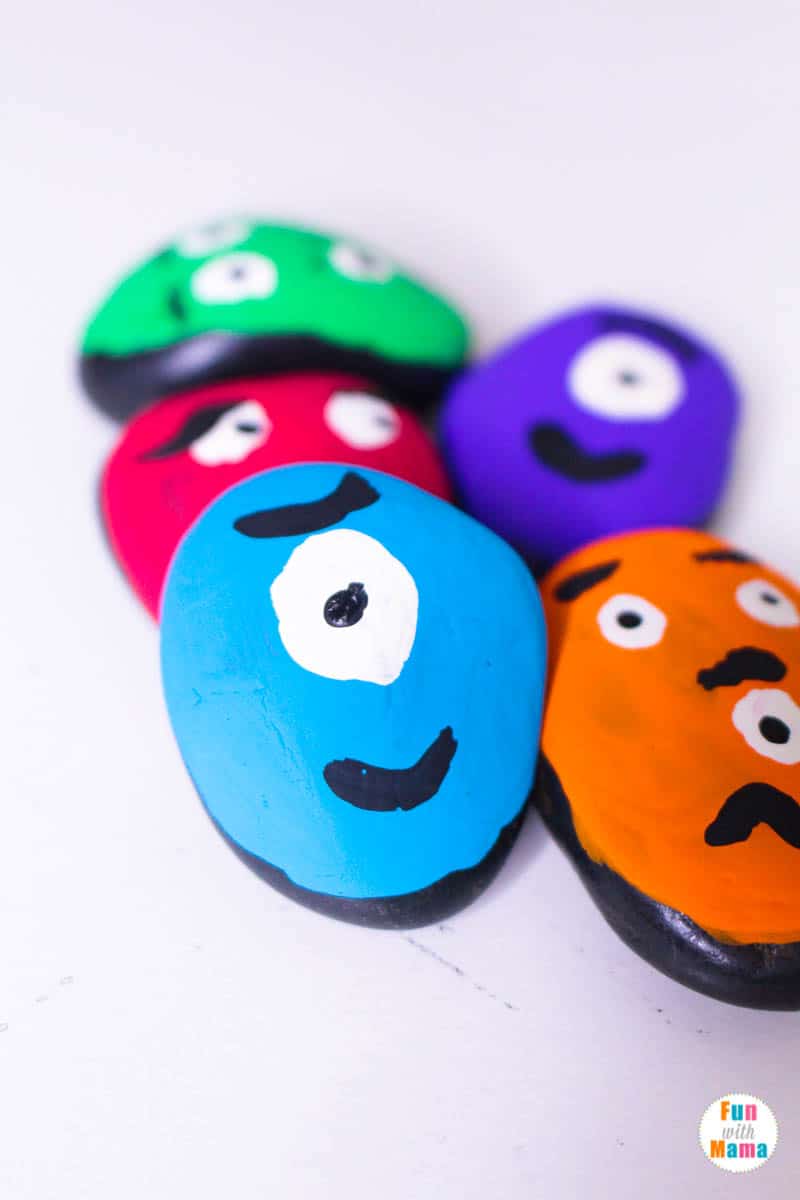
First, paint the surface of the rock with a thin coating of paint. We used bright colors to make friendly monsters. Wait for the paint to fully dry.
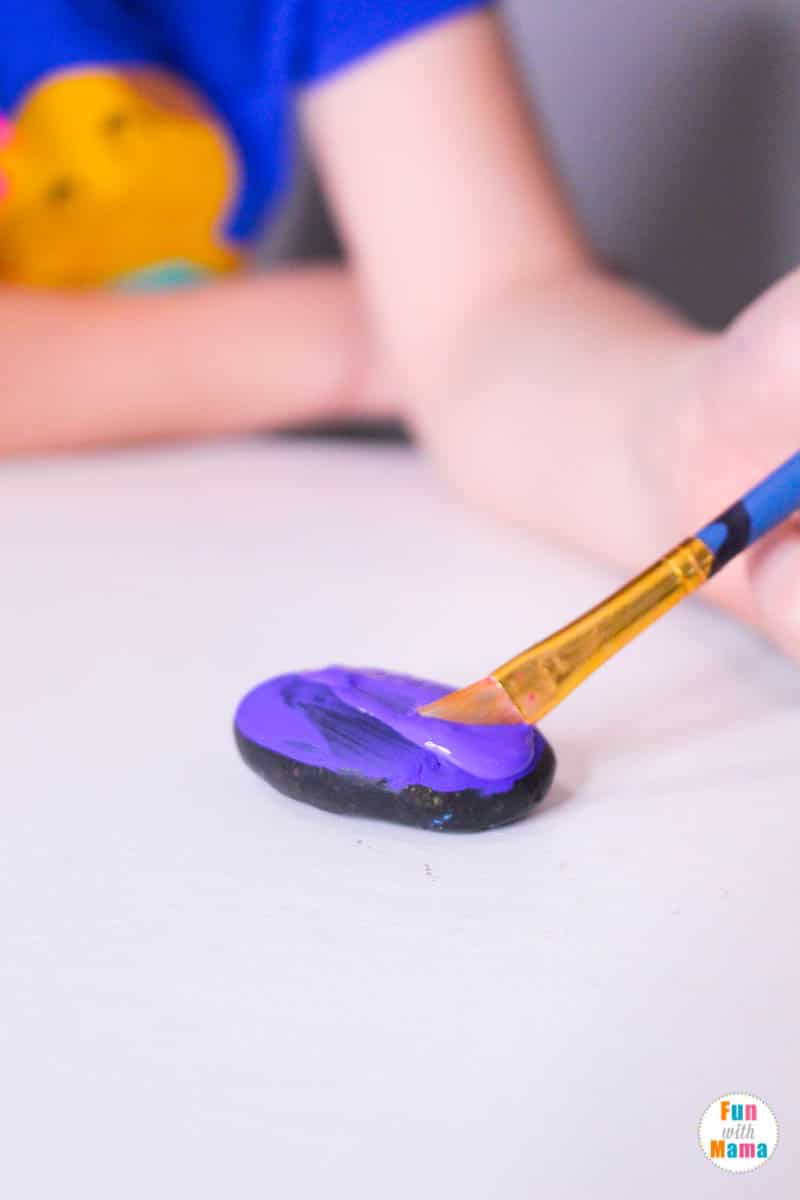
You may need to add a second layer of base coat to the rock before moving on to the detail stage.
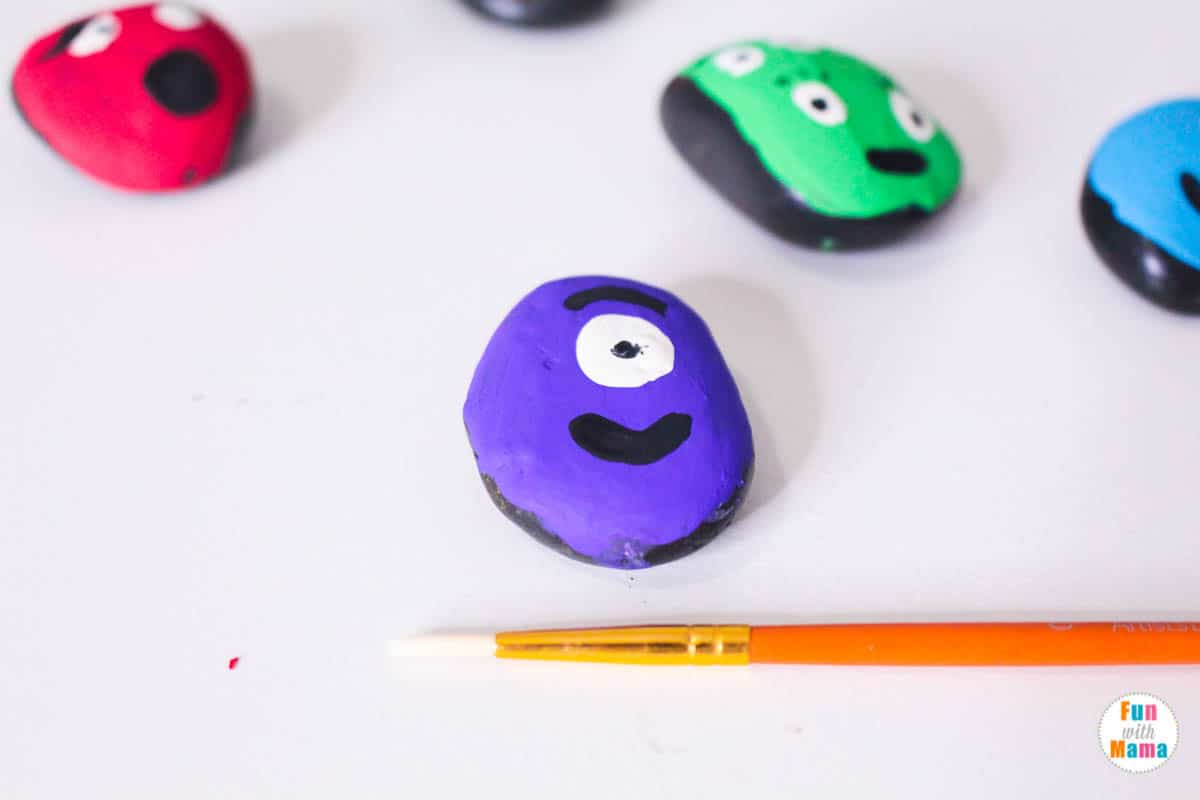
Once the paint is fully dry, paint on your eyes and faces onto the rocks. We chose basic monster faces, with a variety of eye and mouth shapes.
The kids had a lot of fun creating the various monster face designs.

Let the paint dry.
Once the paint is fully dry, apply a sealer over the rock, overlapping the paint on the outside edges to discourage chipping. You won’t need to apply a sealer if you’re using enamel paint.
Let the sealer dry for 24 to 72 hours before storing or playing with the monster rocks.
Use your monster rocks as Halloween treats, as backpack pals, paperweights, or just let your kids play with them at home! These rocks would also make adorable gifts from your kids to friends, grandparents, and other family members.
These monster rocks are the perfect way to introduce rock painting for kids!
More rock painting activities for kids:
Earth Day Crafts – Coffee Filter Earth Paintings
Homemade Paint For Finger Painting
Alphabet Printables Q-Tip Painting
Action Art Spin Painting For Kids


[…] don’t have to save these monster rocks for Halloween. They’re perfect for any time of the year! Fun with […]